Previously you would have made overrides/changes to vehicle assignments as part of the creation of a temporary shift pattern which would then override the regular shift pattern as a result for the date period defined. Now you will be able to make changes to the vehicle assignments without needing to configure a whole new shift patter by creating a vehicle exception against the regular shift pattern.
Configuring a Vehicle Exception will allow you to make temporary changes to the vehicle assignments for a specified shift pattern as you required for a defined date window (eg increasing the number of vehicles to cope with Peak Demand (Christmas Time) etc)
Note you will able to to both add and remove vehicles as part of the same exception where required
1. Creating a Vehicle Exception
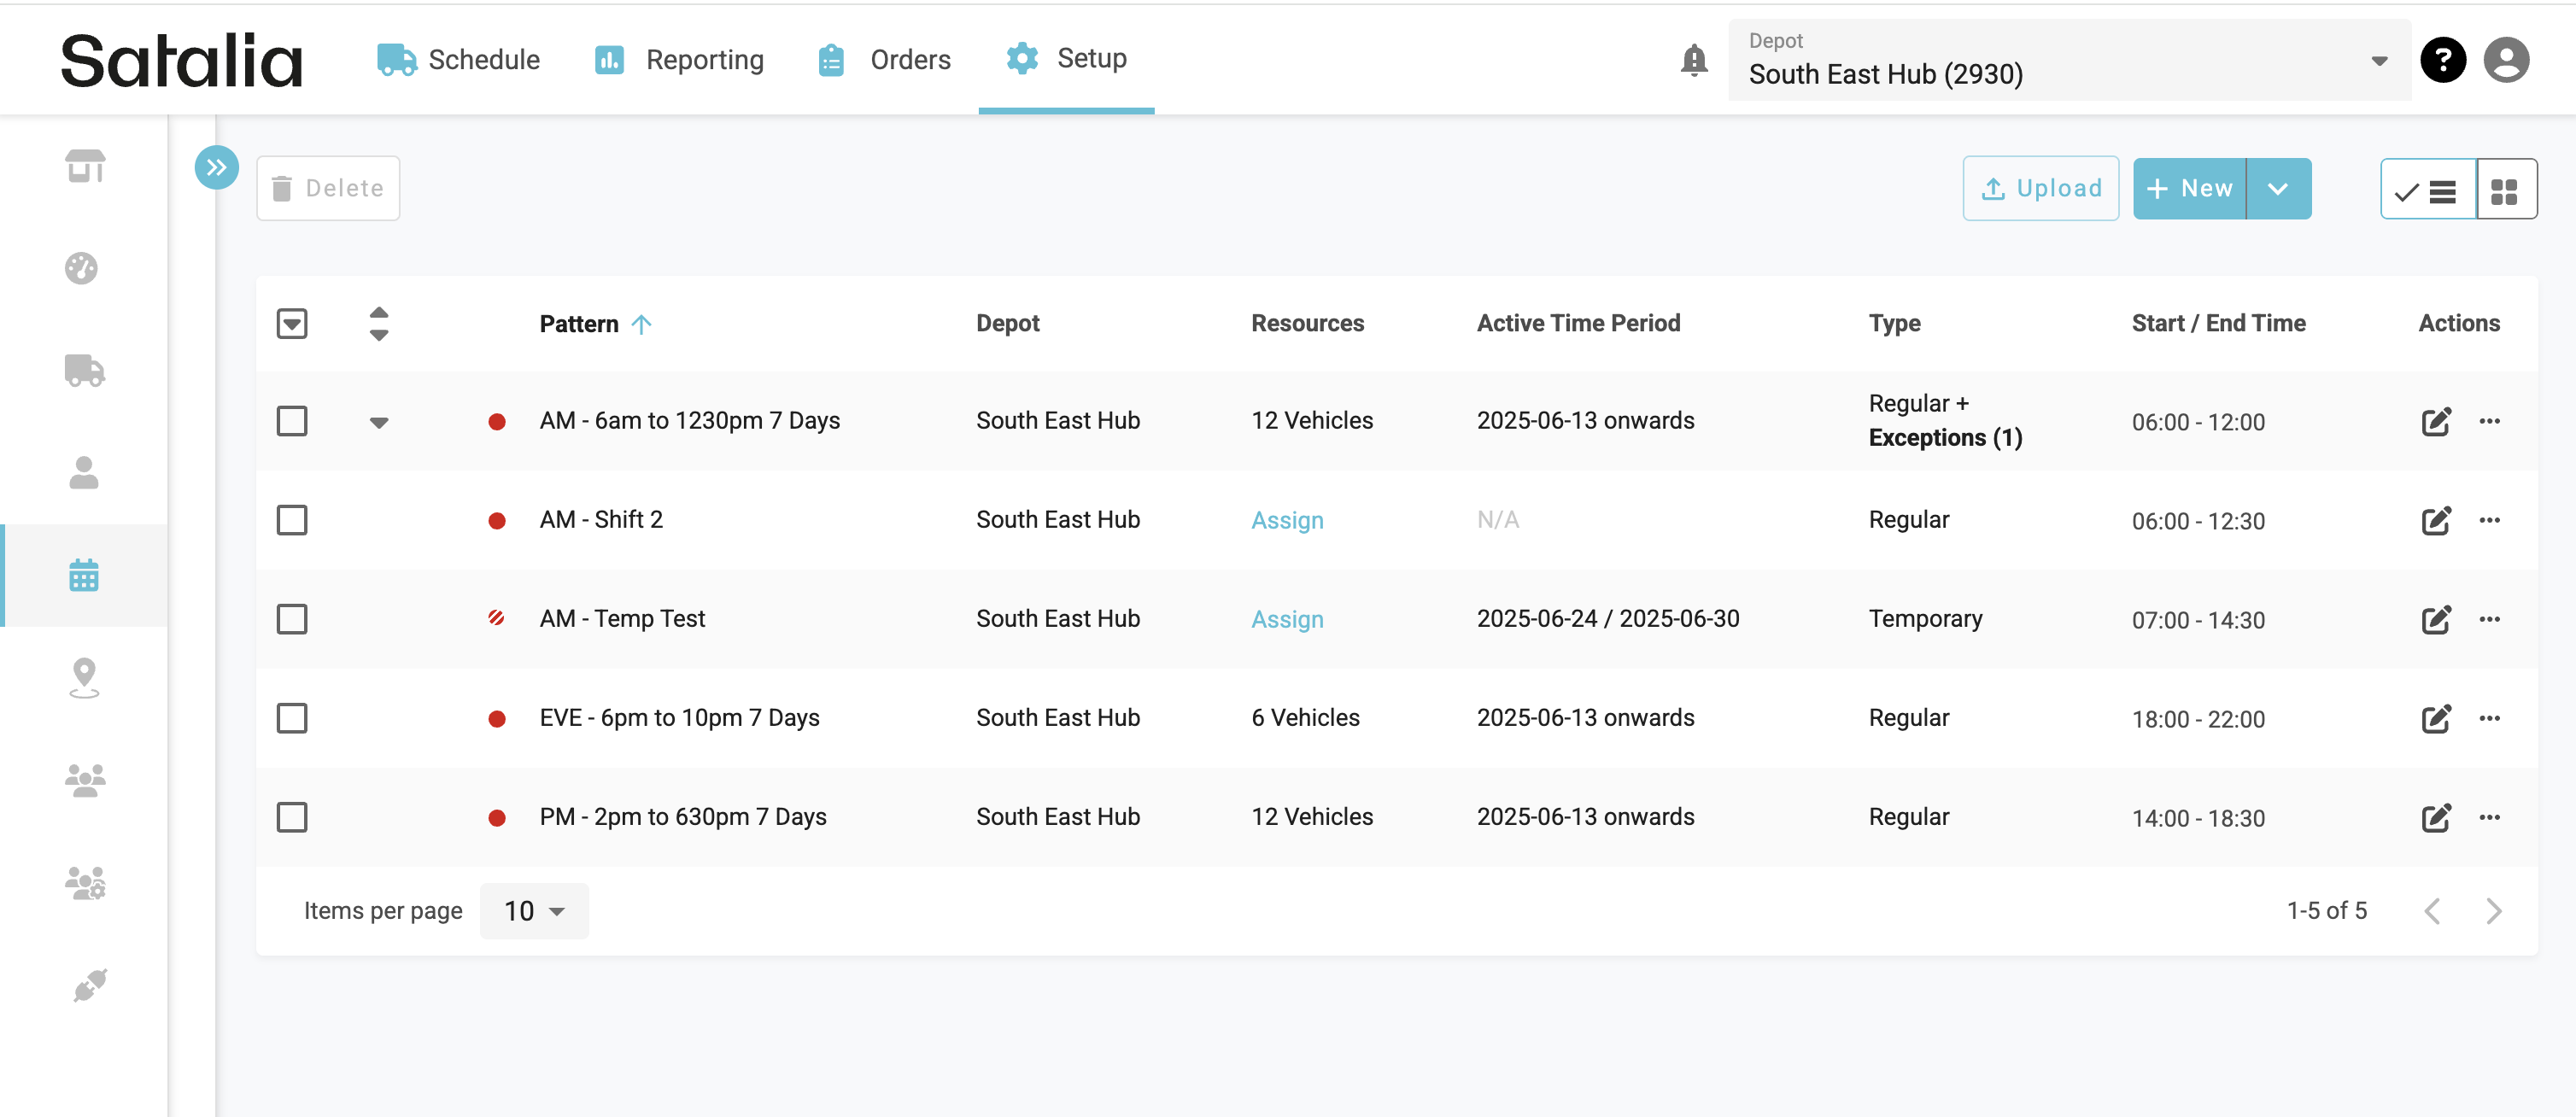
To create a vehicle exception (previously handled via a temporary shift) you should access the list view for shift patterns.
You must the select the Create exception option from the actions.
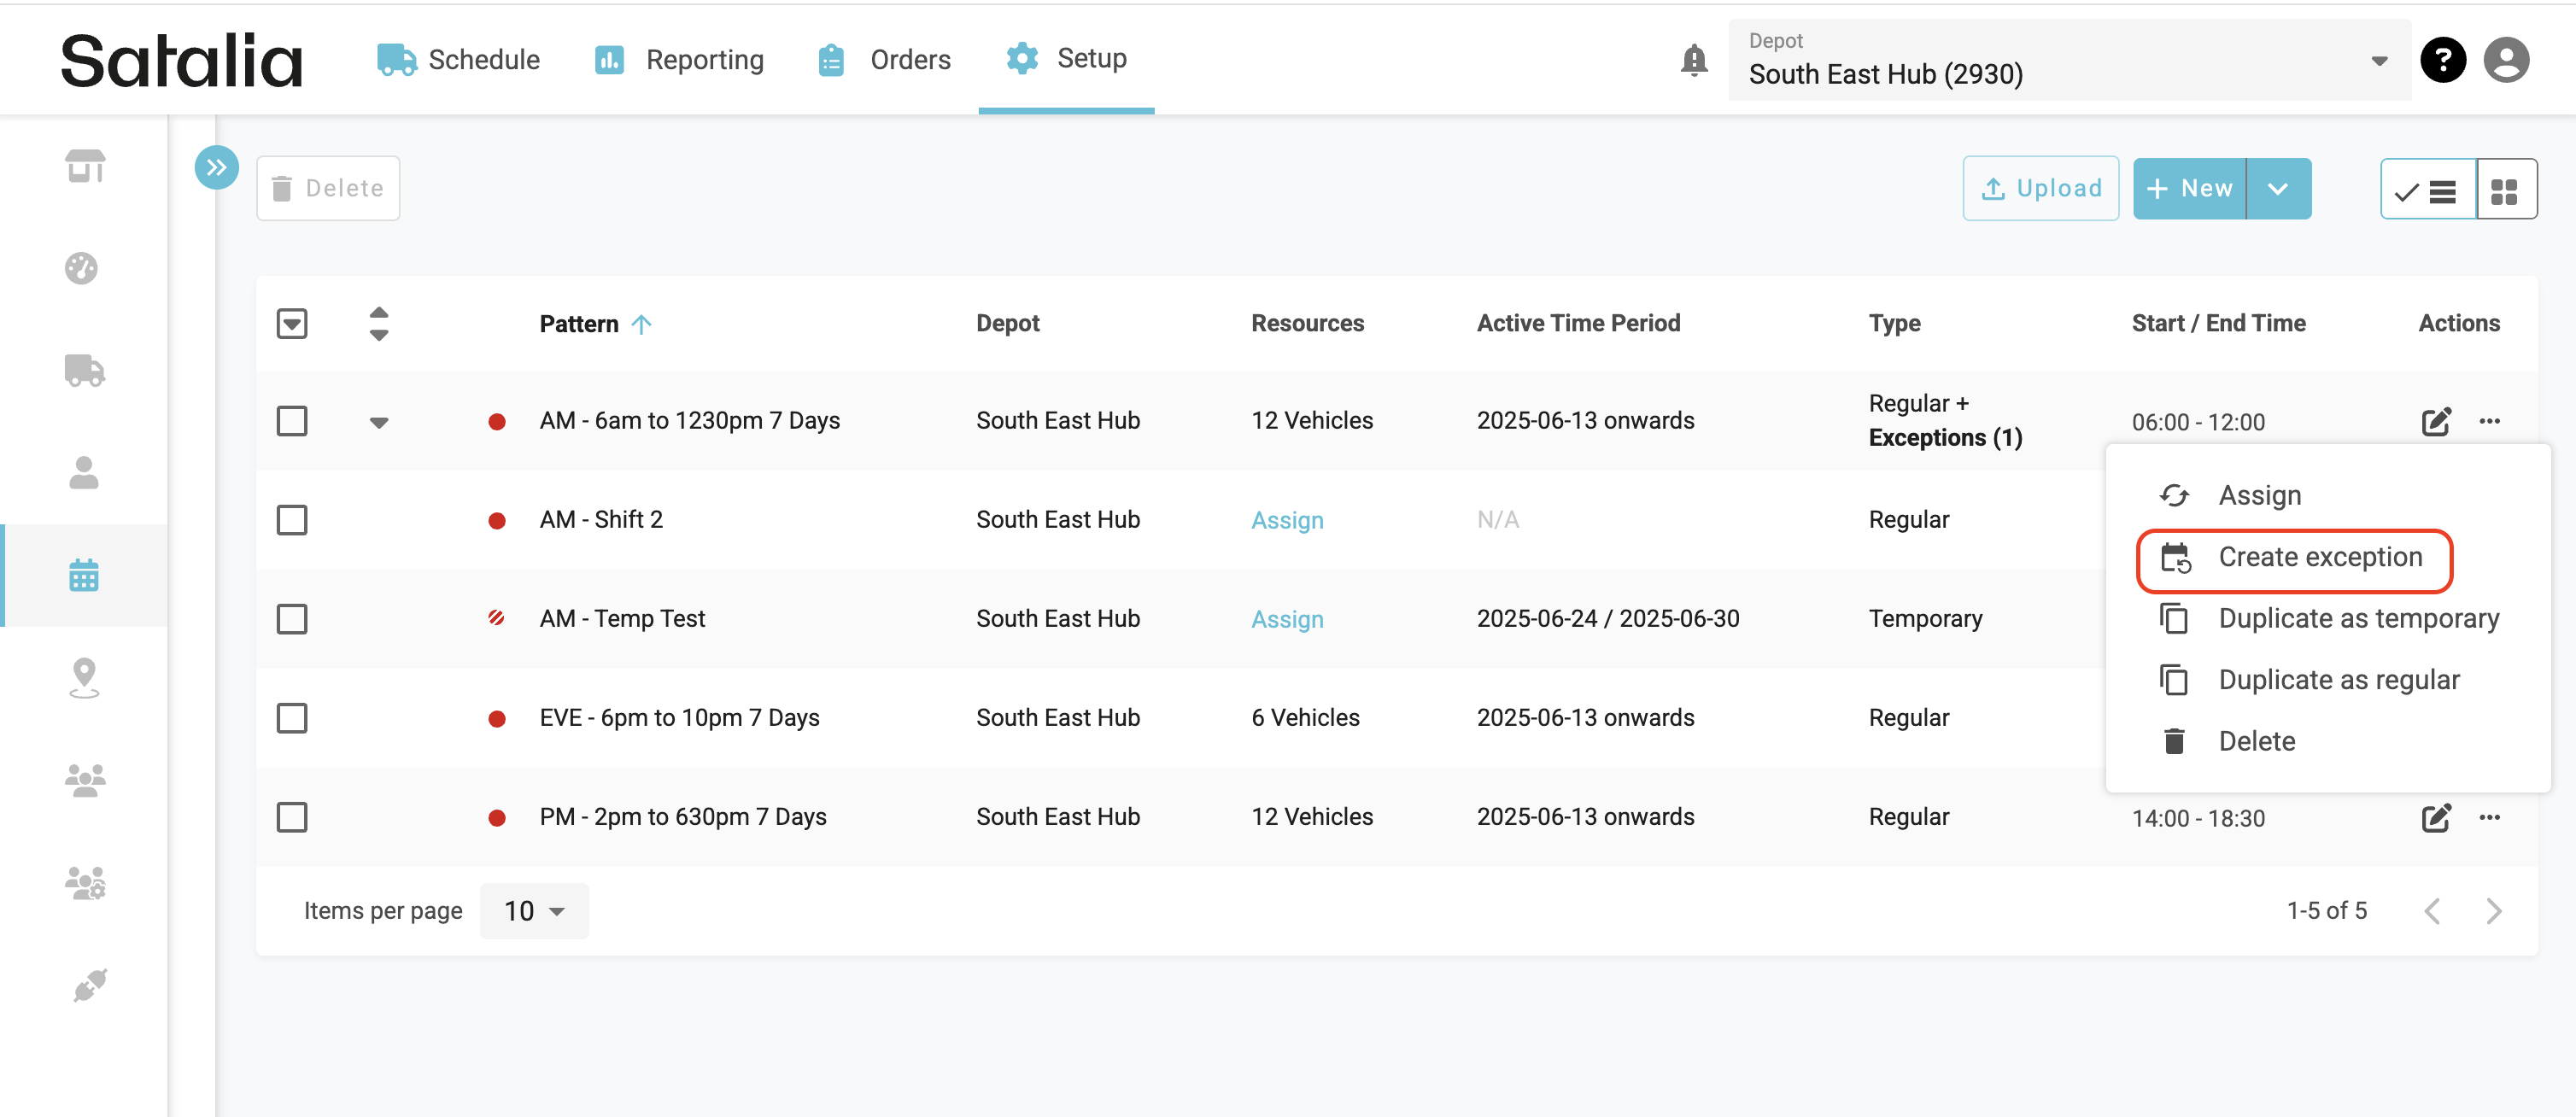
You will be prompted to select the exception type you wish to configure. In this instance it will be the Vehicle Exception Option.

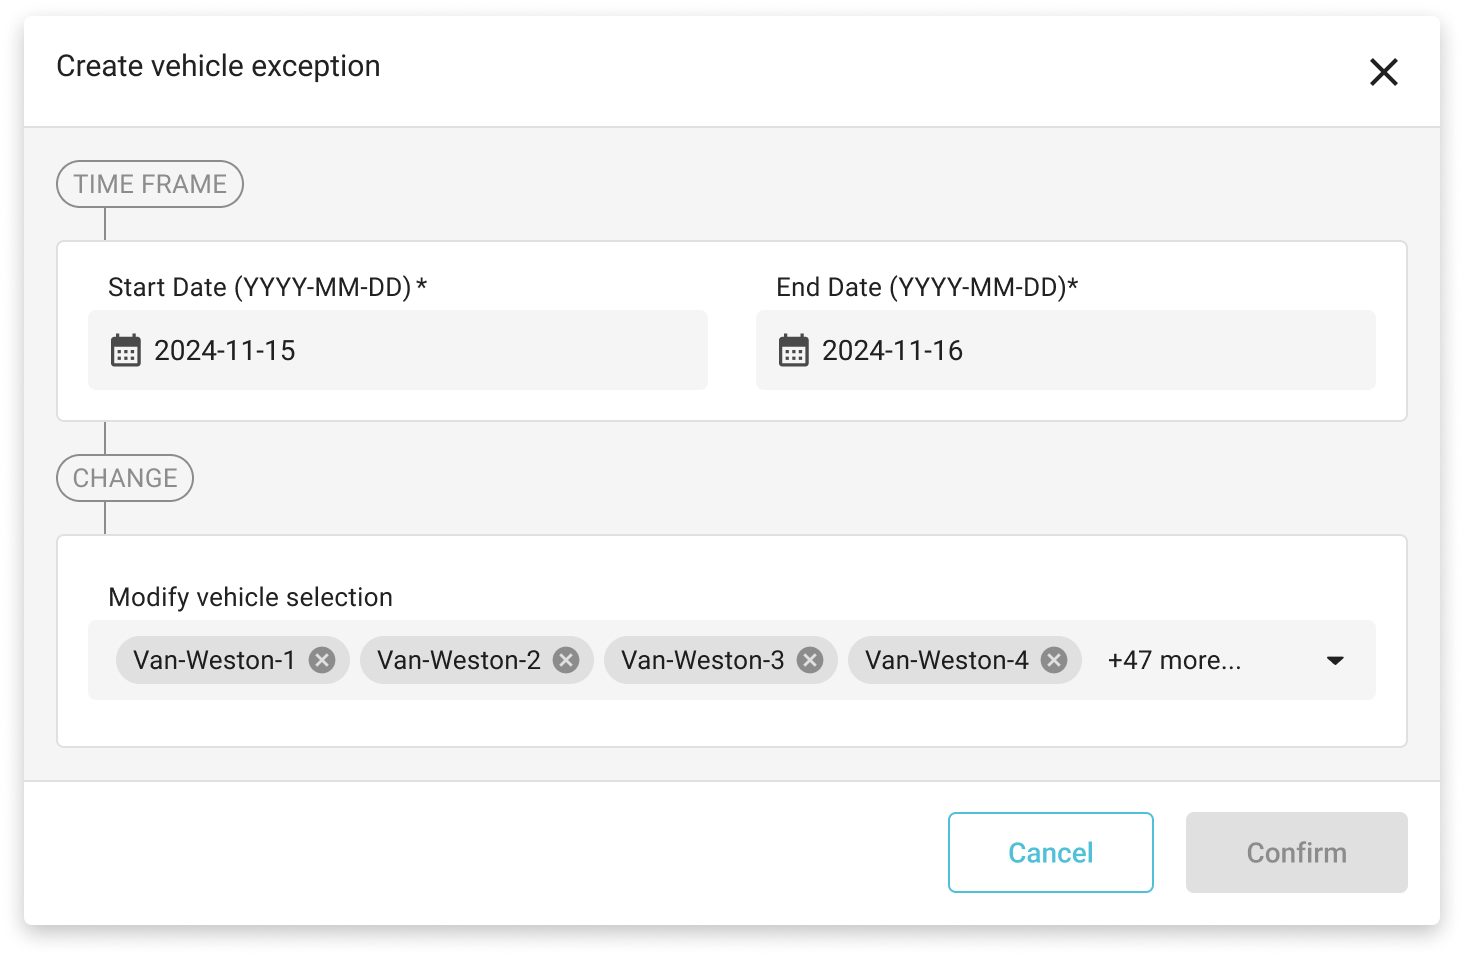
Once you have selected the Vehicle Exception Option you will first be prompted to define a timeframe for the exception to be applied for in the form of a Start and End Date.
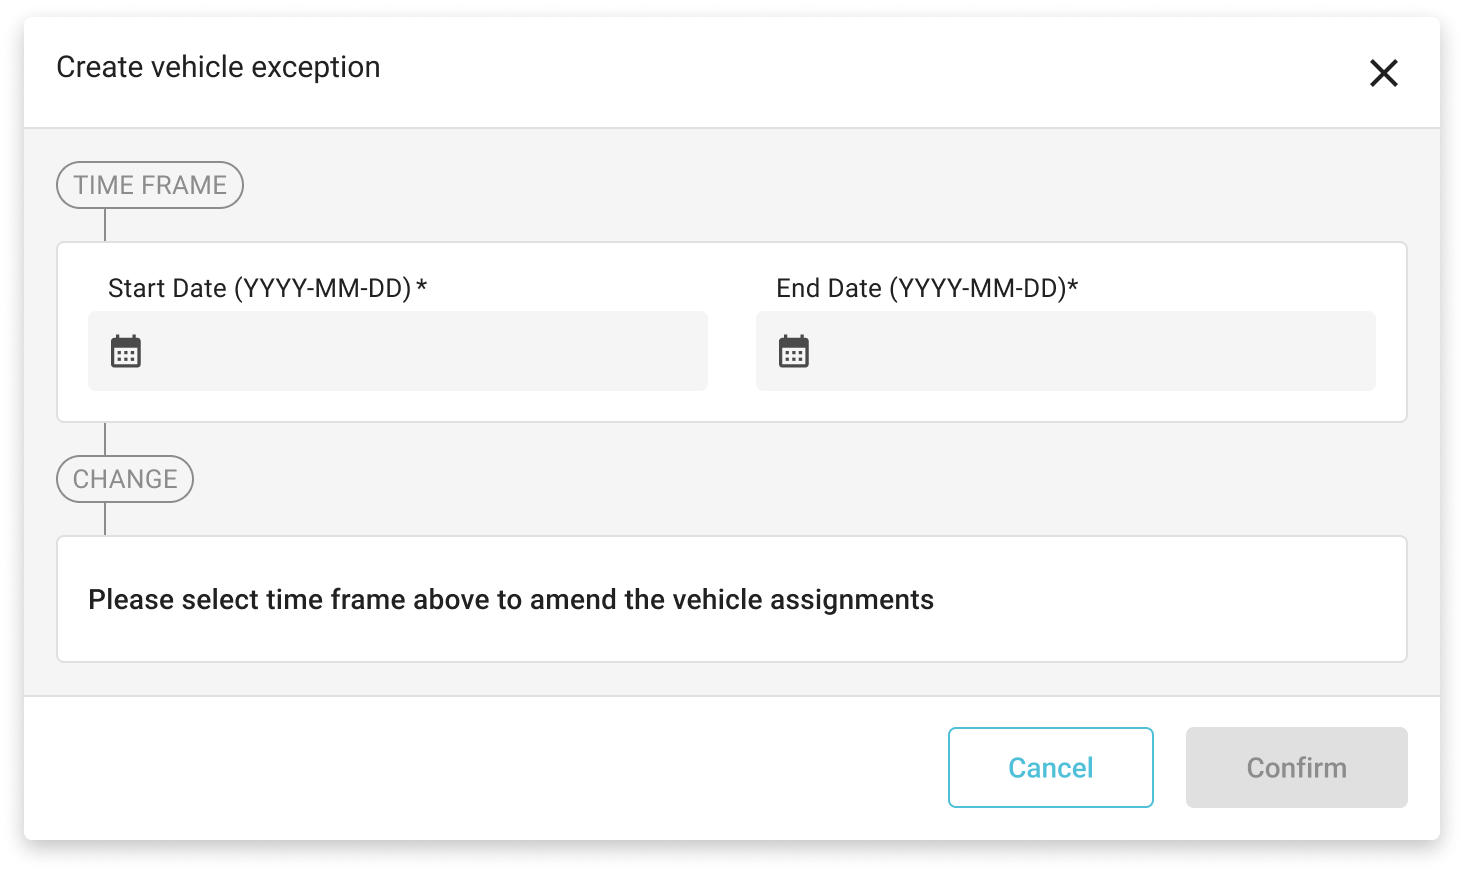
When a start and end date have been defined for the exception you will then be able to apply changes to the vehicle assignment. You will either be able to add additional vehicles or remove vehicles from the shift pattern assignment for the defined date period. Note that when adding additional vehicles they must be active within the platform in order to be available for selection.
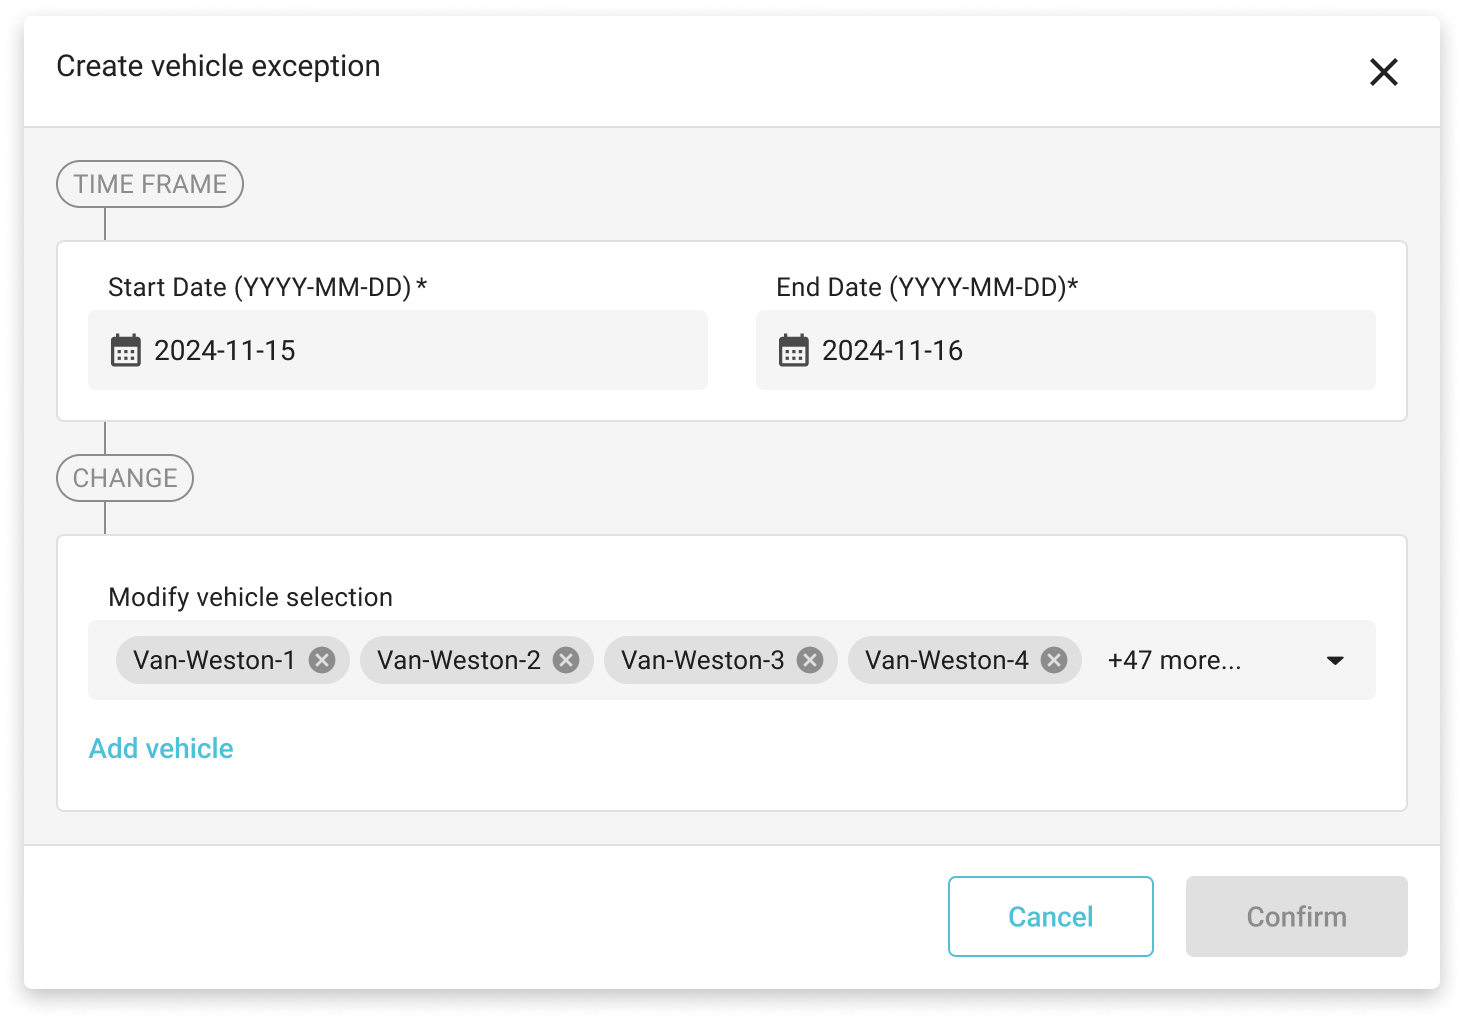
2. Adding Additional Vehicles as part of Exception
When you want to add additional vehicle/s to the shift pattern as part of the exception you must select the Add Vehicles Option where you will be presented with a list of active vehicles available within your chosen Depot to select from.
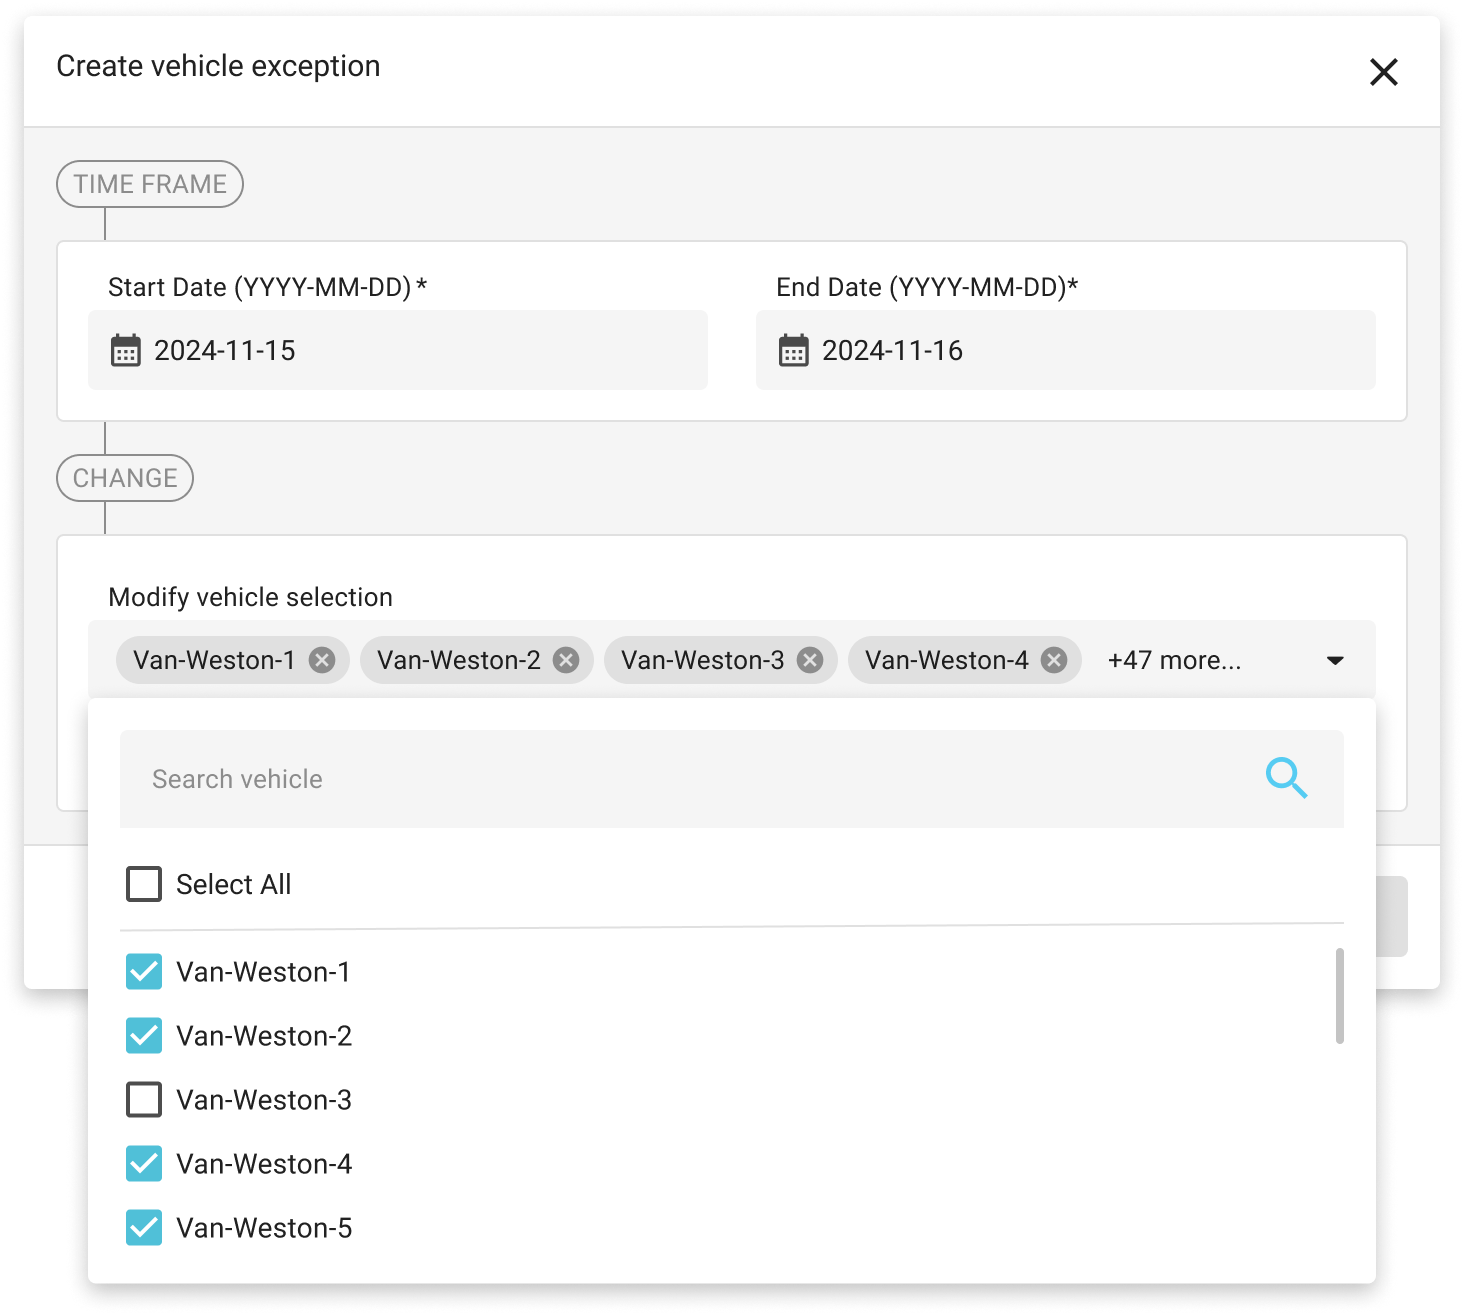
<< Image of Selection Dropdown>>
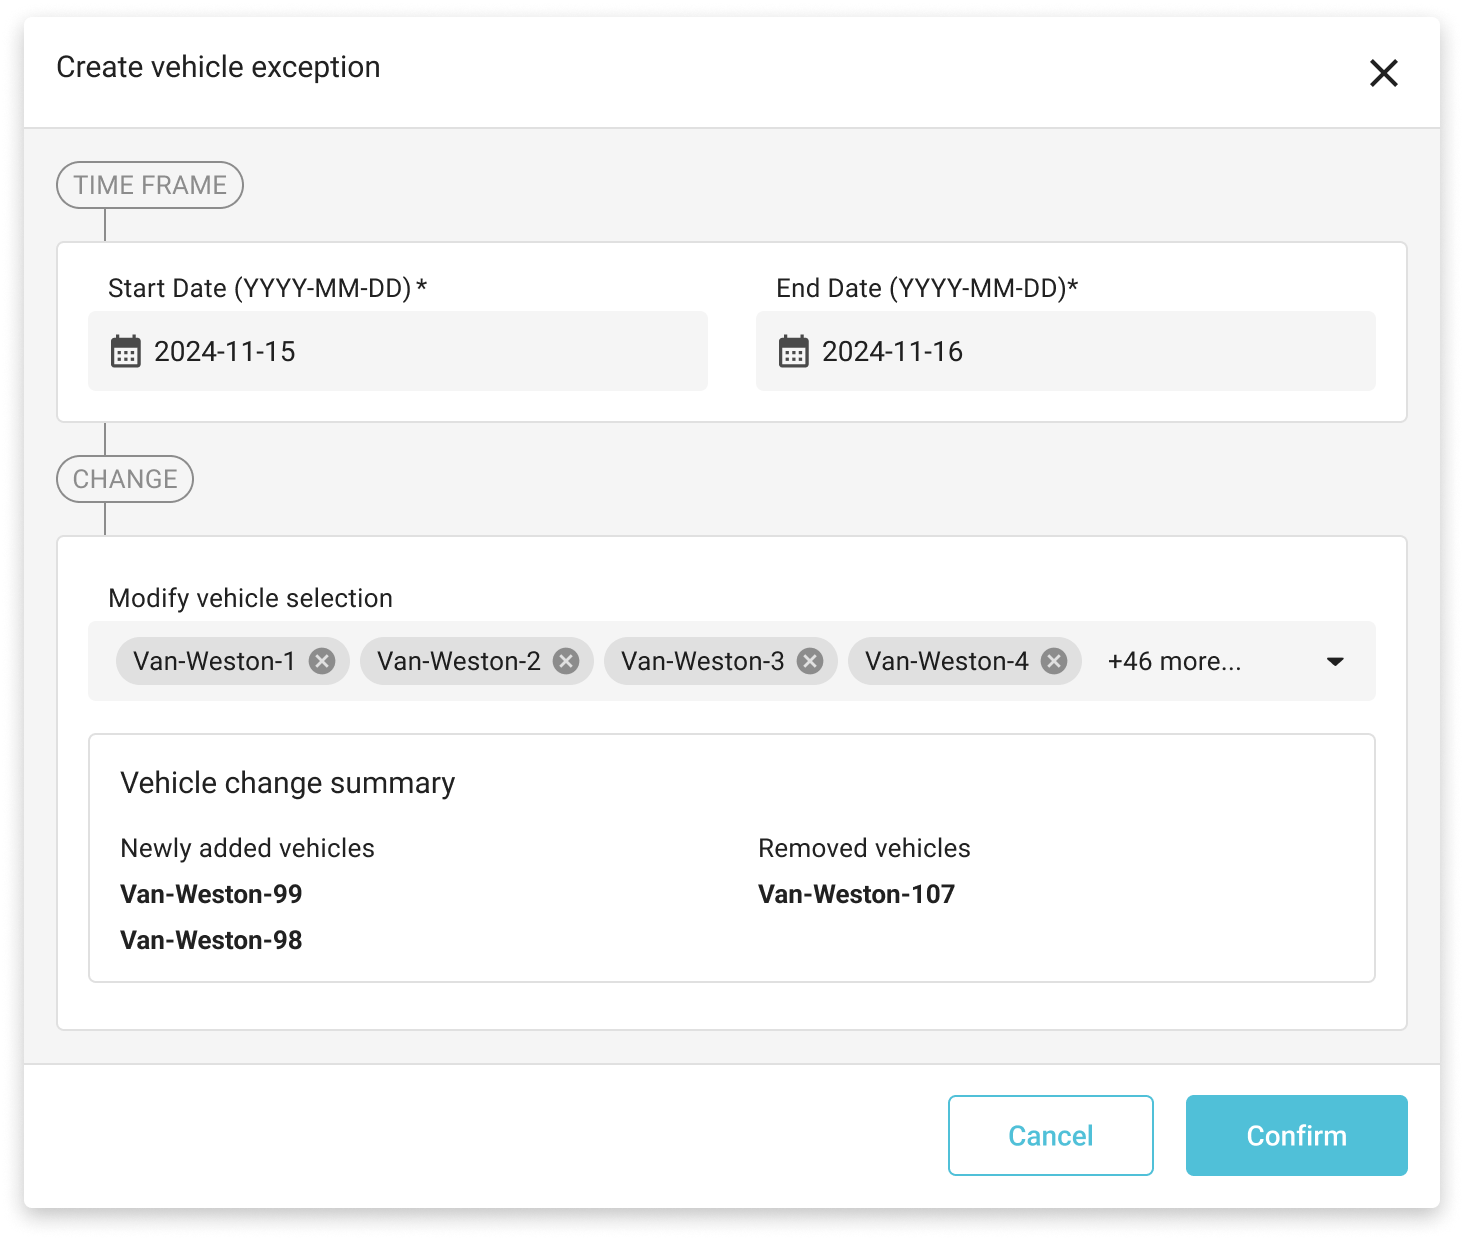
Once you have made your relevant selections as part of the exception you will be presented with a summary of the changes being applied.
3. Removing Vehicles as part of Exception
When you want to remove a vehicle/s that have been assigned to the shift pattern as part of the exception you must expand the dropdown list in the modify vehicle selection section where you can then either search and remove a vehicle assignment or simply uncheck the box for the relevant vehicles.
Once you have made your relevant selections as part of the exception you will be presented with a summary of the changes being applied.
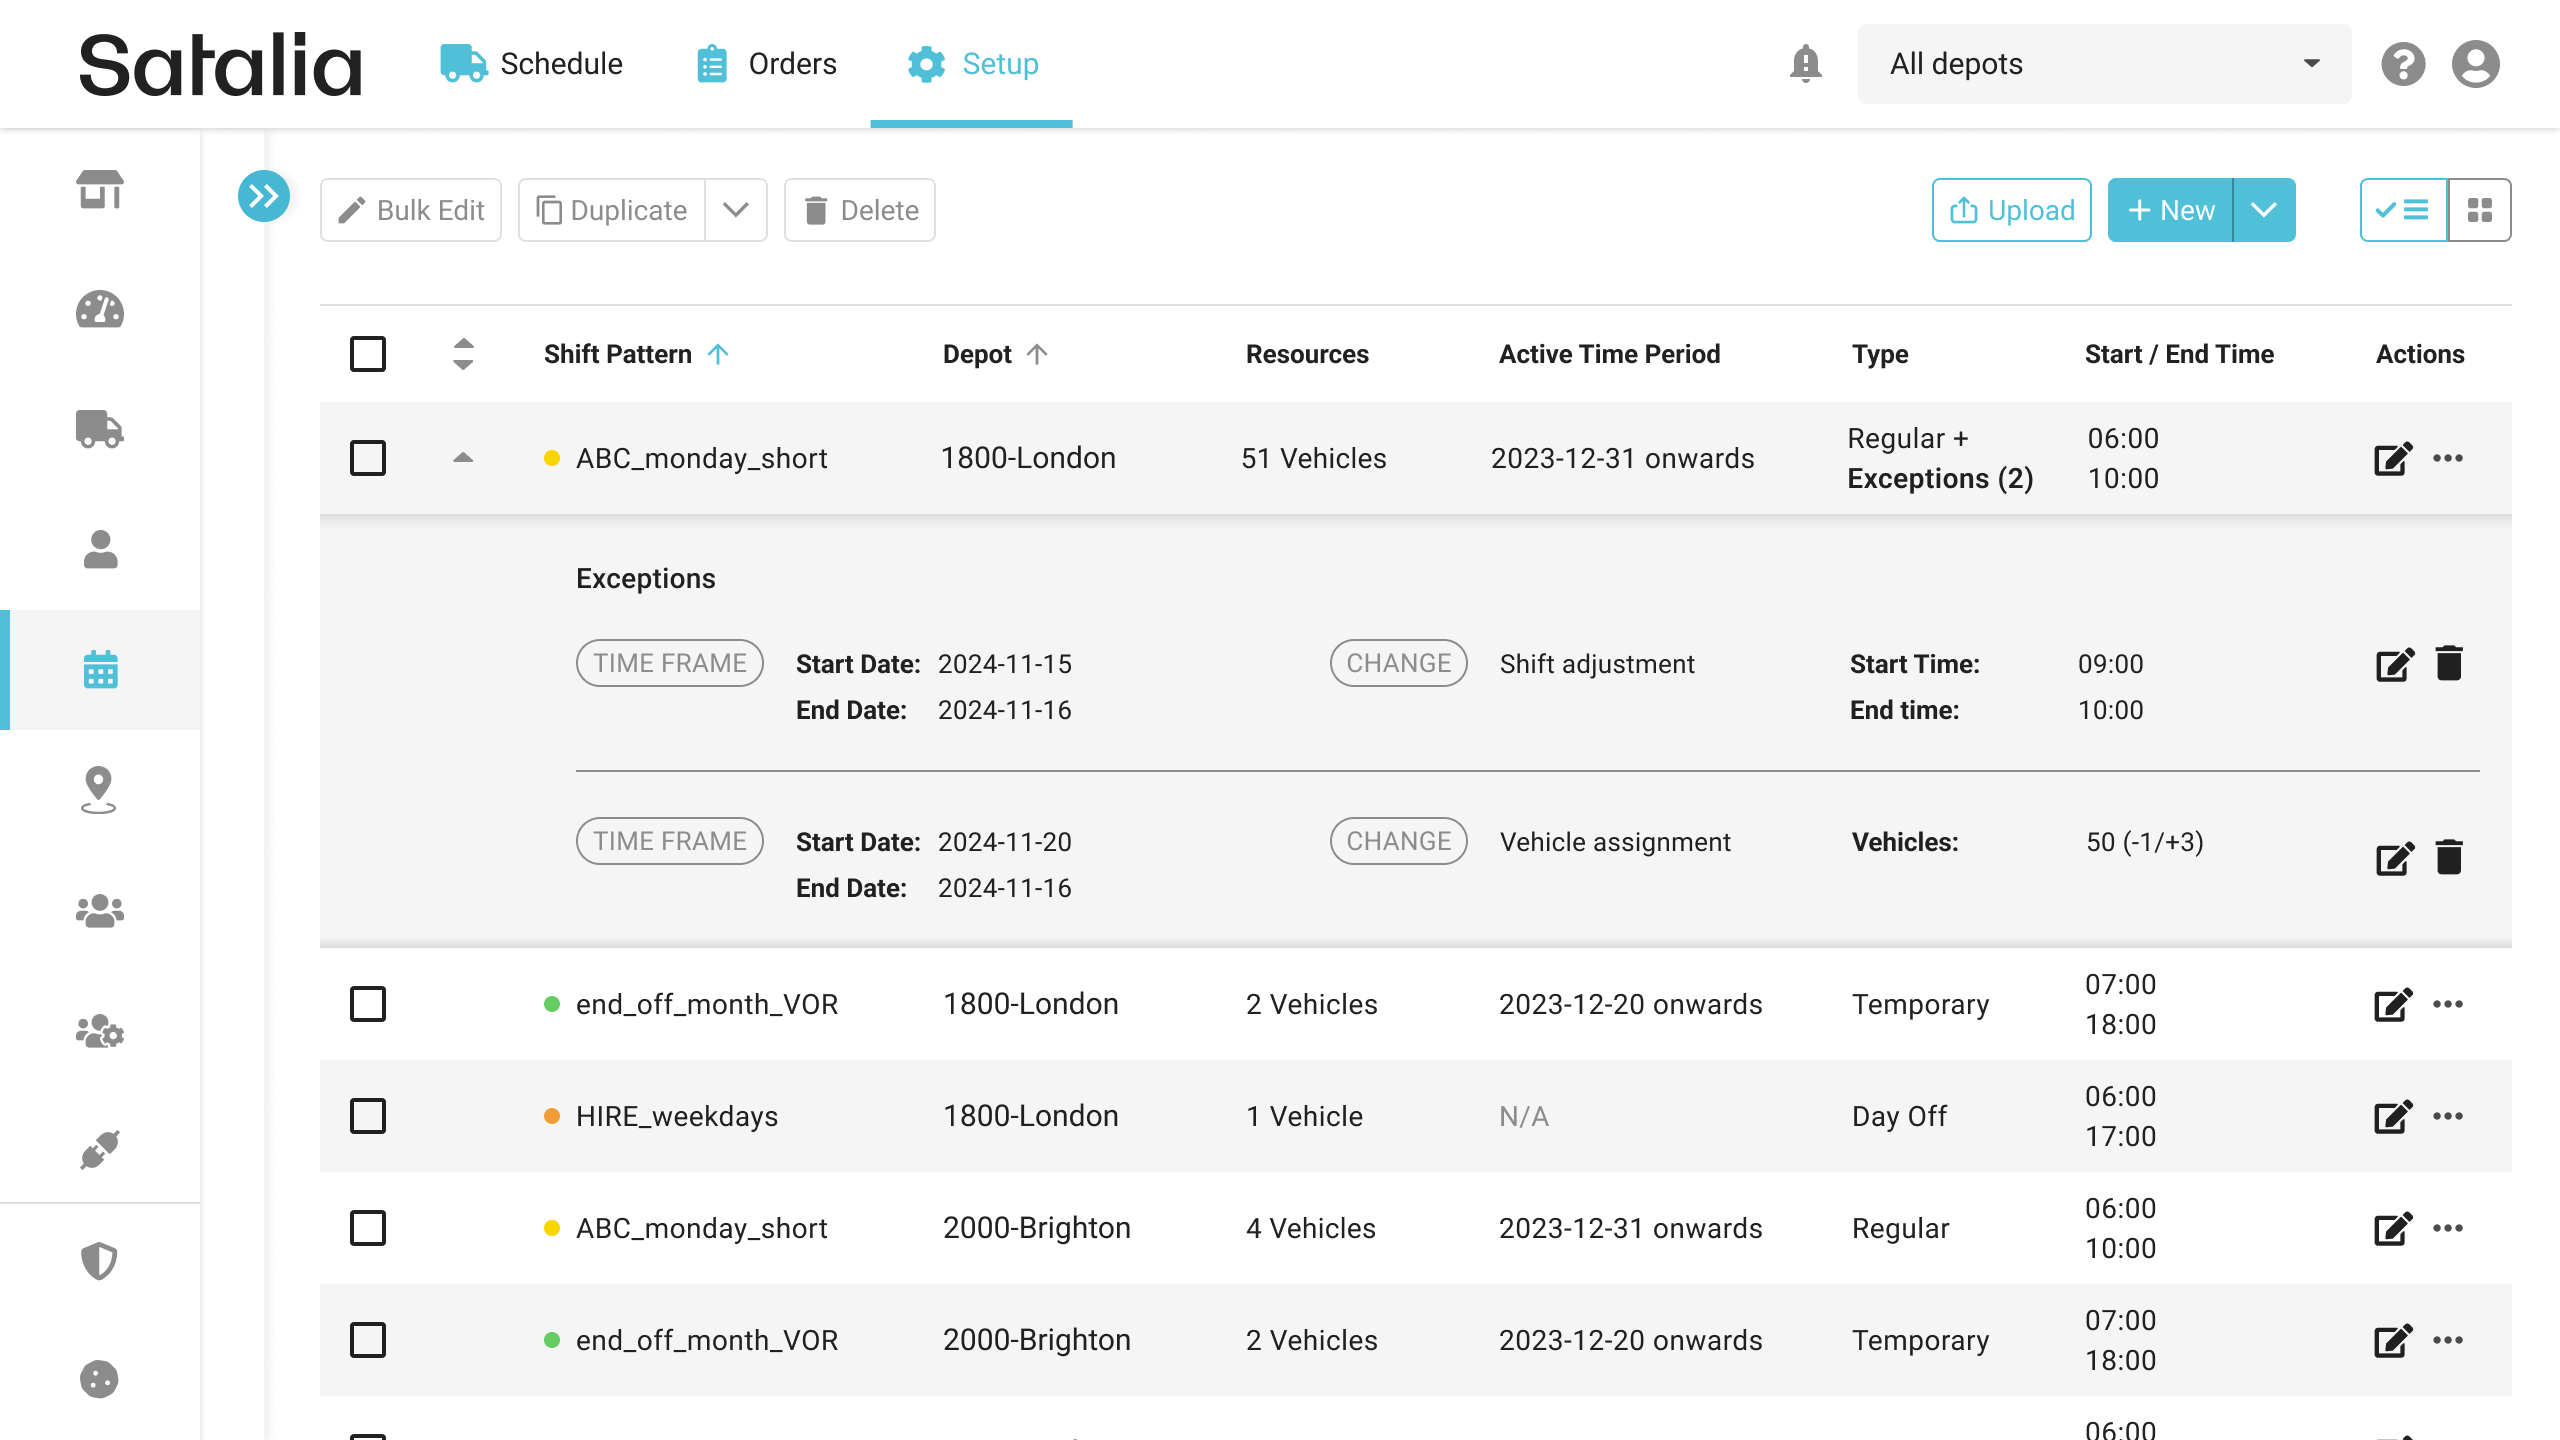
4. Viewing and Editing Vehicle Exceptions
Once you have defined a vehicle exception it will be visible against the shift pattern in the list view and provides a summary of each exception that has been defined against the shift pattern. Note that this will only show active or future dated exceptions.