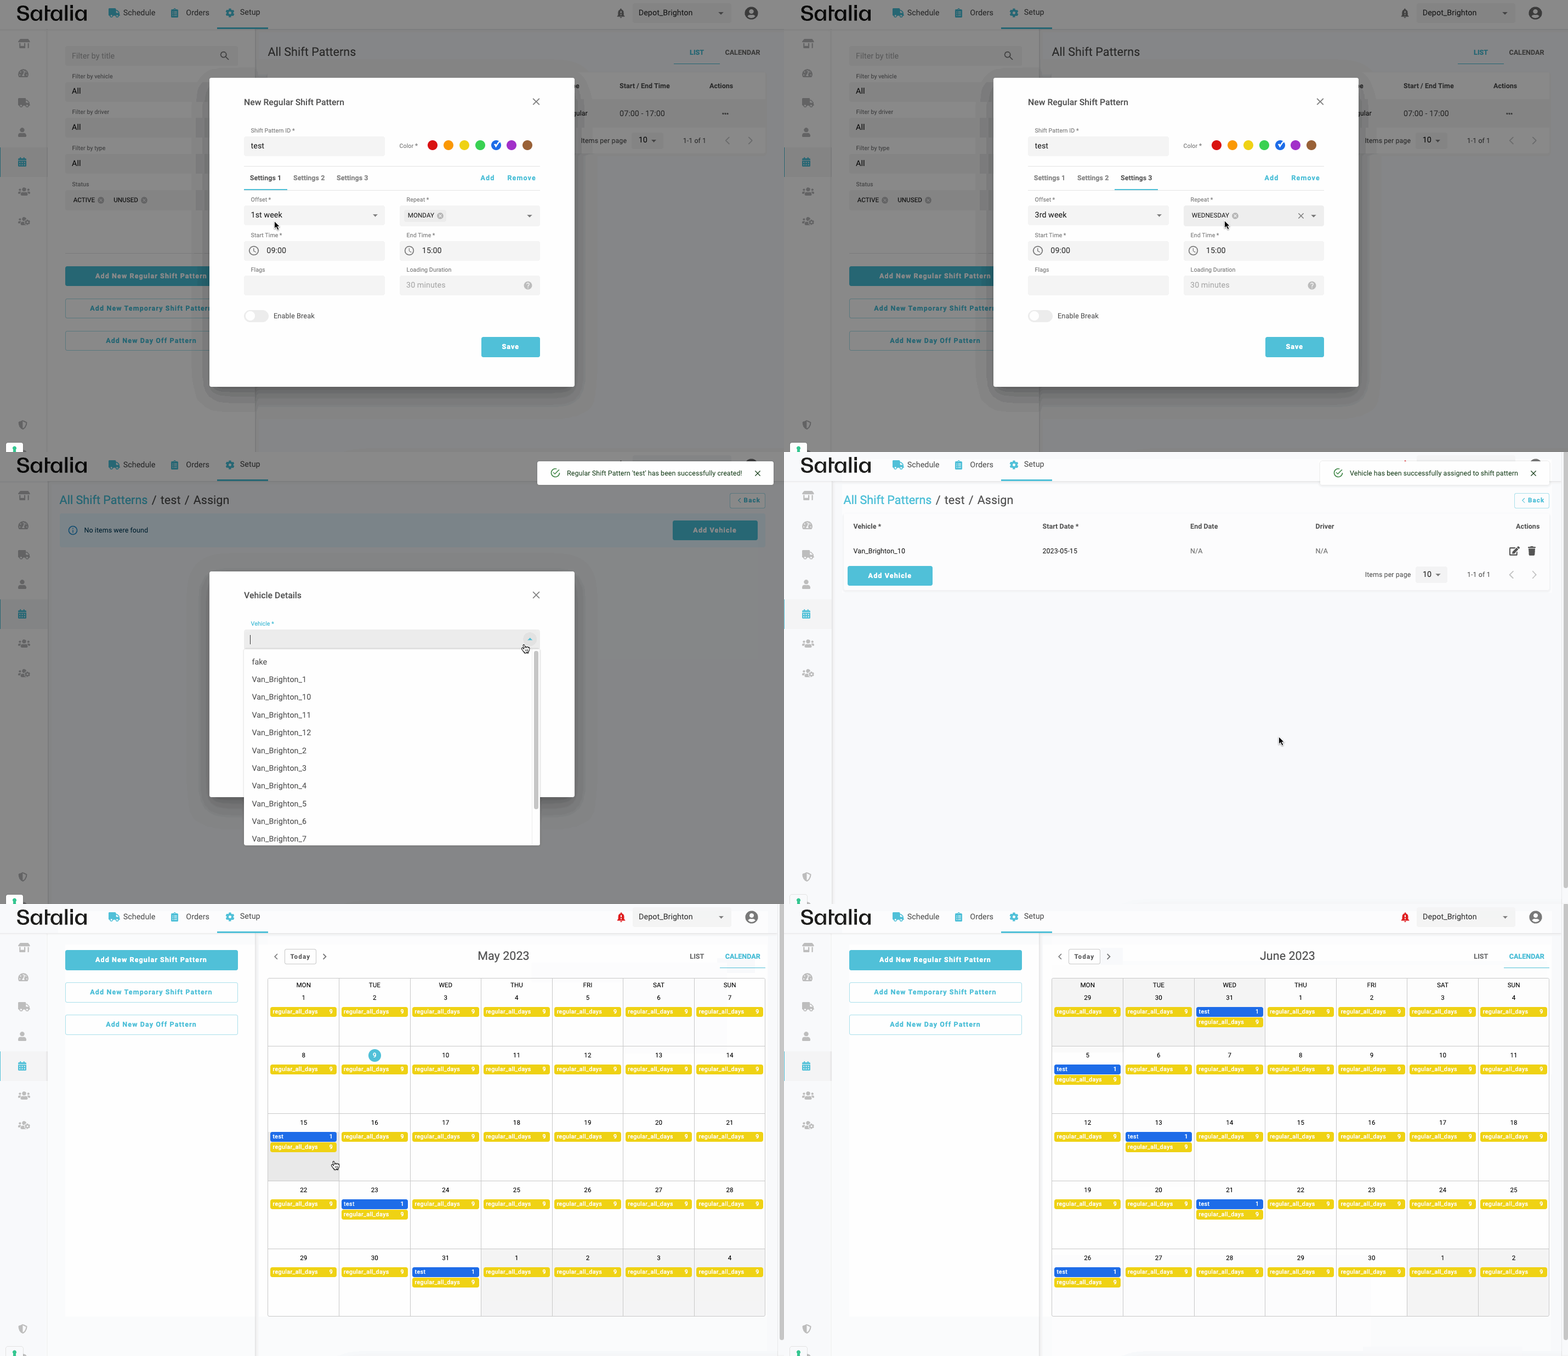
A regular shift pattern is a standard go-to pattern type that does not have a fixed start and end date. It is mostly used to define the baseline shifts. Other pattern types - temporary and day off - are mostly used to temporarily tweak the baseline.
In this article, we will cover two scenarios of how to create a regular shift pattern:
-
Create a regular shift pattern that repeats every day.
-
Create a shift pattern that runs shorter hours at the weekend.
1. Create a regular shift pattern that repeats every day
It’s a two-step process.
First you will need to create a shift pattern. Then assign vehicles to it.
Say you wanted to create a basic shift pattern that runs every day, every week, starts at 12pm and finishes as 8pm. Simply click on ‘Add New Regular Shift Pattern’ and fill in those key configurations. You can then choose a specific colour for that shift pattern – brown in the example below.
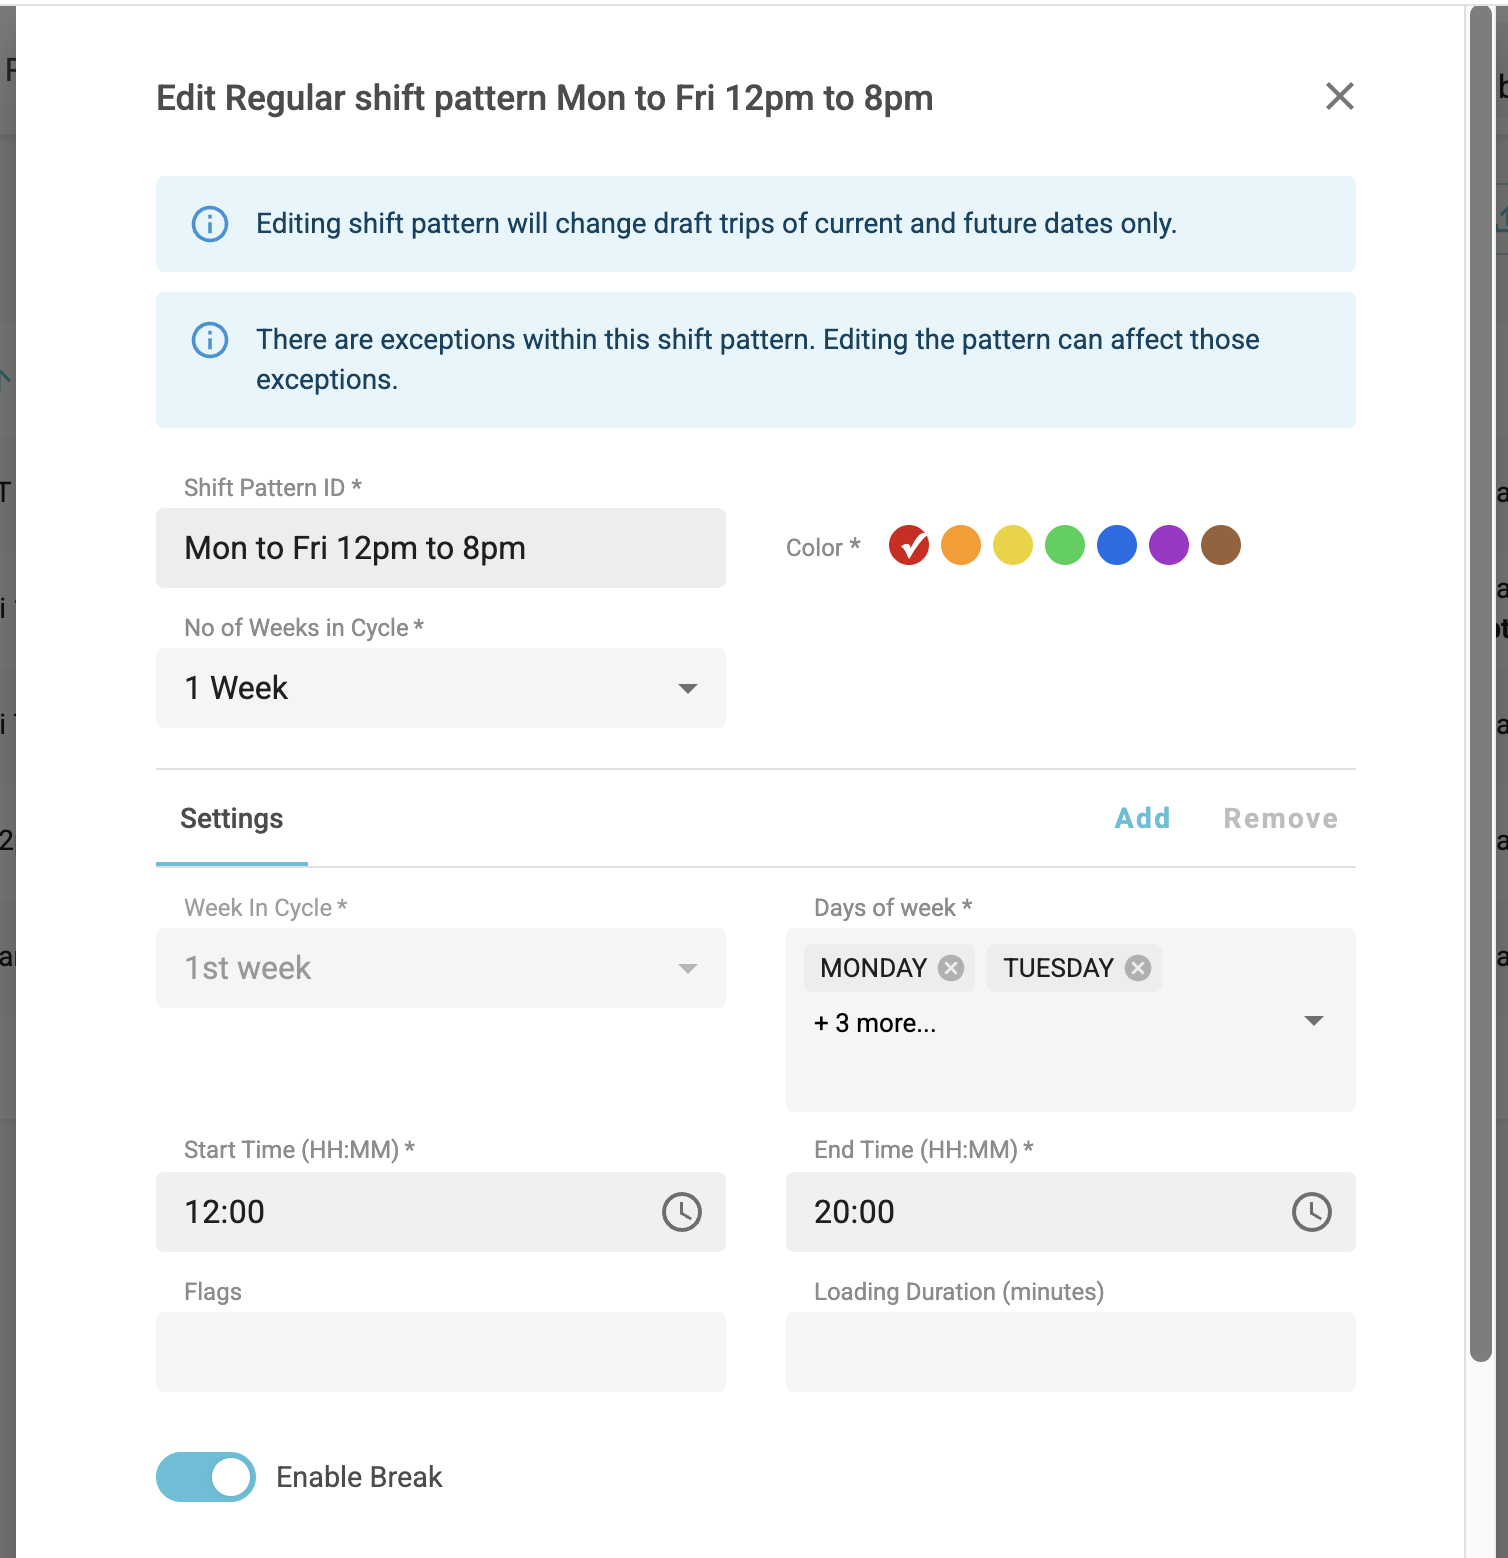
In Order to set the correct repitition of this shift pattern you need to ensure the following 2 fields are set correctly on the Shift Pattern.
No of Week In Cycle (Below Shift Pattern ID):
This fields defines the max repetition of your shift pattern and the associated settings. Eg you may want it to repeat every 4 weeks so this would be 4 Weeks in that example.
This enables the platform to identify that this shift pattern and the associated settings should repeat every 4 weeks and should you not have a setting for week 4 in the pattern then it will be left blank for that week ensuring true repetition every 4 weeks.
Week In Cycle (Within the Specific Shift Pattern Settings):
This fields defines the week within the shift pattern repetition that the setting will occur on. Eg 1st Week, 2nd Week etc.
Note that this field will only display applicable options based the No of Weeks In Cycle that has been selected. Eg if No of Weeks in Cycle = 2 weeks then only 1st Week and 2nd Week will display in the week in cycle.
Note that due to the introduction of the No of Weeks in Cycle Field you do not need to configure settings for each applicable week as the platform will handle the repetition automatically.
There are optional and more advanced features for further configurations, including:
-
Flags – to match specific orders to dedicated trips. The categories of those trips are defined in the shift pattern creation modal. The solution allows single and multiple flags. Discover more about flag matching in our dedicated article here.
-
Loading duration - time spent in the depot while loading the vehicle. It is applicable and static for all vehicles assigned to the shift pattern.
-
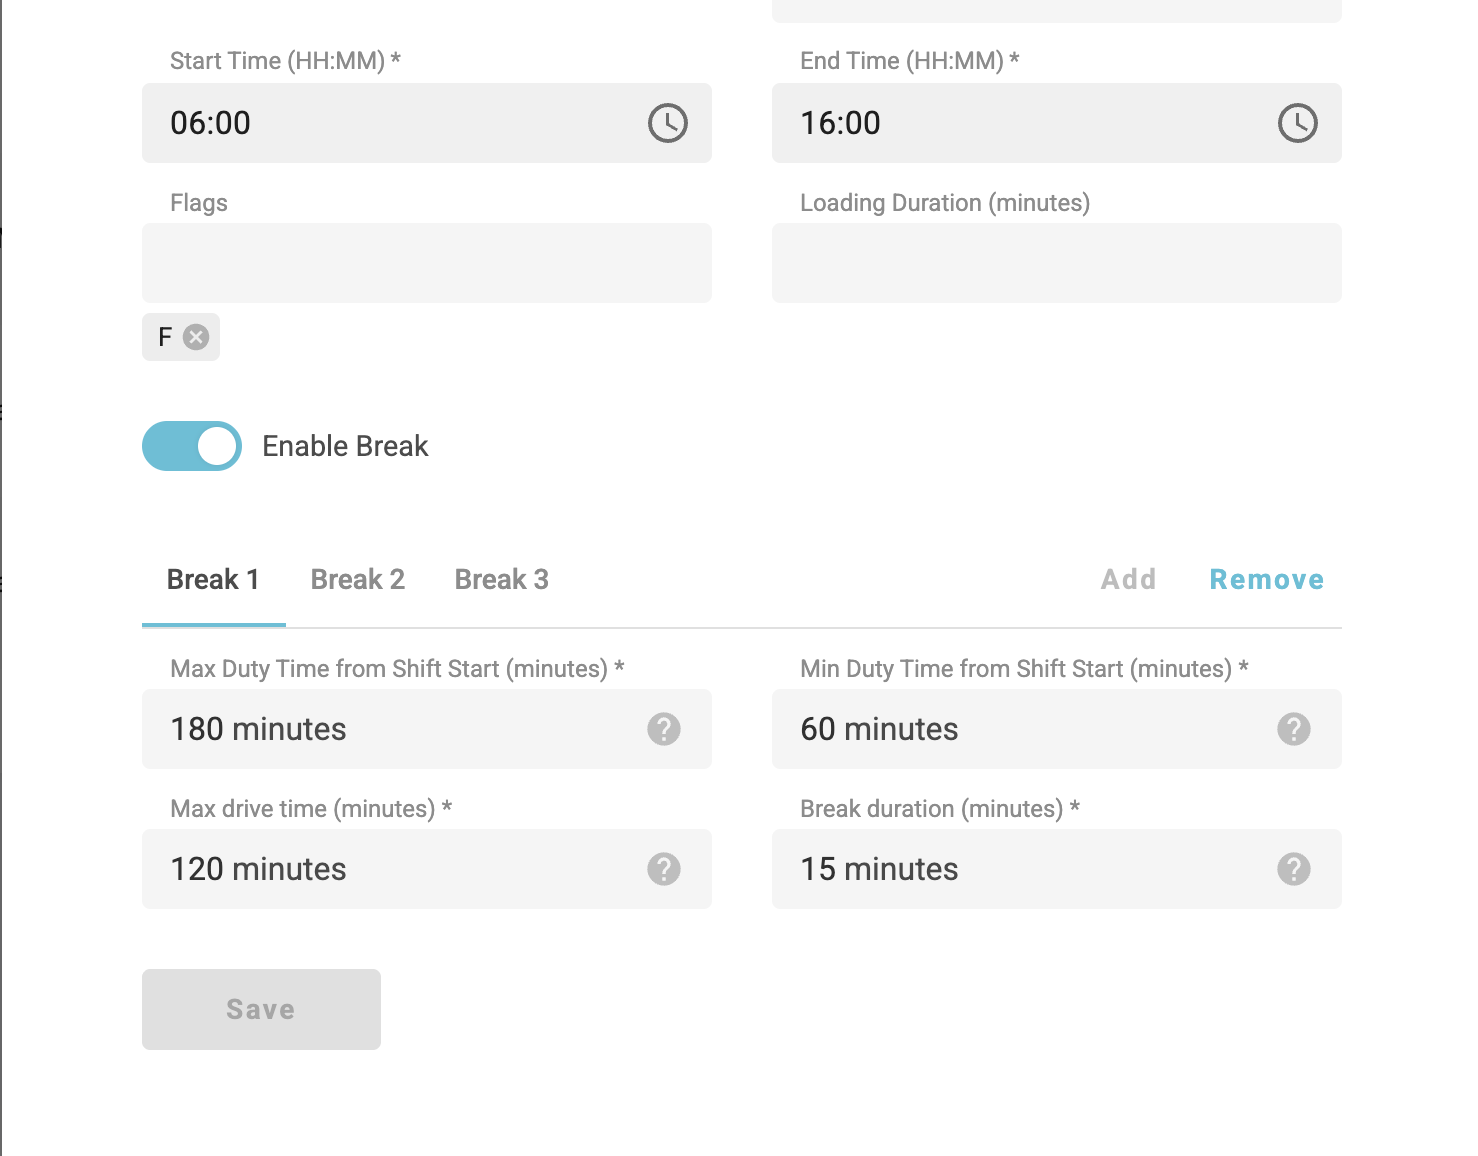
Enable breaks - additional configurations to set requirements for driving breaks. There are settings that include maximum duty time, minimum duty time, maximum drive time, and break duration.
-
Multiple Breaks - When you have enabled breaks you can configure up to a maximum of 3 break windows defining the same settings (max duty time, min duty time, max drive time, break duration)
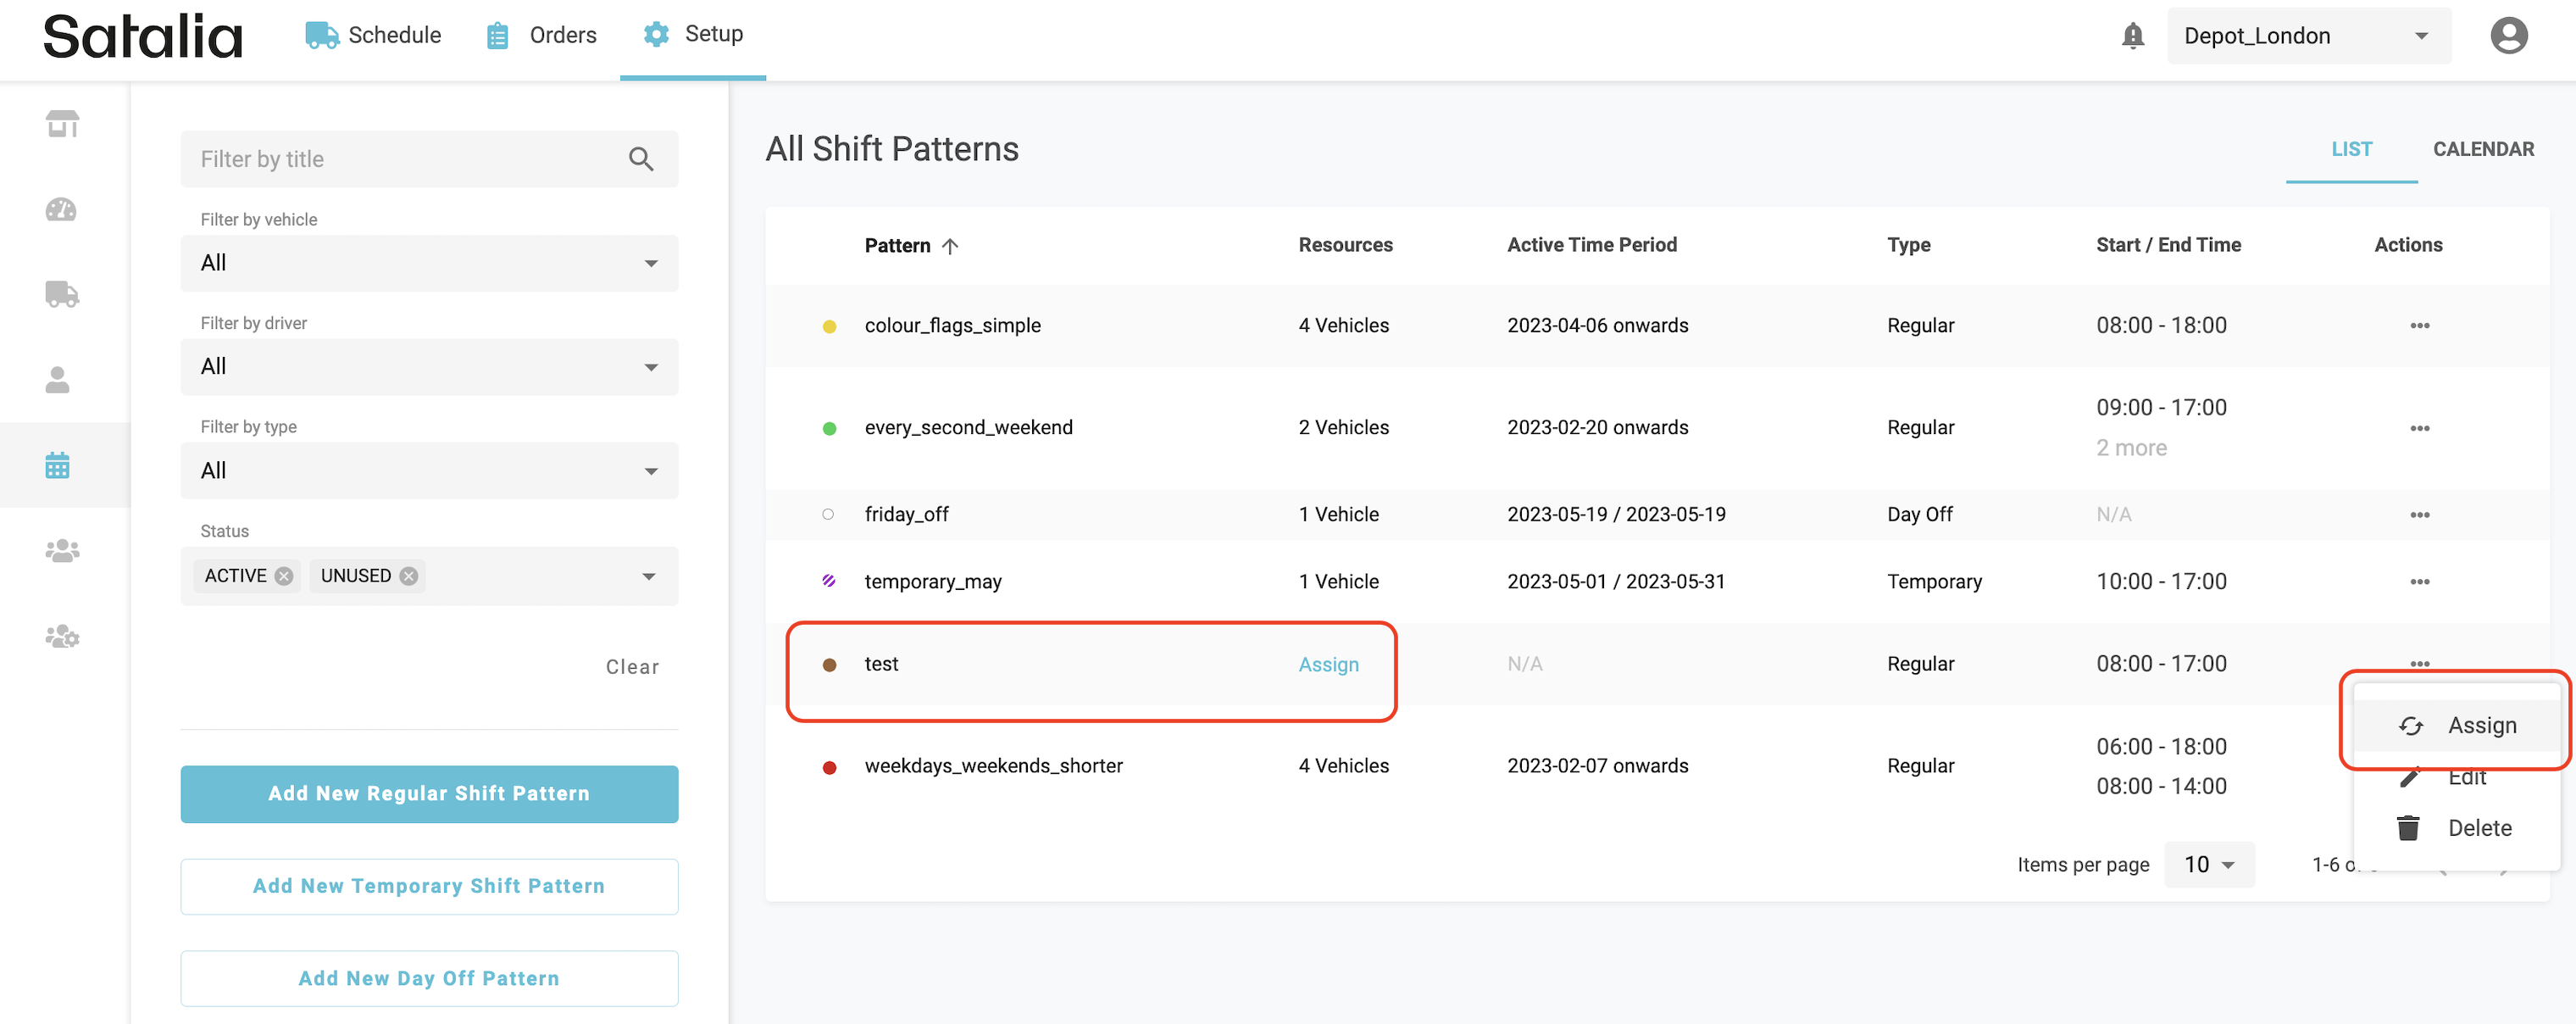
Once you’ve saved your shift pattern, an empty pattern entry will be created in the Shift Patterns List view. This means that the pattern is not yet active and requires vehicle assignment.
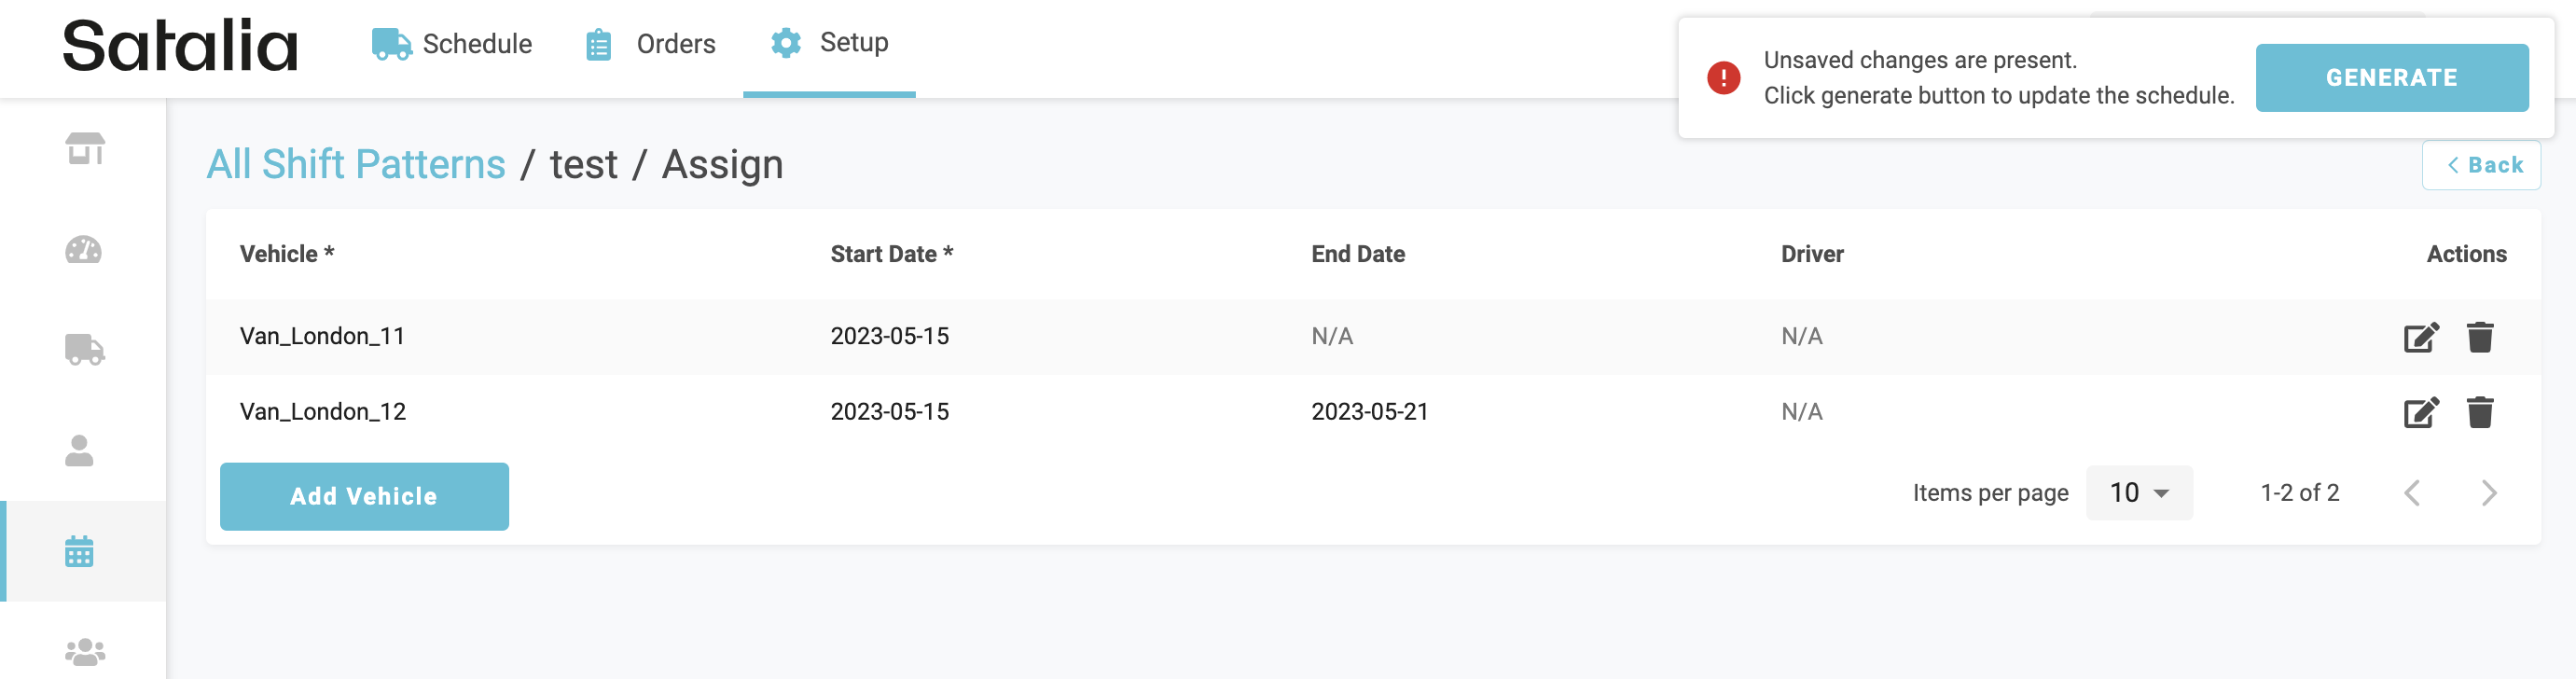
In the vehicle assignment modal, you will see all vehicles assigned to your specified depot and will be able to assign multiple vehicles to the selected shift pattern at the same time. You can differentiate every assignment based on the start and end dates and drivers as you require.
For example, if your fleet usually consists of 10 vehicles, you may want to prepare for Black Friday week by adding two additional vehicles for a fixed 7-day period.
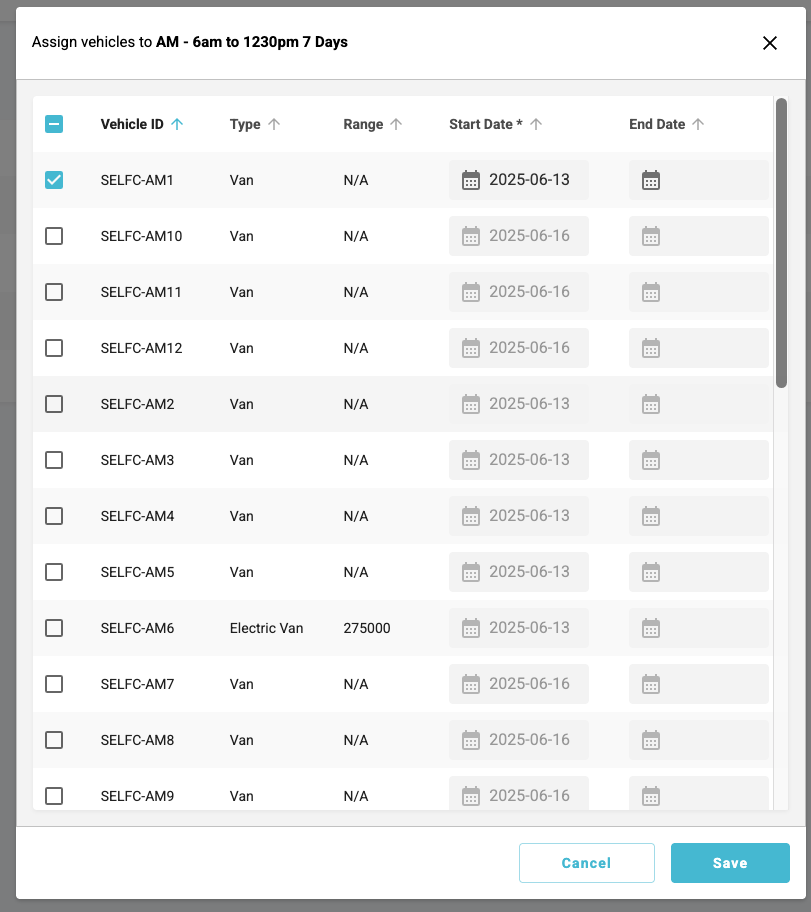
Assigning a vehicle without an end date will ensure that it will be available for scheduling perpetually. The end date can always be set or changed later.
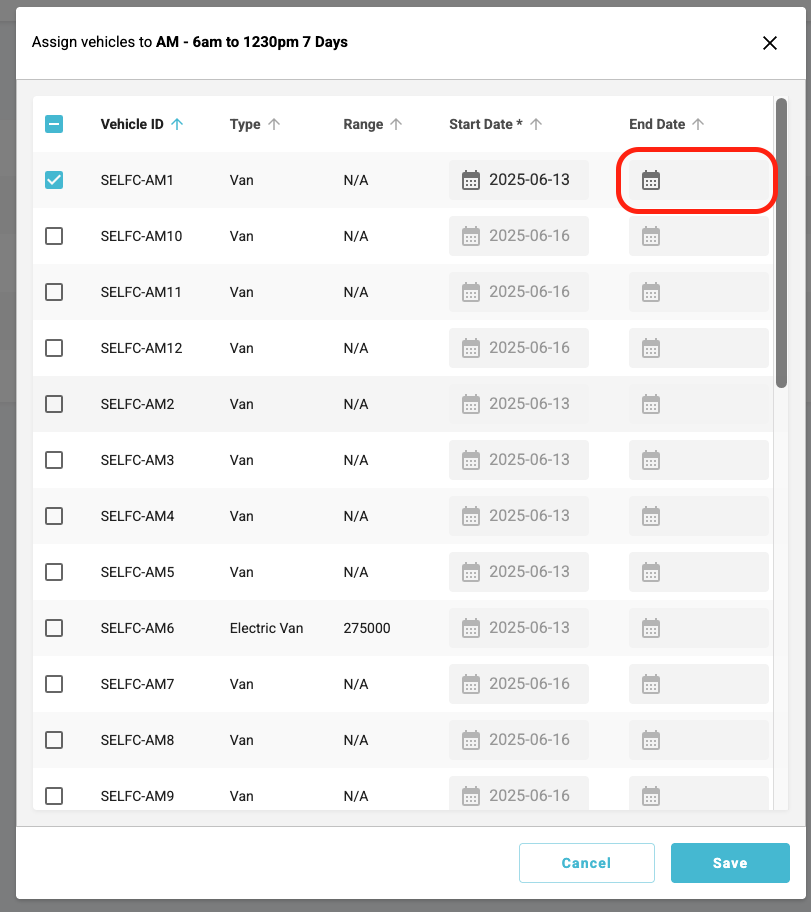
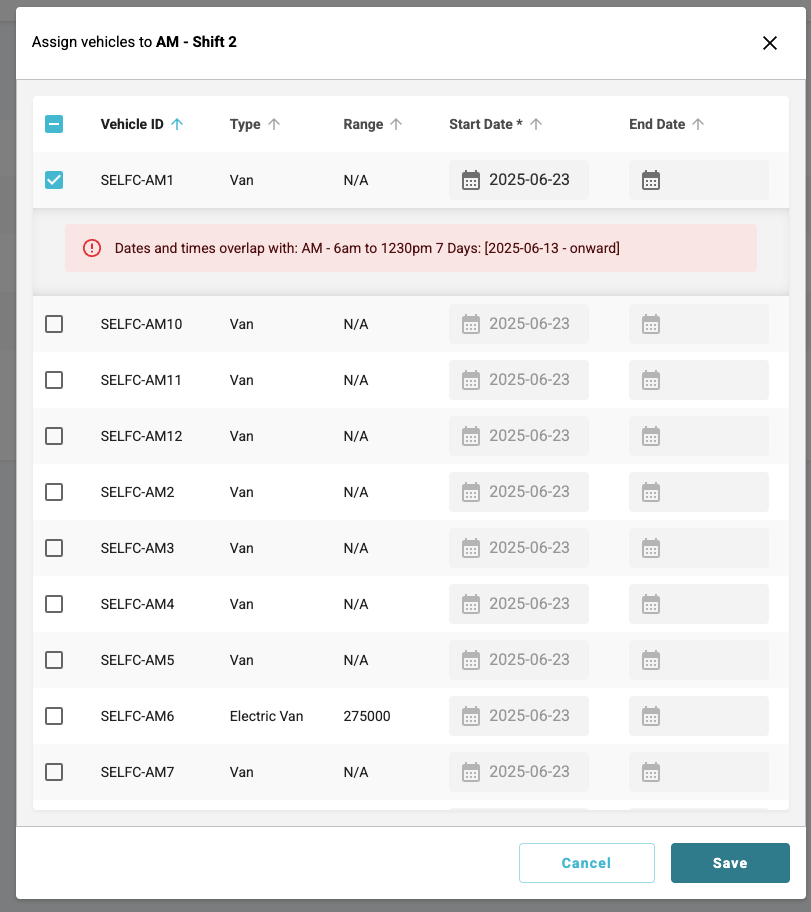
Always consider that the same vehicle can’t be assigned to multiple overlapping regular patterns - the error message will inform if you attempt to do so.
After you’ve created all the required assignments, check the List and Calendar view. The pattern should now be active with two vehicle assignments placed for the specified dates (brown blocks).
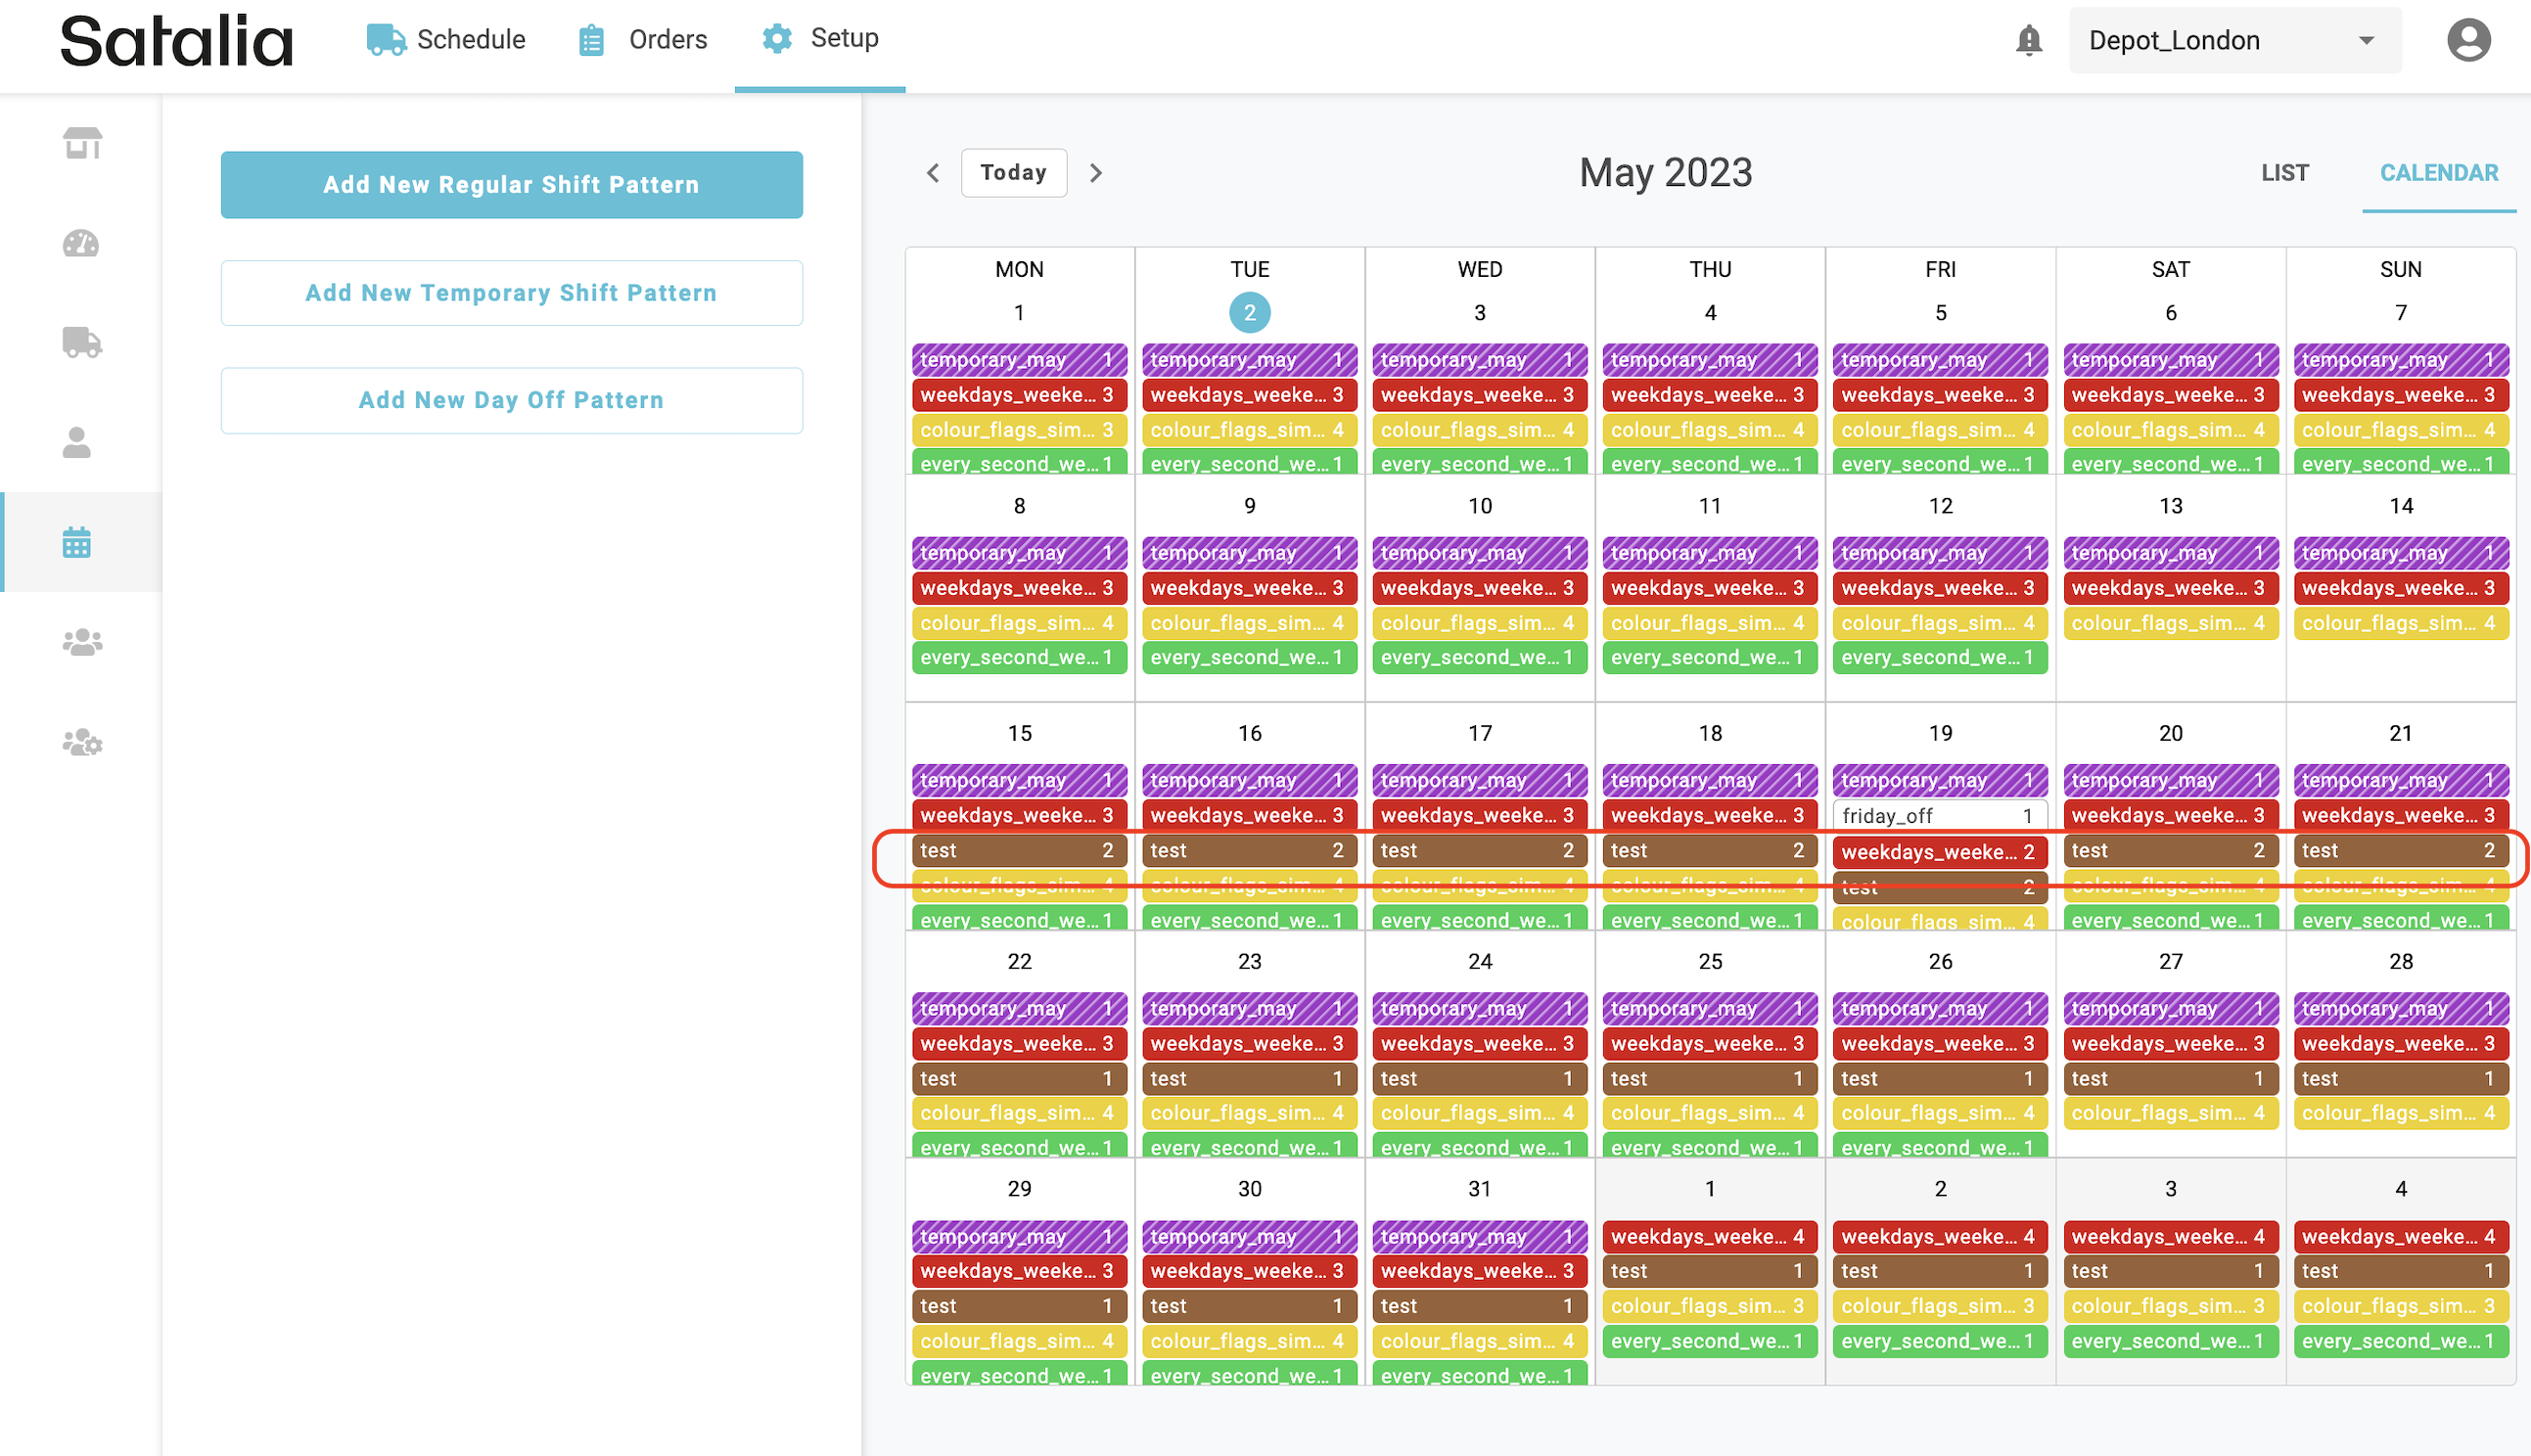
Click on any day and you’ll see the details of exact assignments and their basic configurations.
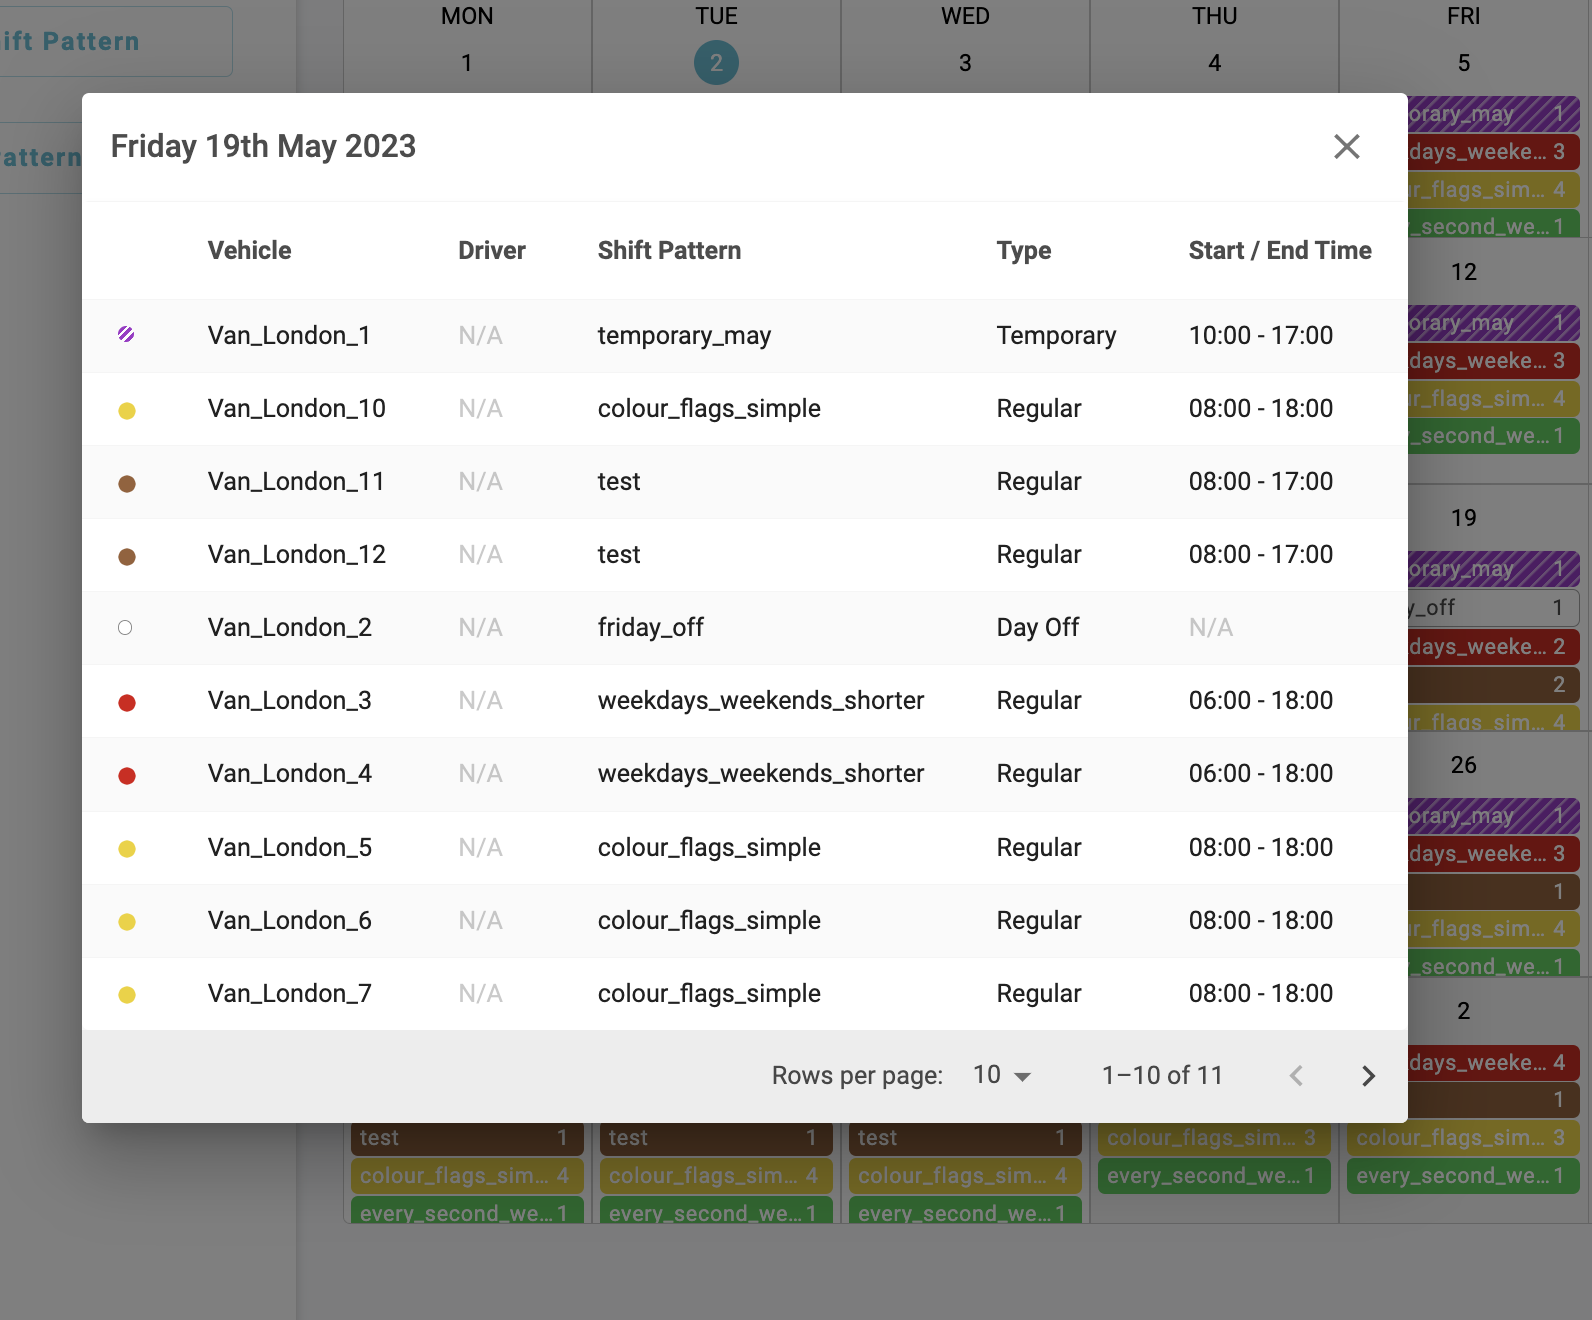
Newly assigned vehicles will be added to the schedule too. And they will be available for orders.
Please note that when you create a new shift pattern or assignment, or edit existing ones, you’ll see the Red Bell in the top right corner.
This means that schedule has not yet been updated with your latest shift changes. Pressing the ‘Generate’ button will update the schedule immediately. But it’s no problem if you don’t. The schedule will regenerate automatically in the set interval (controlled in the Depot form “Schedule Regeneration”).
2. Create a shift pattern that runs shorter hours at the weekend
By using the ‘Settings’ option in the shift pattern creation modal you have the flexibility to create different shift configurations for the same assignment pool.
For example, if your fleet operates longer hours during weekdays and shorter hours during weekends. To implement this you don’t have to create two separate shift patterns. You can do it all in one pattern. You simply create one setting for weekdays and add another for weekends.
The likes of days, start and end times, flags, loading duration and break configurations can be differentiated for each setting separately.
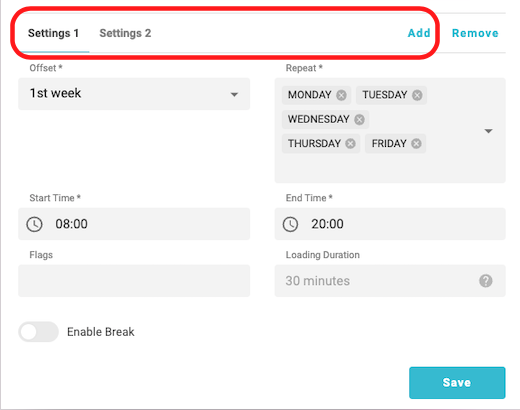
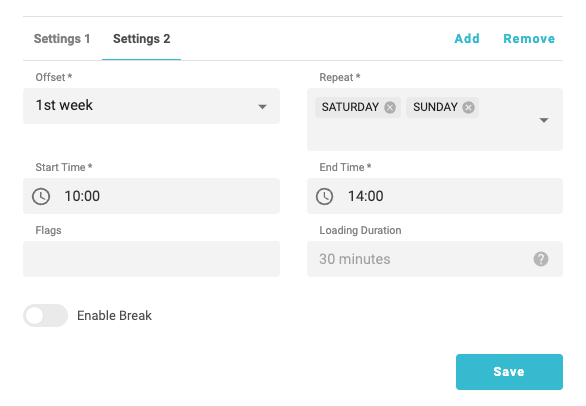
Week In Cycle is a feature that controls the weekly repetition of the setting. For example:
-
1st week - this pattern will repeat every single week*
-
2nd week - this pattern will repeat every second week*
-
3rd week - this pattern will repeat every third week*.
Combining different Week in Cycle alongside the No of Weeks In Cycle within the shift pattern will create a staggered impact. For example, having 1st, 2nd, and 3rd-week offsets will create a pattern that repeats itself every 3 weeks and for each week has some unique settings.