
You may have a scenario where rather than creating a new shift pattern individually, you want to be able to upload multiple new shift patterns for 1 depot or multiple depots at the same time. You can do this using the shift bulk uploader functionality within the platform.
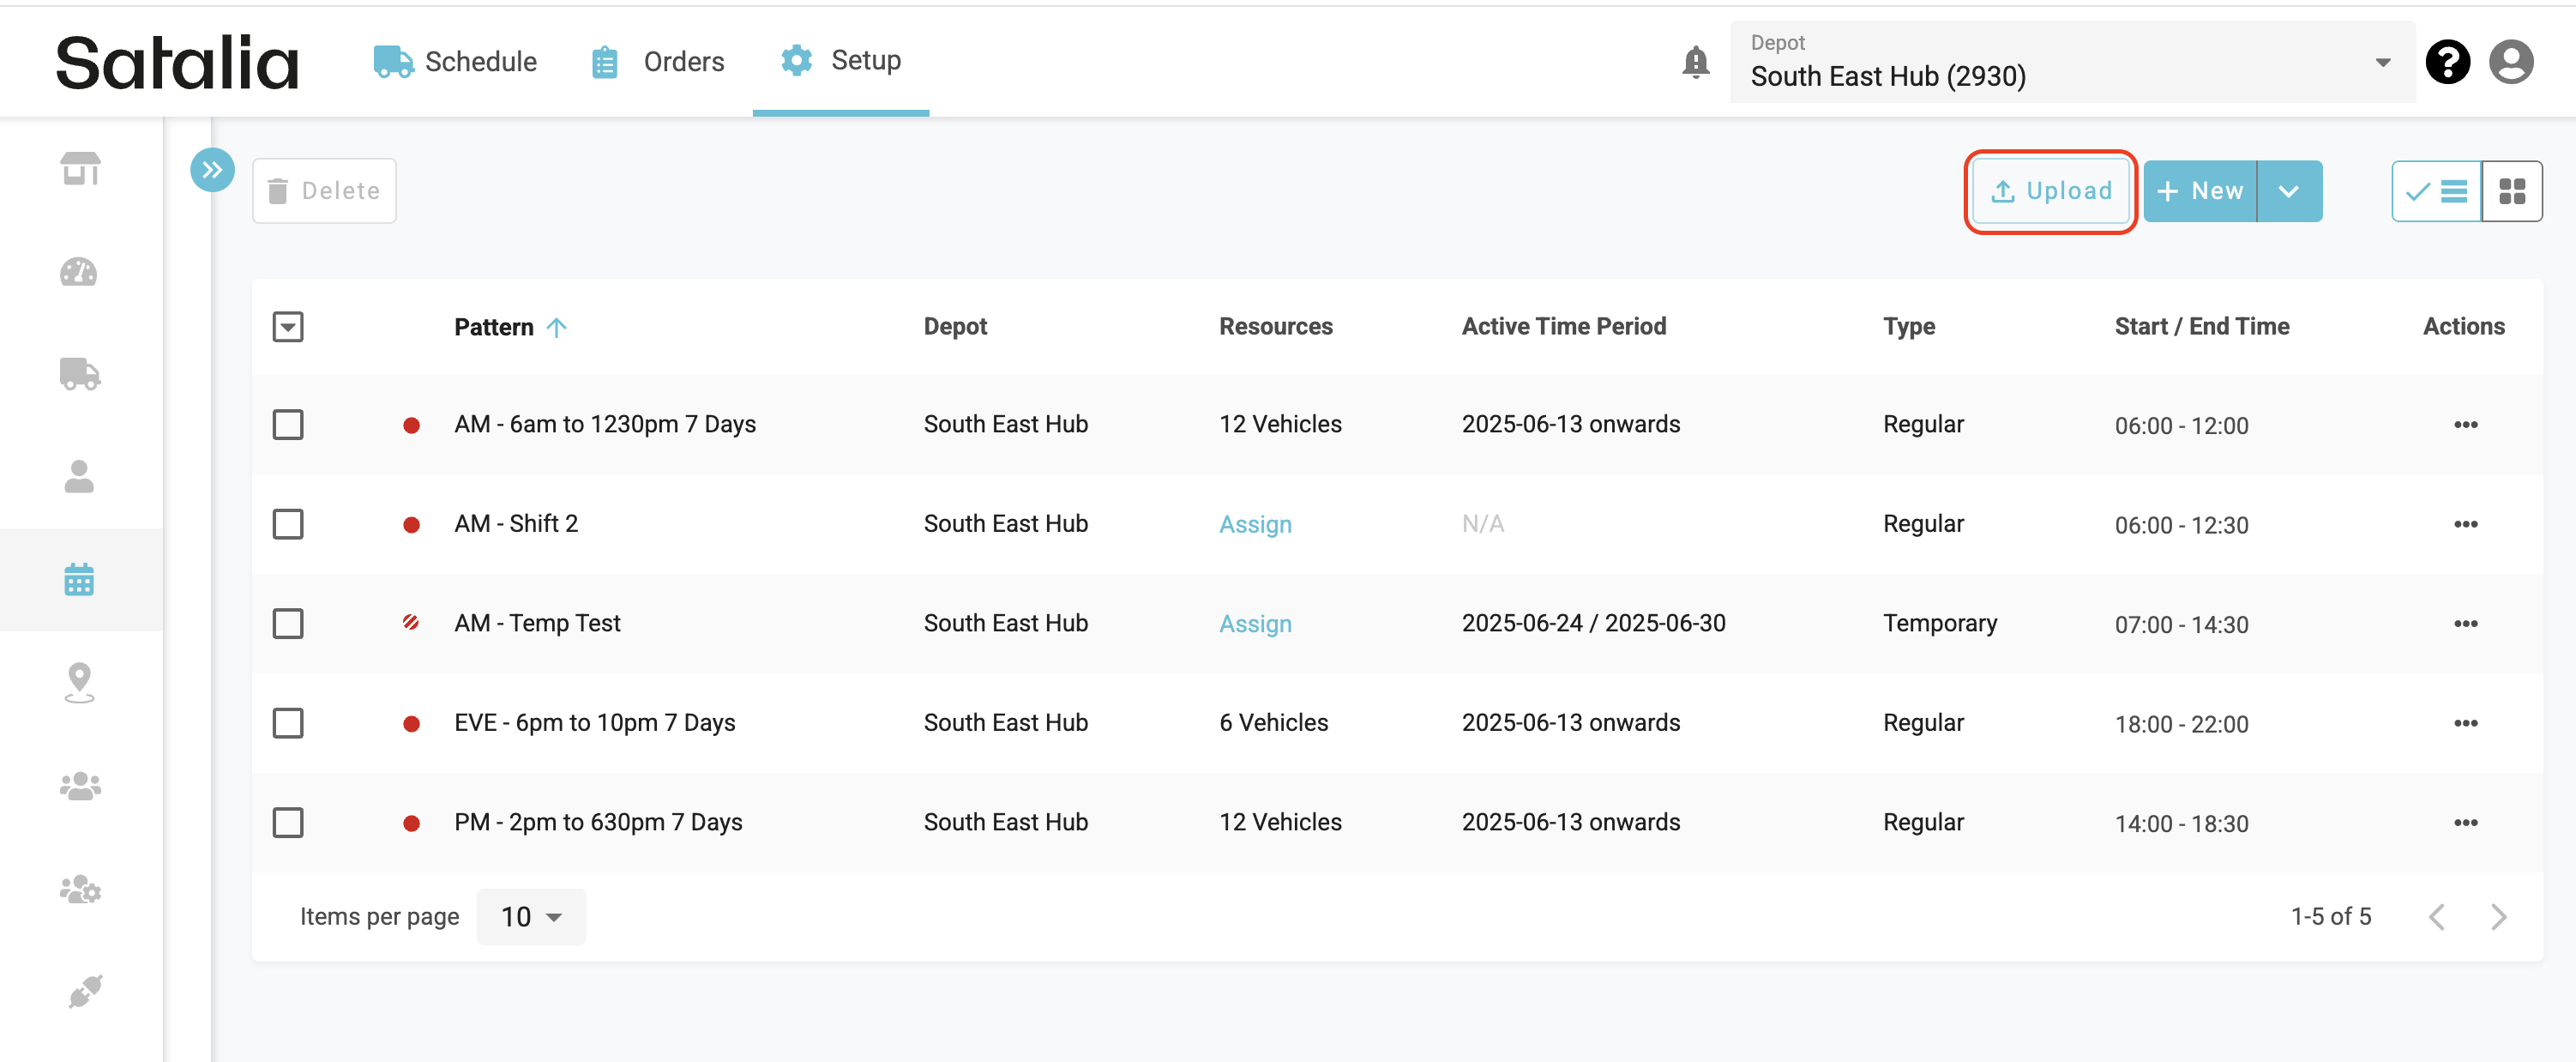
The Shift Bulk Uploader can be accessed by selecting the Upload Button within the Shift Config Screens in the top right corner next to the New Button.
Step 1: File Upload
This will then launch the upload modal where you will be prompted to upload a CSV file with your required shift configuration. Note that only CSV Files are supported as part of this upload process
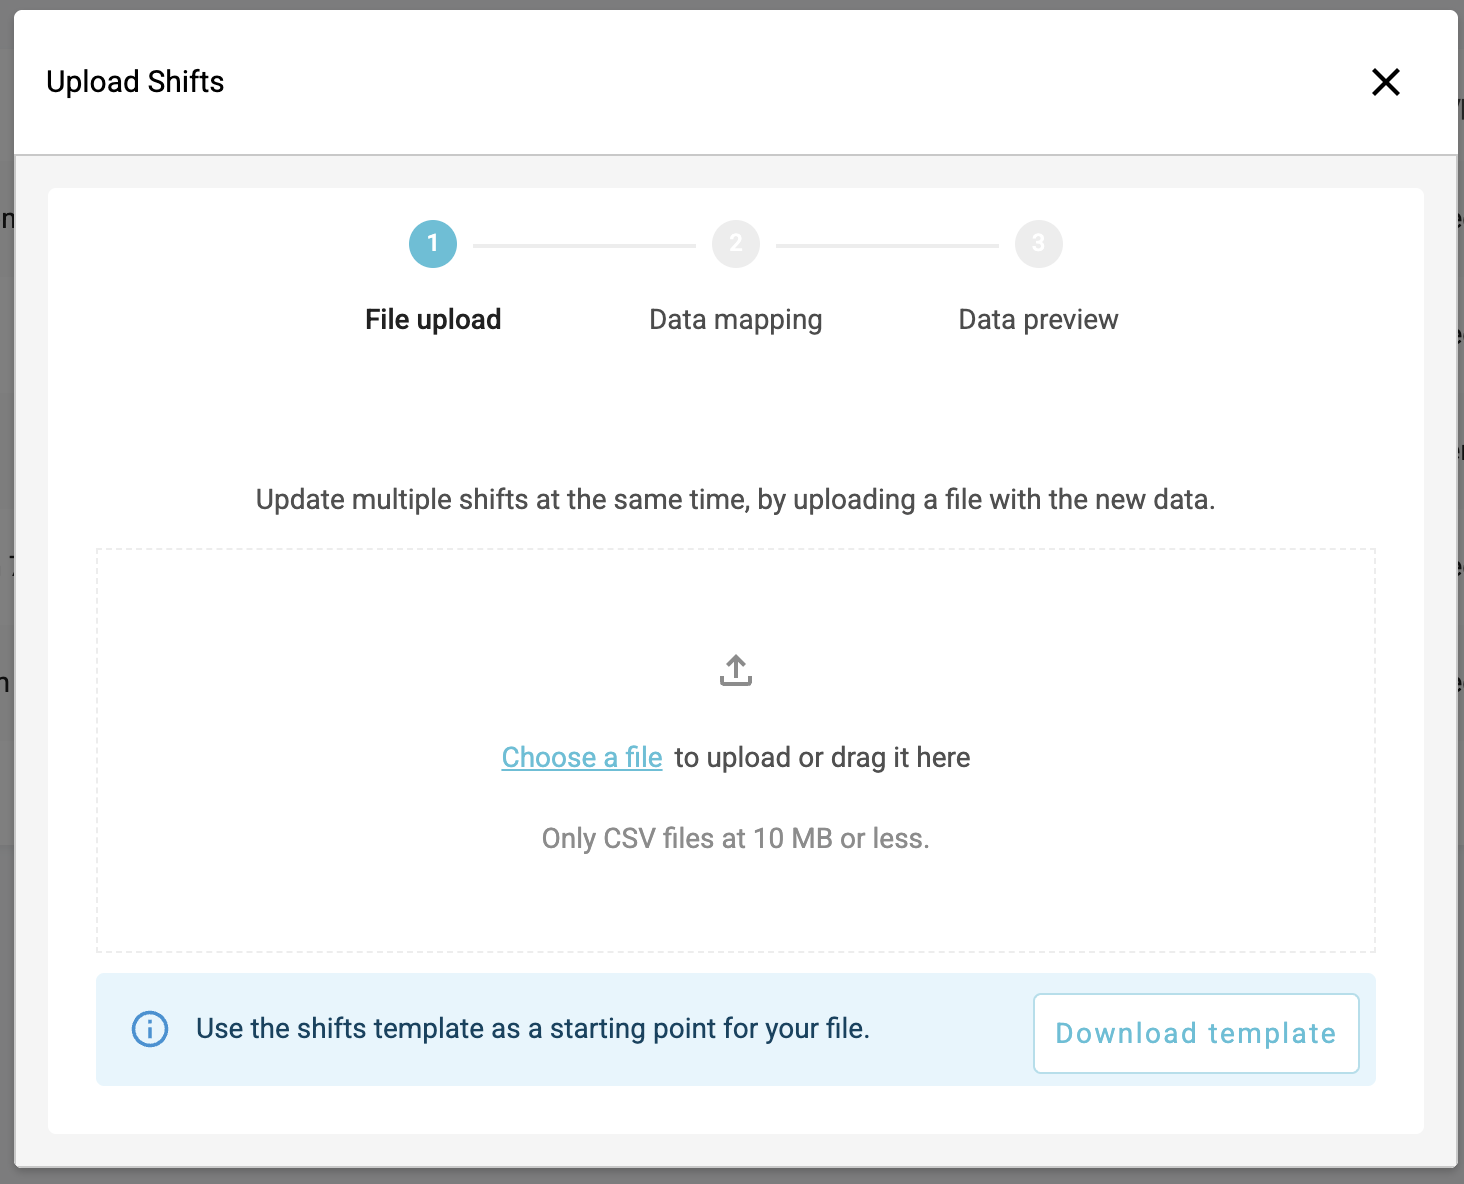
Should you require you can also download the CSV Template as shown above which provides you with the required data fields and sample data to help you get the correct format for uploading.
Once you are ready to upload your file you will select the Choose a file option to upload the necessary file and the modal will then load you into step 2 of the process.
Note: where you want to to upload shift patterns across multiple depots within the one file please ensure that the Depot ID is populated. You do not need to have all the relevant depots selected in the main depot dropdown within the platform.
Step 2: Data Mapping
Once you have selected the file for upload you will be taken to the data mapping stage where the platform initially will make the column headers from your data file to the relevant fields within a shift pattern on the platform.
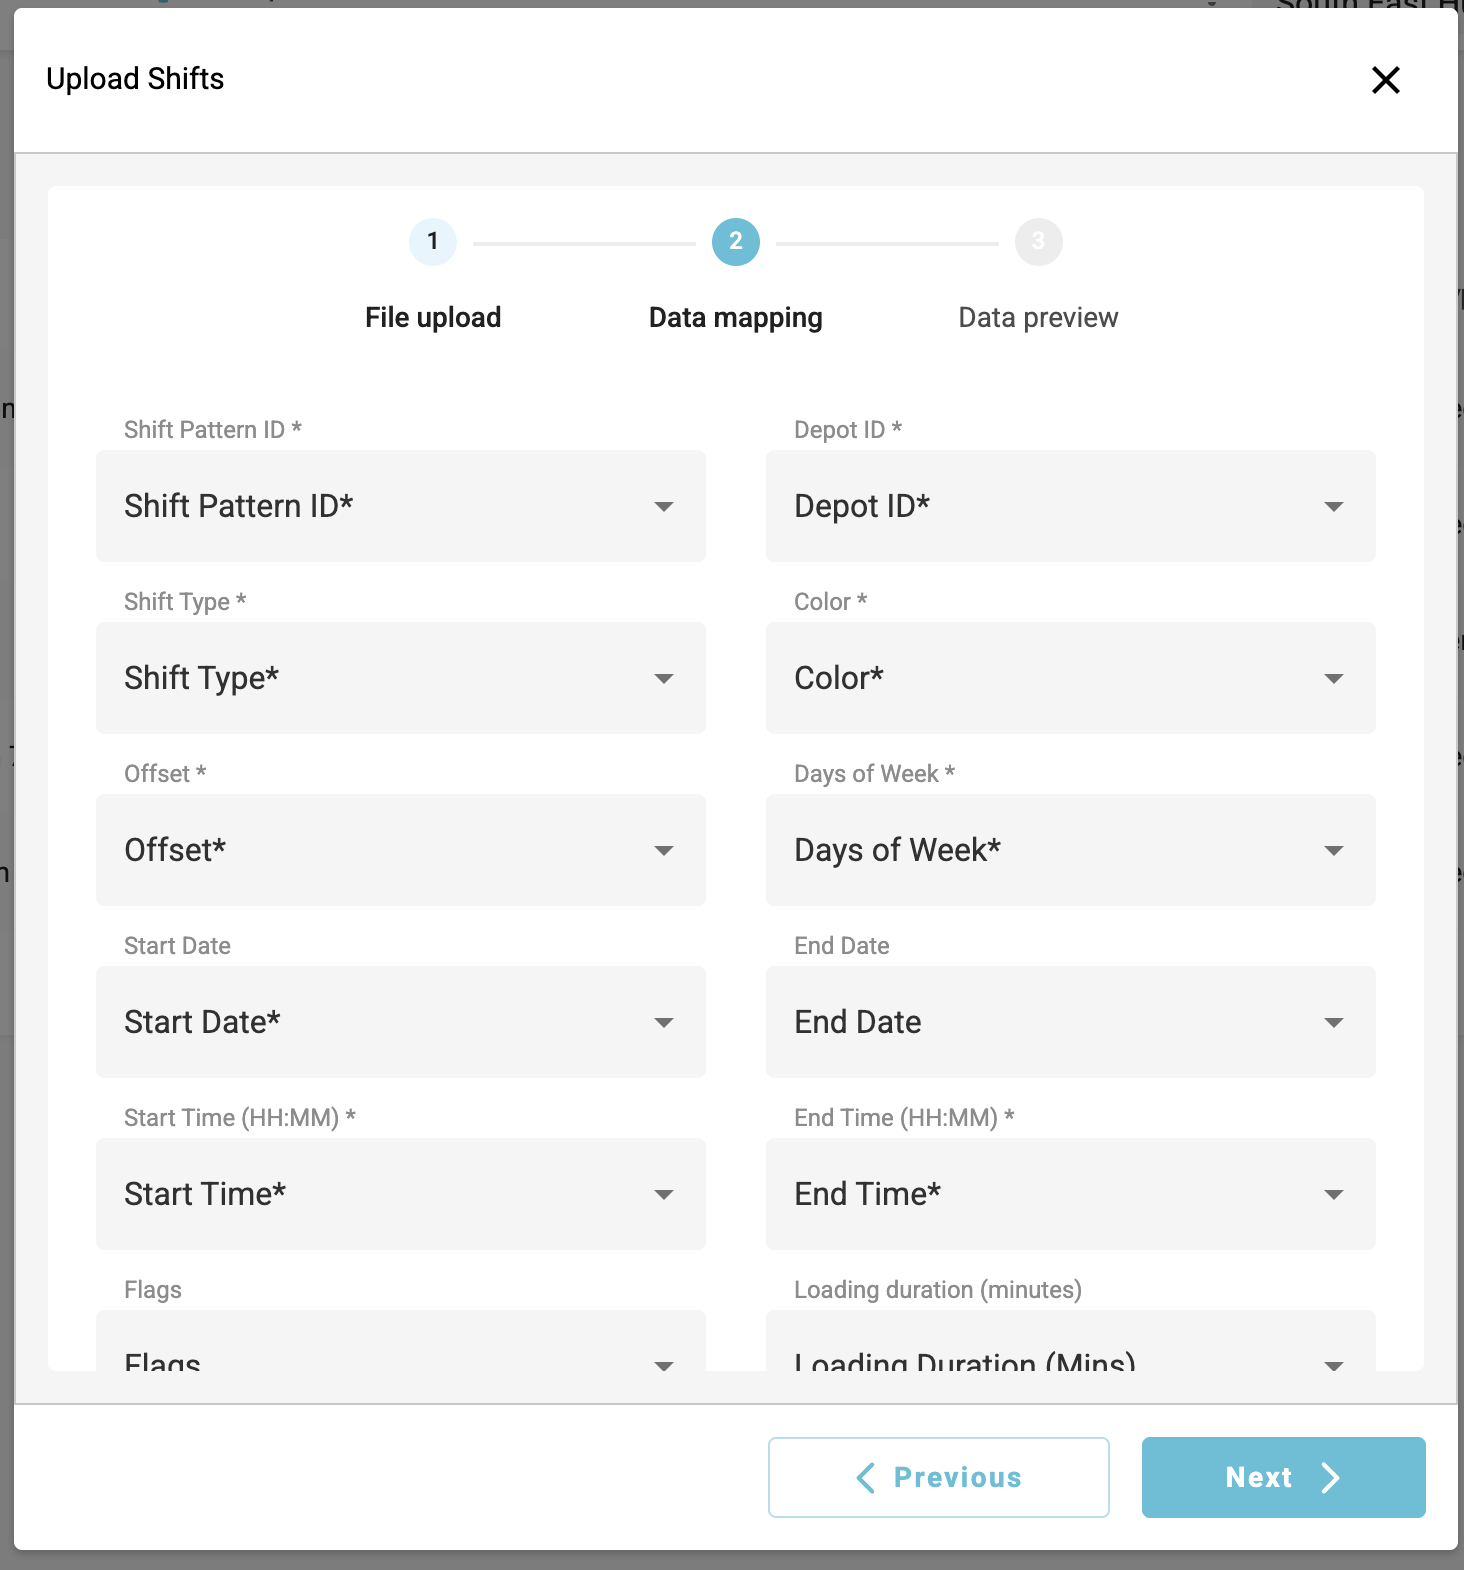
Please review these mappings and where required you can change the mappings via the dropdowns should any of them have been mapped incorrectly. Once your data mappings is ready you can then proceed to step 3 using the Next Button.
Step 3: Data Preview
Once you have confirmed your data mapping in step 2 you will then be shown a preview of the data based on your mappings and config data within the file for a preview prior to submitting to ensure that you have mapped correctly.
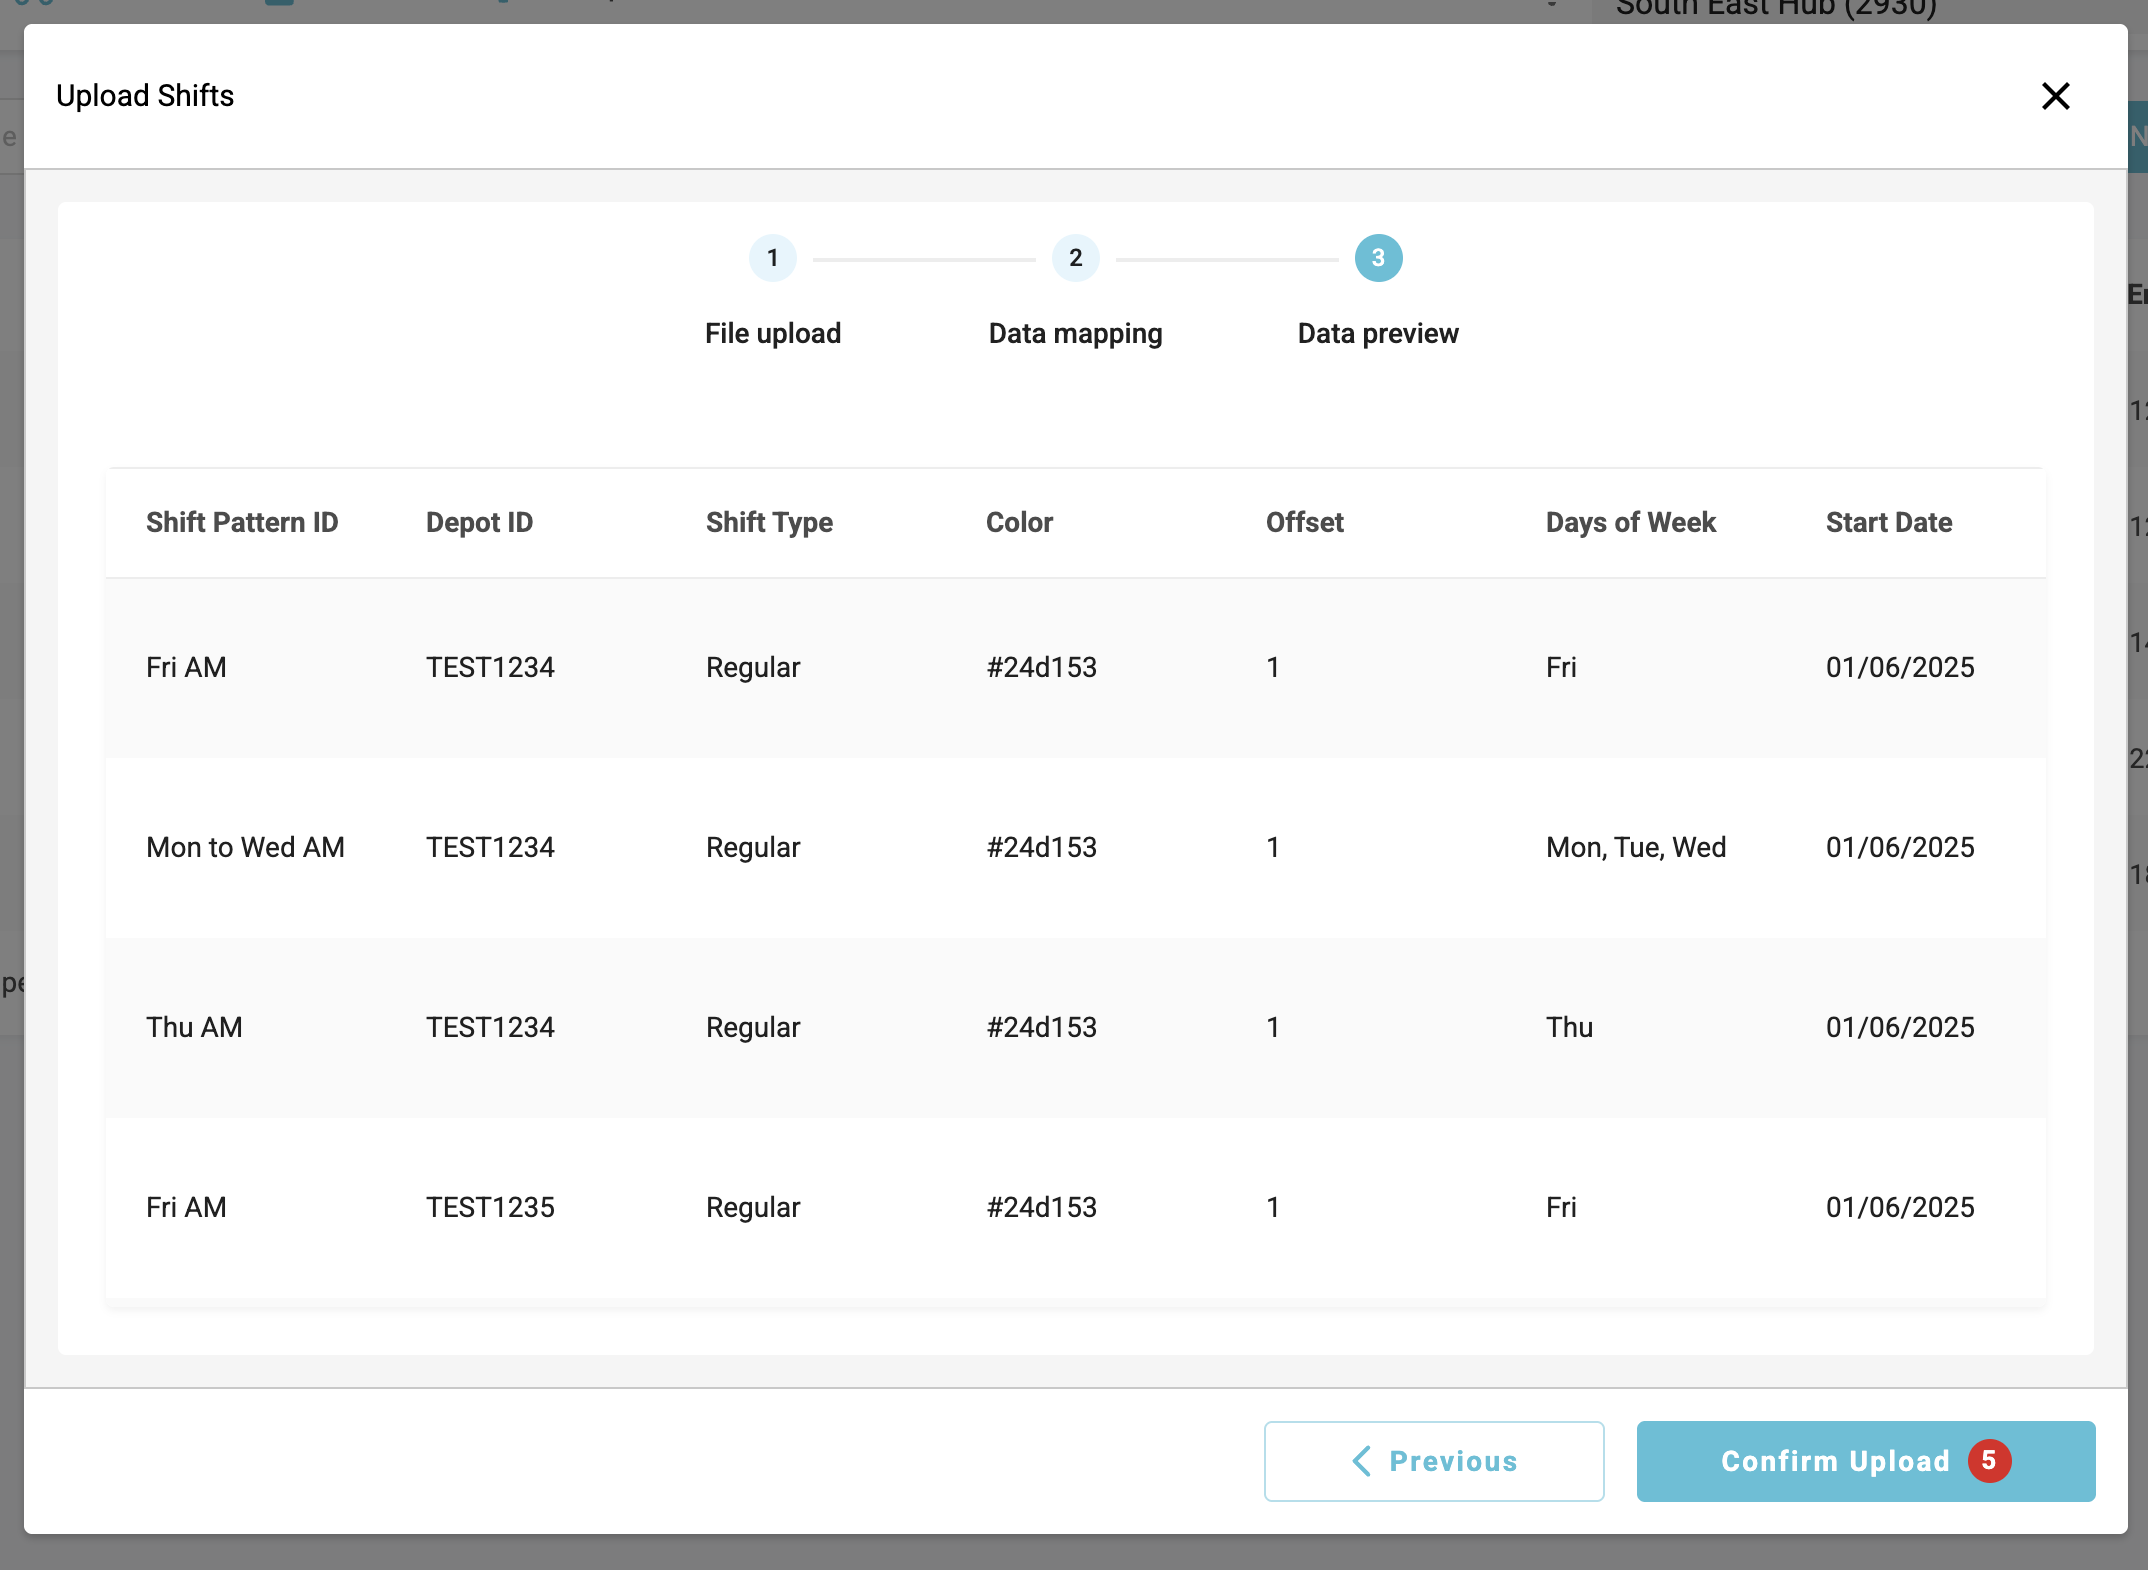
Should you need to make any changes to your data mappings due to mistakes etc you can navigate back to the previous step using the previous button at the bottom of the modal. If you are ready to confirm the upload you will do so by selecting the Confirm Upload button where it shows the number of shift patterns being uploaded.
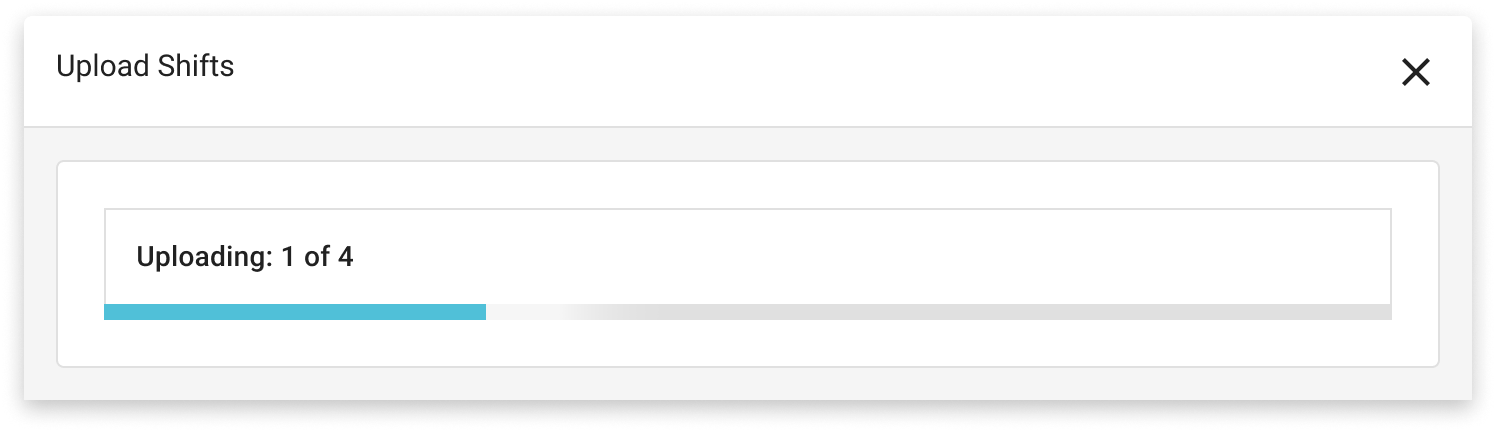
When you confirm the upload you will be presented with a status bar to show the progress of the upload.
Should there be any data validation errors (eg missing mandatory data, incorrect data type etc within the file) the status modal will display these errors as below.
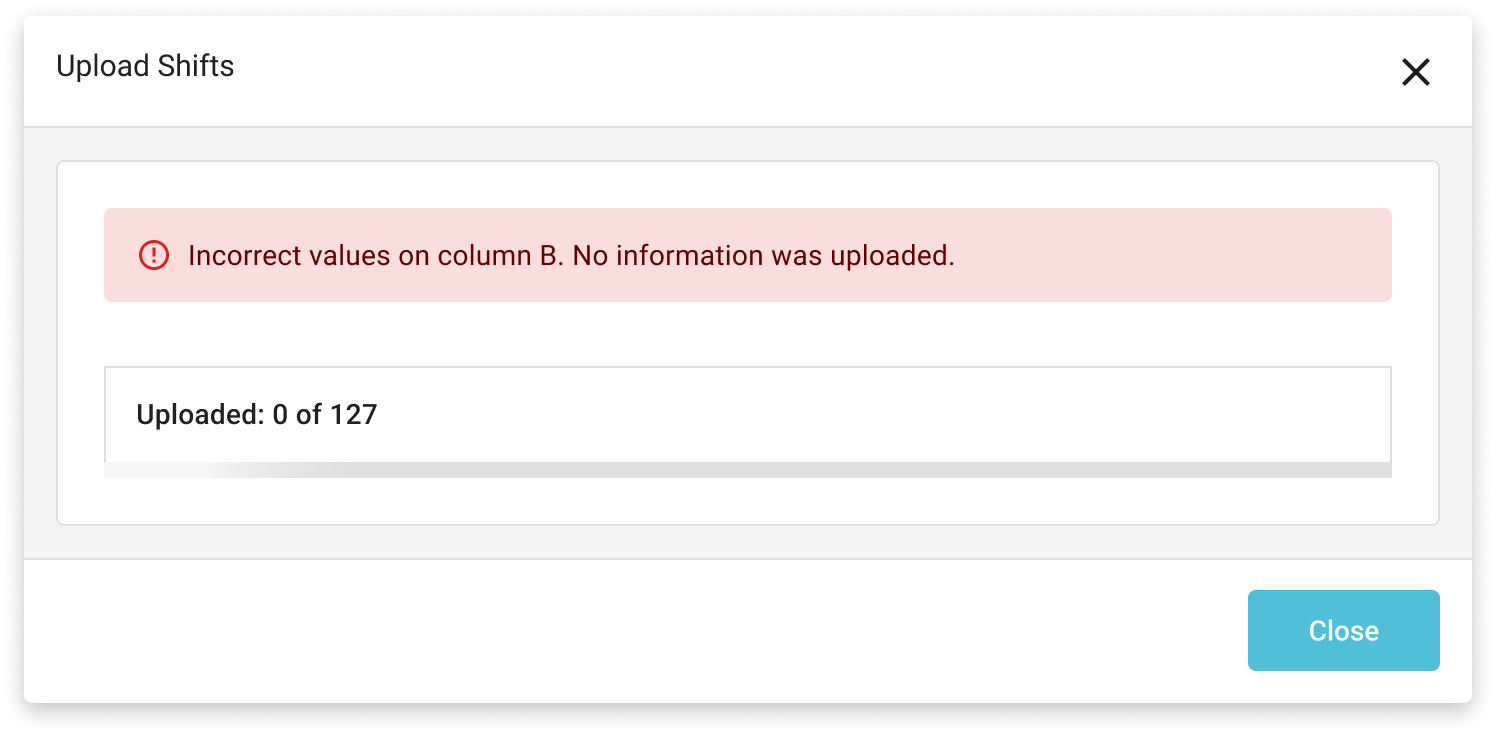
Please note when any validation errors are presented then the whole file will not be uploaded as a result and the amendments must be made and the whole file uploaded again.
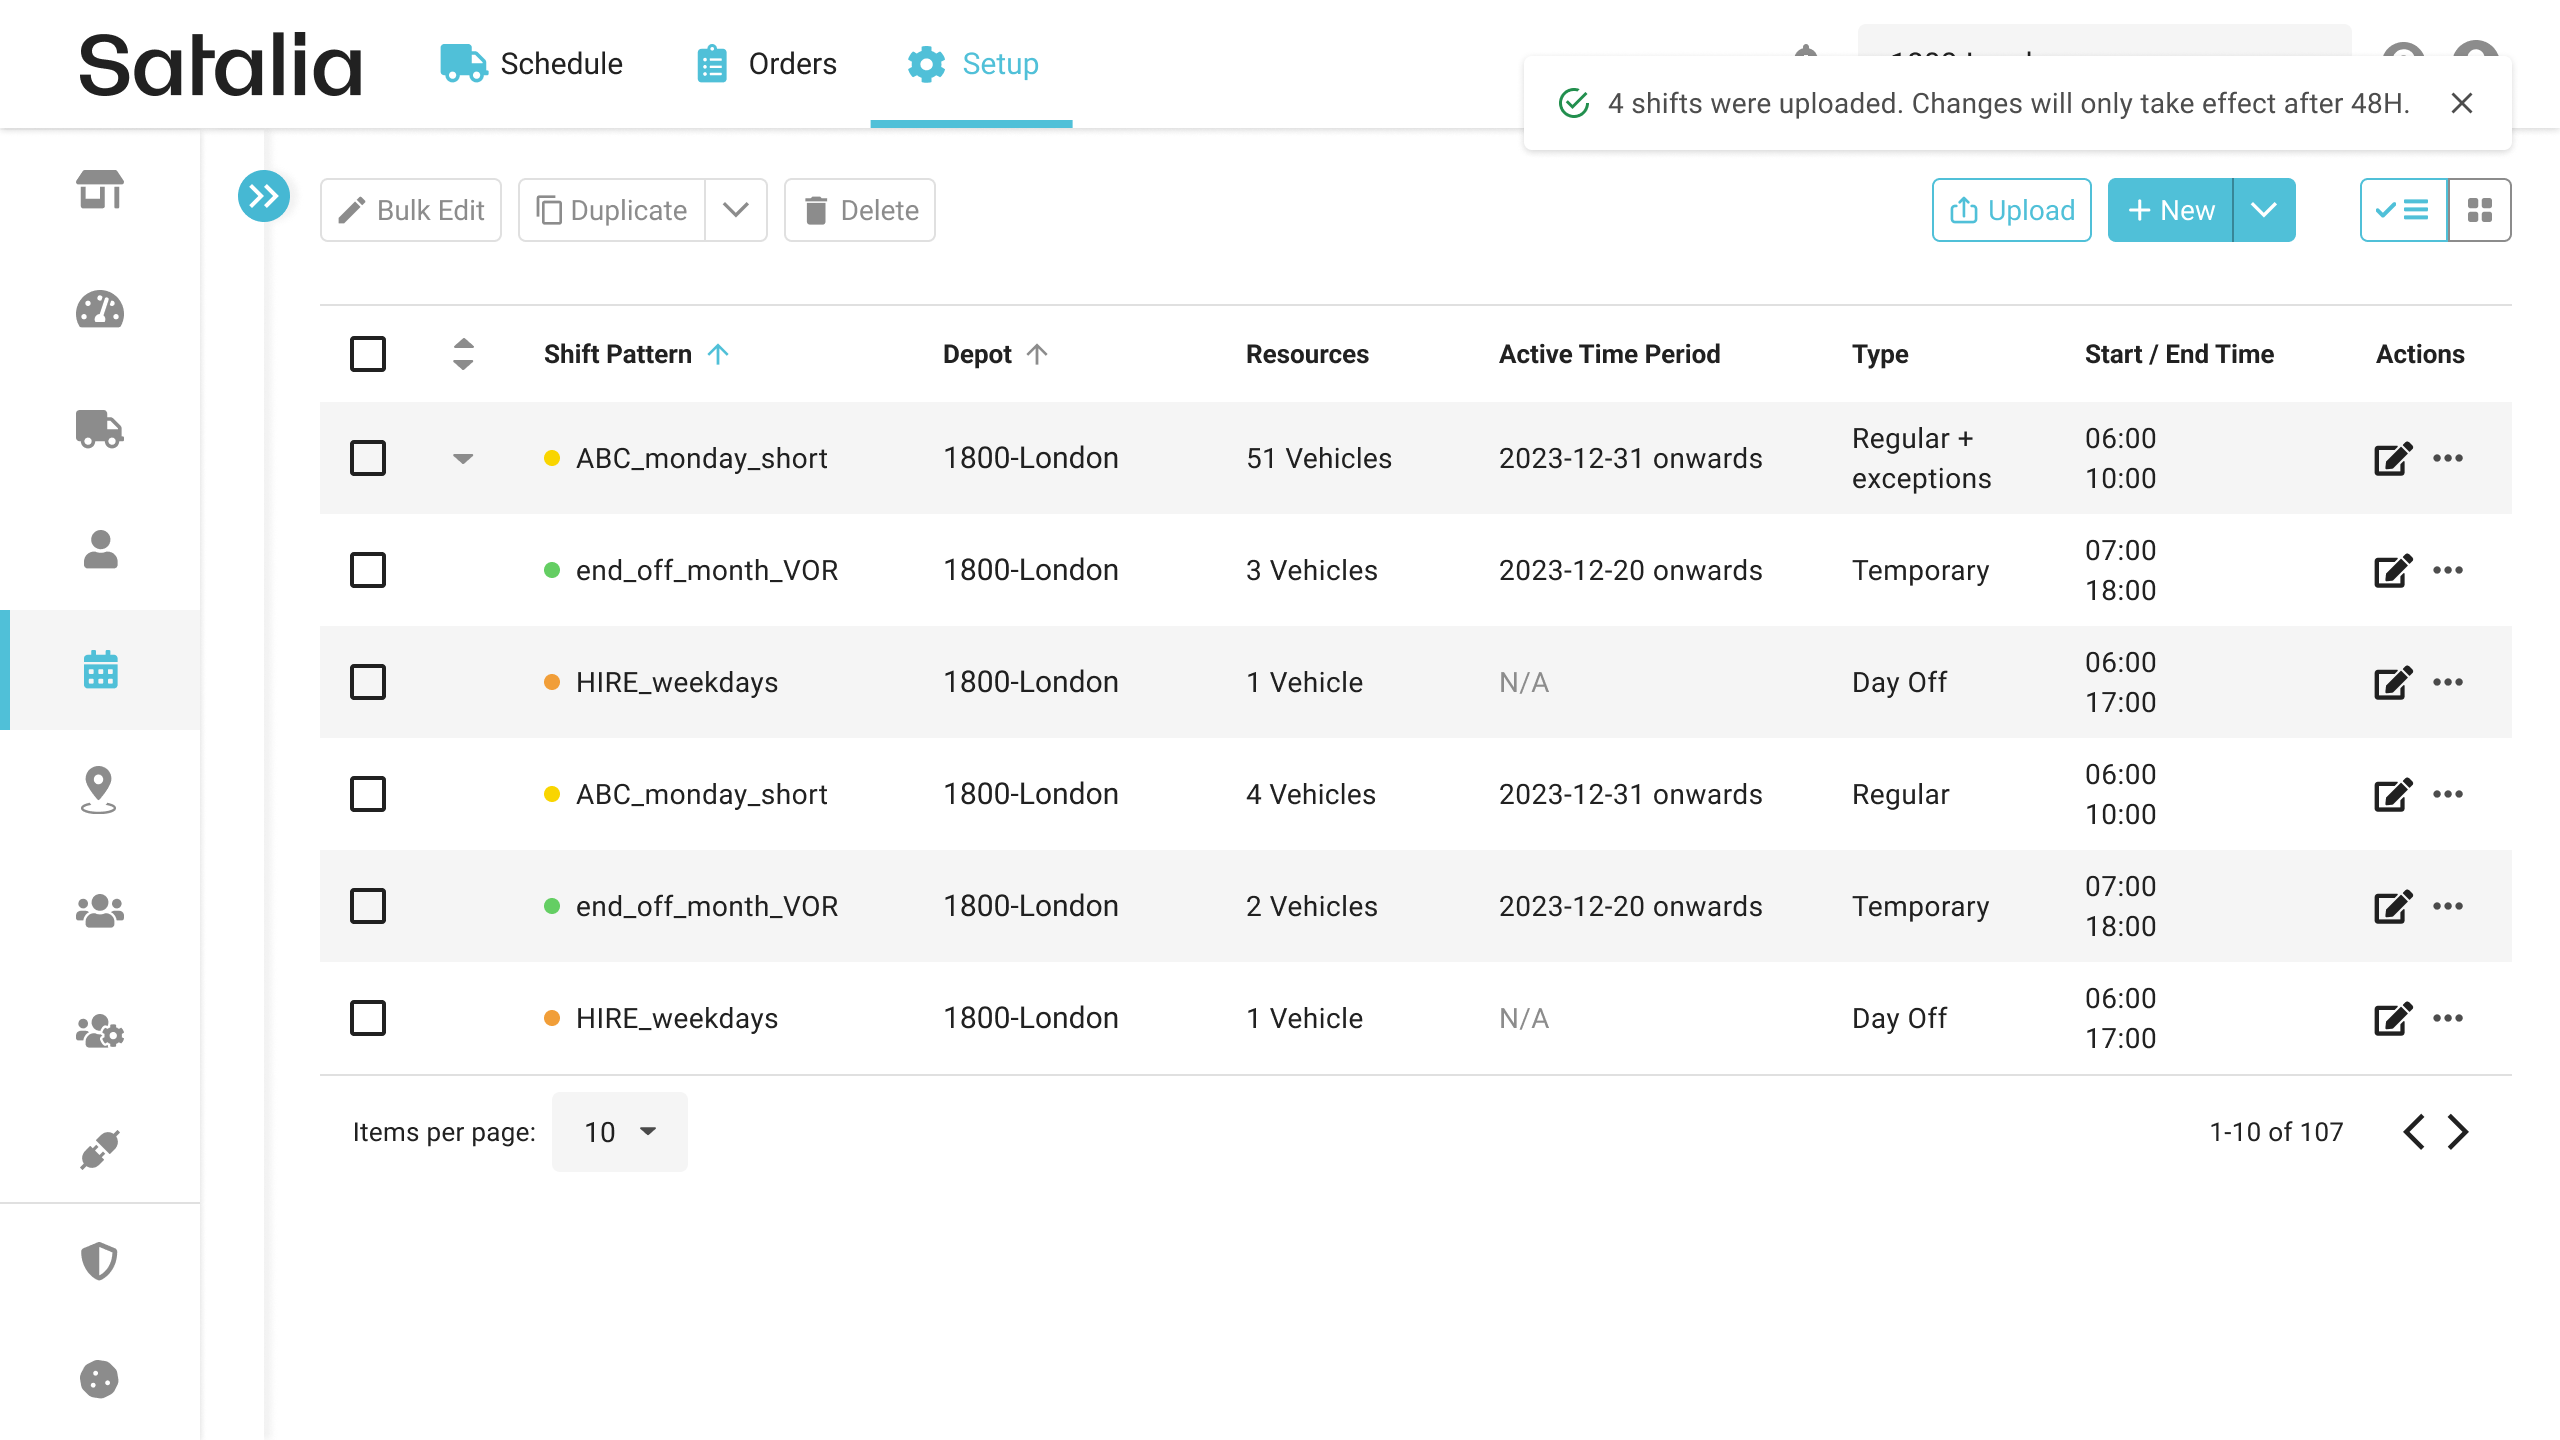
Once you have successfully completed the upload of new shift configuration you will be returned back to the shift pattern page where a confirmation will be displayed confirming the shifts were successfully uploaded. Note these changes take effect immediately after upload.
When the shifts have been successfully uploaded you are then ready to completer the vehicle assignment process for the new shifts which will make the capacity available for your customers to book against. The guide on how to assign vehicles to shifts can be found here.