
How to create temporary shifts
Note: Depracted/Removed as part of 2.77.0 Release - Now handled via use of Shift Pattern Exceptions & Vehicle Exceptiond
Temporary shifts work in a very similar way to regular shifts. But there are two core differences to be aware of:
Temporary shifts have a defined start and end time which is shared across all assignments.
Temporary shifts overwrite the regular shift configurations for the same vehicle.
Temporary shifts are mostly used when you need to change already existing regular shift configurations temporarily. Examples of this could be where you need to reduce working hours or days, or edit break durations. In this case, your fleet will continue to run as per the regular shift, but during the period of temporary pattern, the fleet will follow new configurations.
A second use case is for temporarily adding (hired) vehicles to extend capacity or replace existing ones.
Below we explain how to create temporary shifts.
1. Create a temporal shift pattern
It’s a two-step process to create a temporal shift pattern: First, you’ll need to create a temporary shift pattern. Then you must assign vehicles to it.
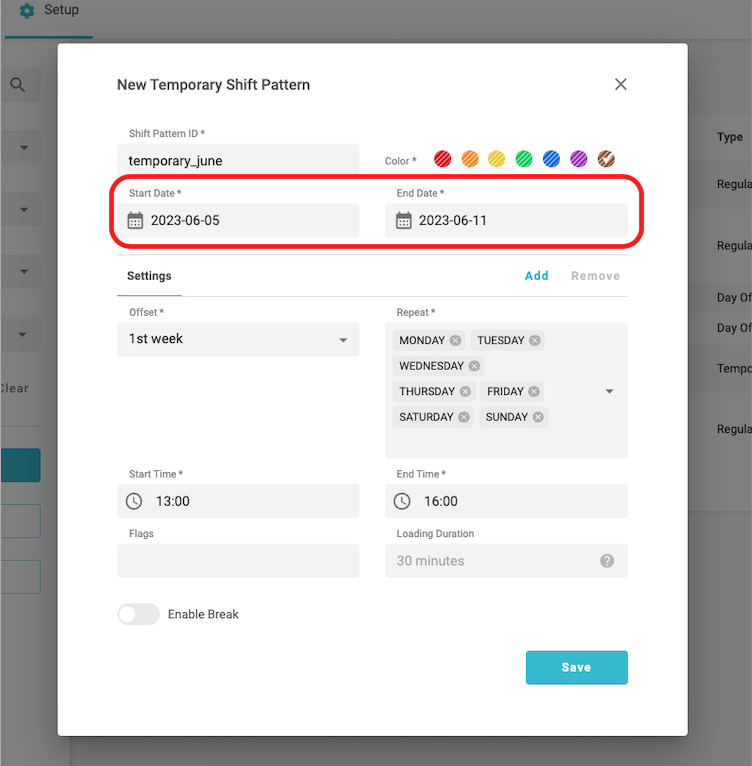
Say you wanted to create a temporary shift pattern that’s valid for the first week of June 2023, begins at 1pm, finishes at 4pm and runs every day of that week. The only difference from the regular shift pattern is the date range (as circled in the screenshot). All other configurations are exactly the same. For a more in-depth explanation of various fields, read our article on how to create a regular shift pattern.
Once you’ve saved the shift pattern, an empty pattern entry will be created in the Shift Patterns List view. This means that the pattern isn’t yet active and requires vehicle assignment.
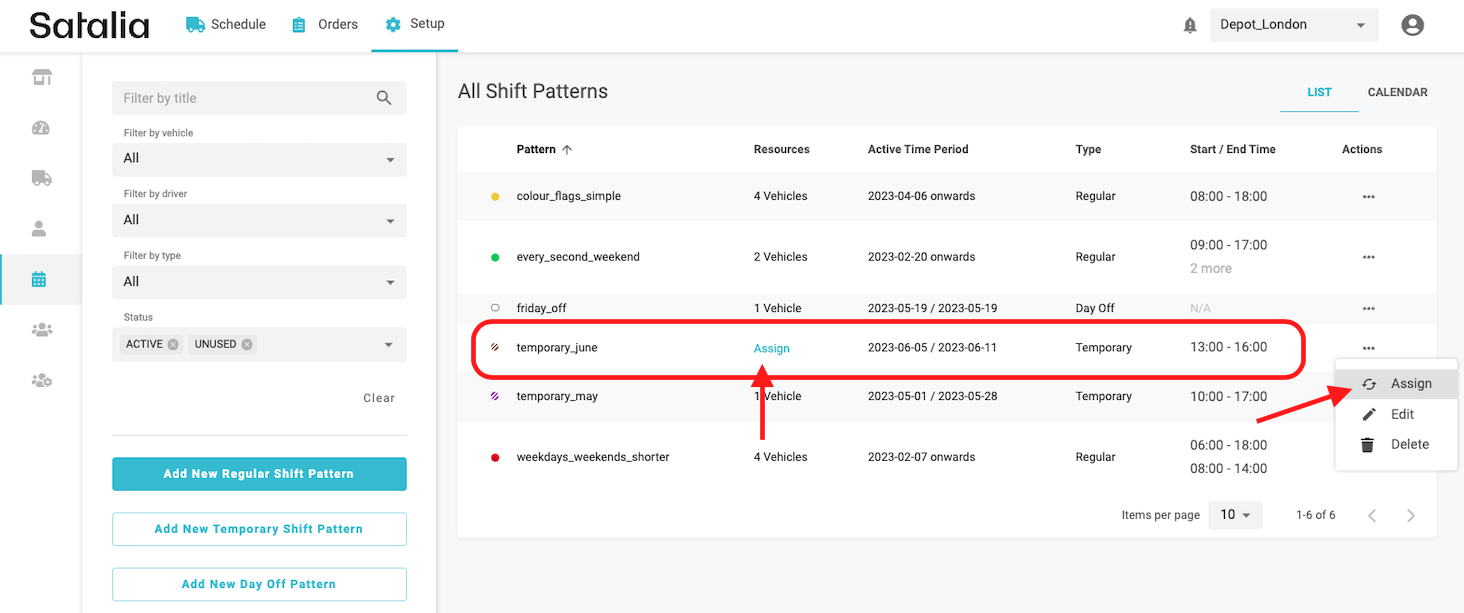
From this point, you can assign vehicle(s) and activate temporary shifts. You can do it by either clicking on the active ‘Assign’ button or in the right drop-down list.
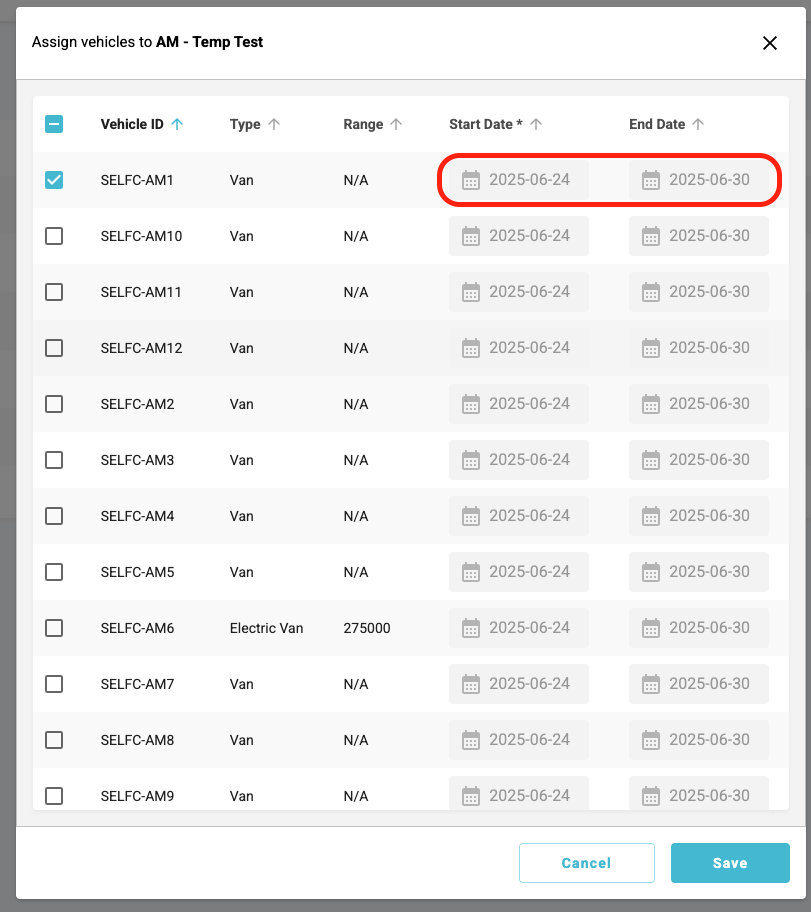
Multiple vehicles can be assigned to the same pattern, though every assignment will have fixed start and end dates. This is inherited from the shift pattern configuration.
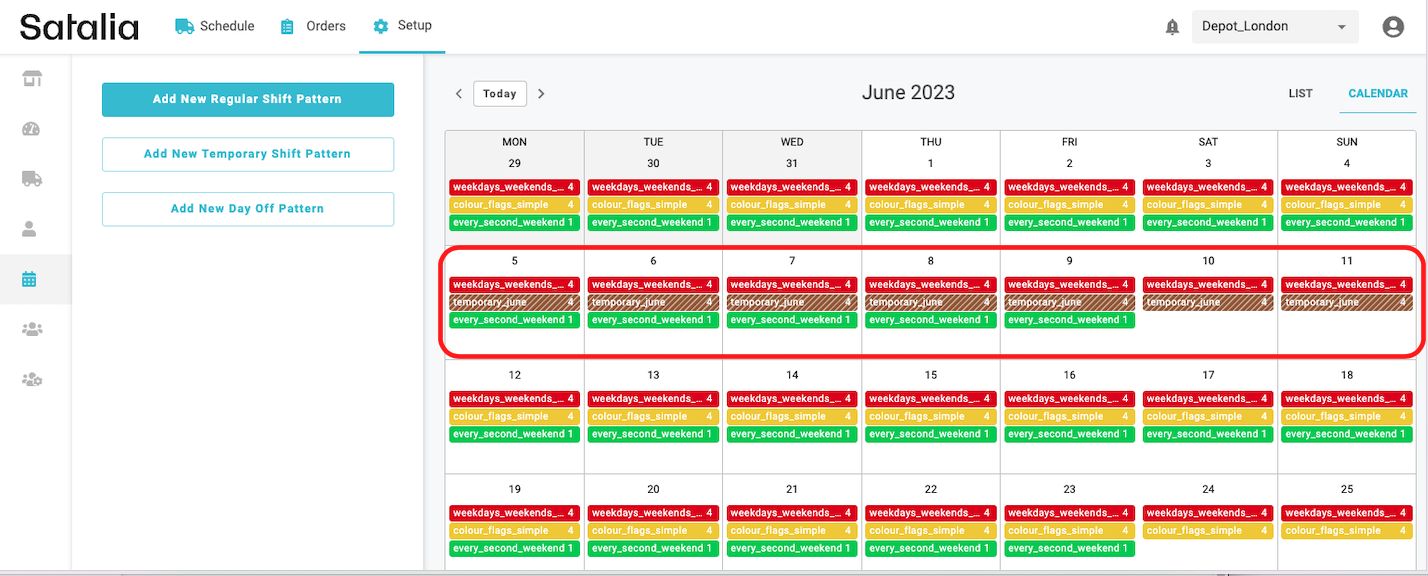
As an example, say you chose to assign vehicles that already have regular shifts, so the temporary pattern would overwrite the other baseline shifts. You can see it in the calendar view. The regular yellow pattern “colour_flags_simple” was fully replaced by a brown coloured “temporary_june” pattern.
Always remember, the same vehicle can’t be assigned to multiple overlapping temporary patterns - the error message will let you know if you attempt to do so.
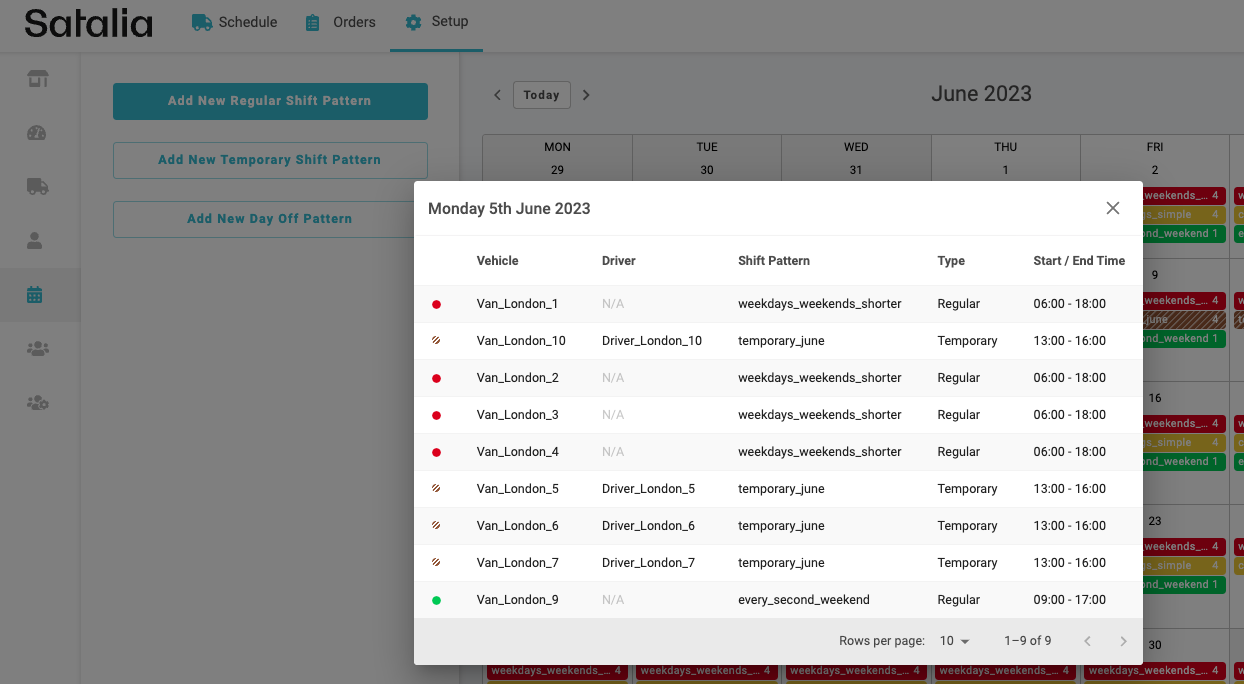
Check the List and Calendar view. Now you should see the pattern as active with a number of vehicle assignments. If you need to check details for all assignments on that day, click on the day in the calendar view. The modal with all active assignments - including the newly created temporary ones - will be visible for validation.
The changes introduced with temporary override will be applied to the schedule too.
For example, if you overwrite the regular shift with a temporary one that has significantly shorter hours, you will see those shorter trips on the Schedule page. Just remember, this might result in some orders being unscheduled if they can’t fit in edited or other trips.
Please note that when creating new shift patterns and assignments or editing existing ones, you’ll see the Red Bell in the top right corner. This means that the schedule has not been yet updated with your latest changes. Pressing the ‘Generate’ button will update the schedule instantaneously. It’s no problem if you don’t, as the schedule will regenerate automatically in the set interval (controlled in the Depot form ‘Schedule Regeneration’).

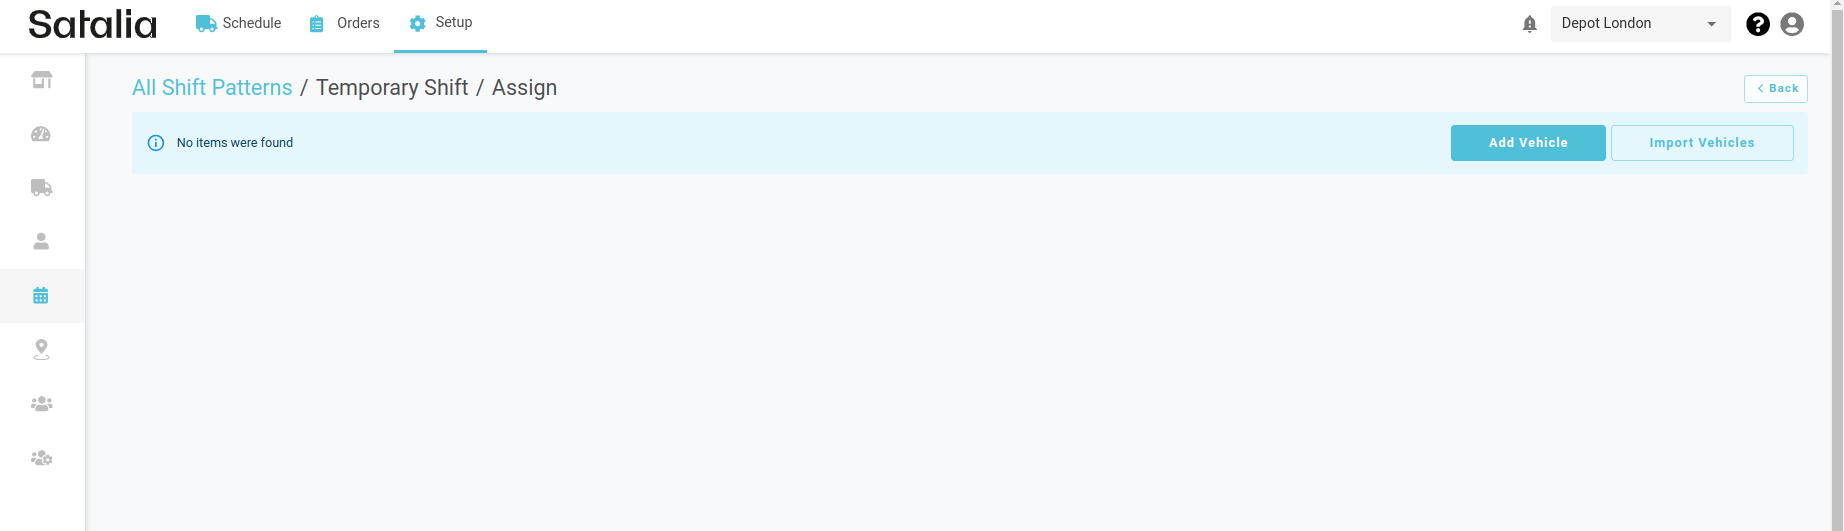
2. Vehicles import
You can also import all regular shift pattern assignments to the temporary shift pattern by clicking the ‘Import Vehicles’ button.
Once you do, the modal will appear. This allows you to choose the shift pattern that contains the vehicles which need to be assigned for a new temporary shift pattern.
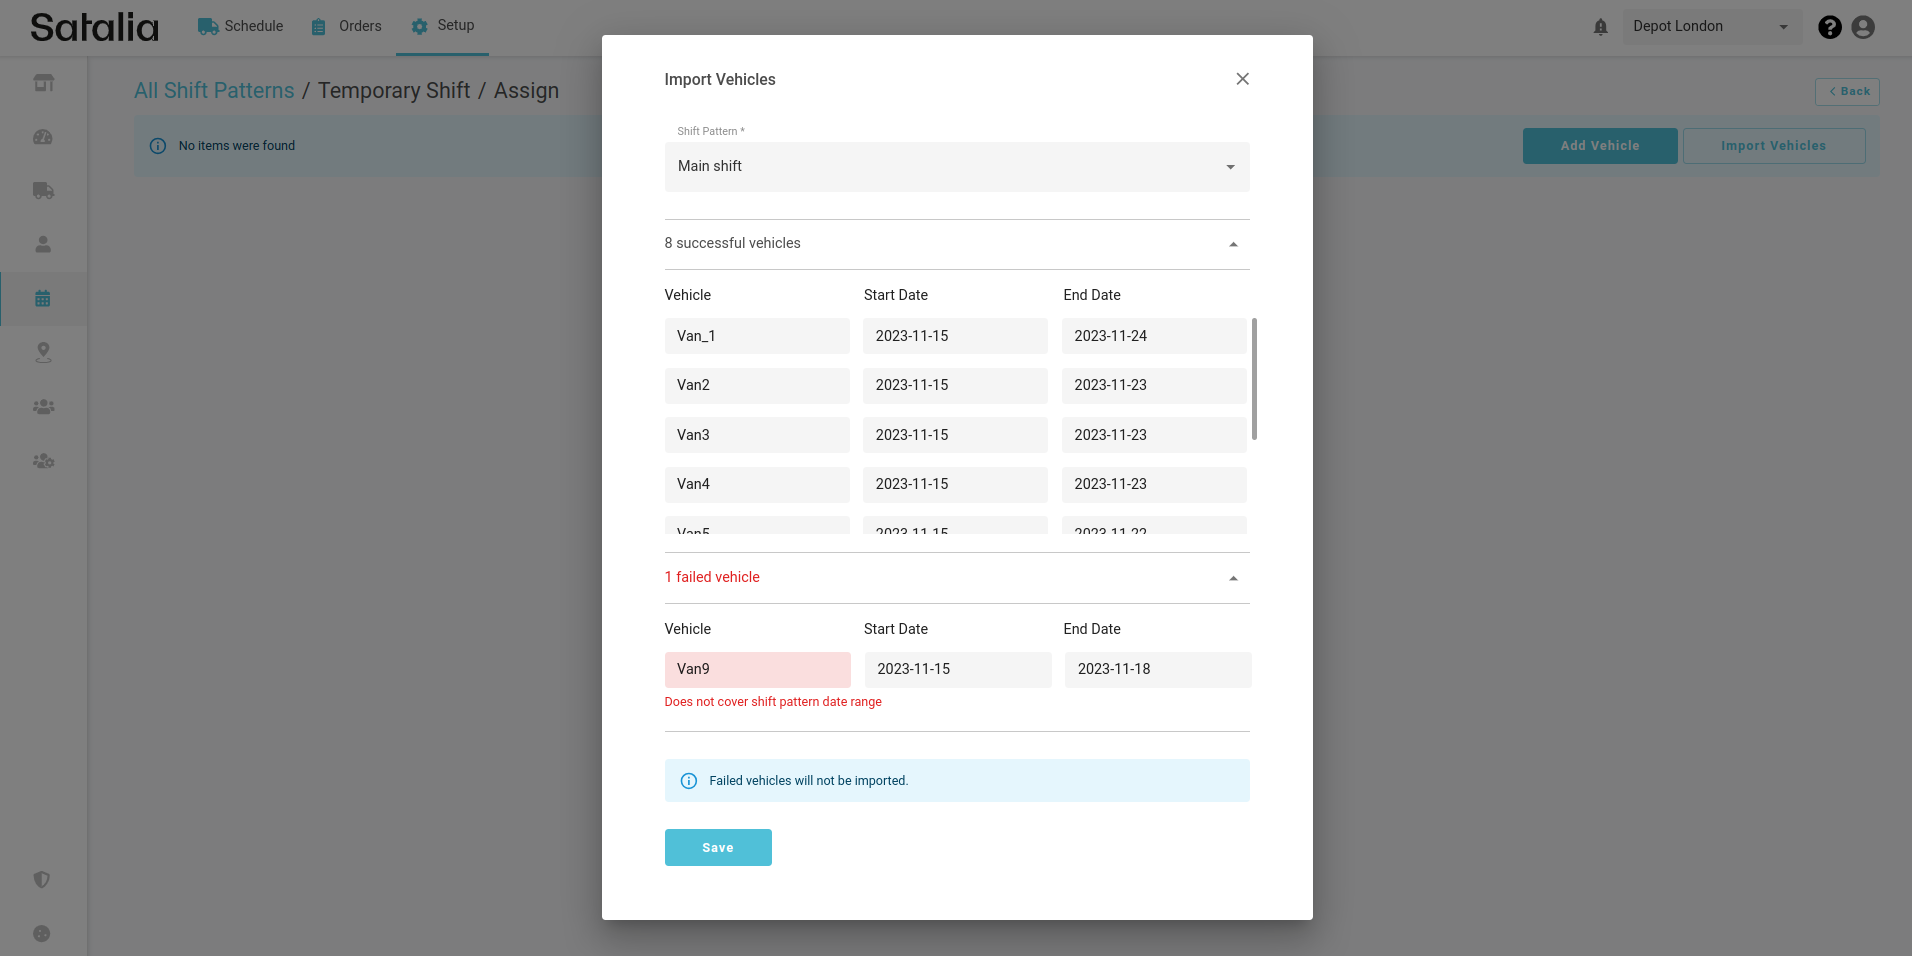
If the vehicles align with the specified temporary shift pattern date range, the changes will be successfully applied. Otherwise, vehicles that don’t meet the criteria will be listed in the modal as failed.