1. What is a territory?
A territory is a specific geographic area or region that is assigned to a delivery vehicle. The purpose of dividing delivery areas into territories is to efficiently manage and organise the distribution of goods and services.
There are two types of territories: permitted and prohibited. A permitted territory is an area where a particular delivery vehicle is allowed to operate. Orders can only be scheduled in that area. A prohibited territory is an area where orders can’t be scheduled, but vehicles are allowed to drive through.
Specific vehicles are permitted to deliver only in a dedicated territory because:
-
Of drivers’ local knowledge of the area
-
Serving and offering slots in any vehicle and any part of the catchment area is not efficient for your business
-
Cargo/bikes should serve only central (or smaller dedicated) or low-traffic neighbourhood areas
-
EVs should deliver in ultra-low emission zones
Certain vehicles are prohibited from delivering in a specific territory because:
-
Large vehicles in city centres aren’t feasible or practical
-
The area is temporarily closed due to an event/ natural disaster
-
Likely thefts or driver abuse in high-crime areas
-
ICE vehicles should not deliver into ultra-low emission zones
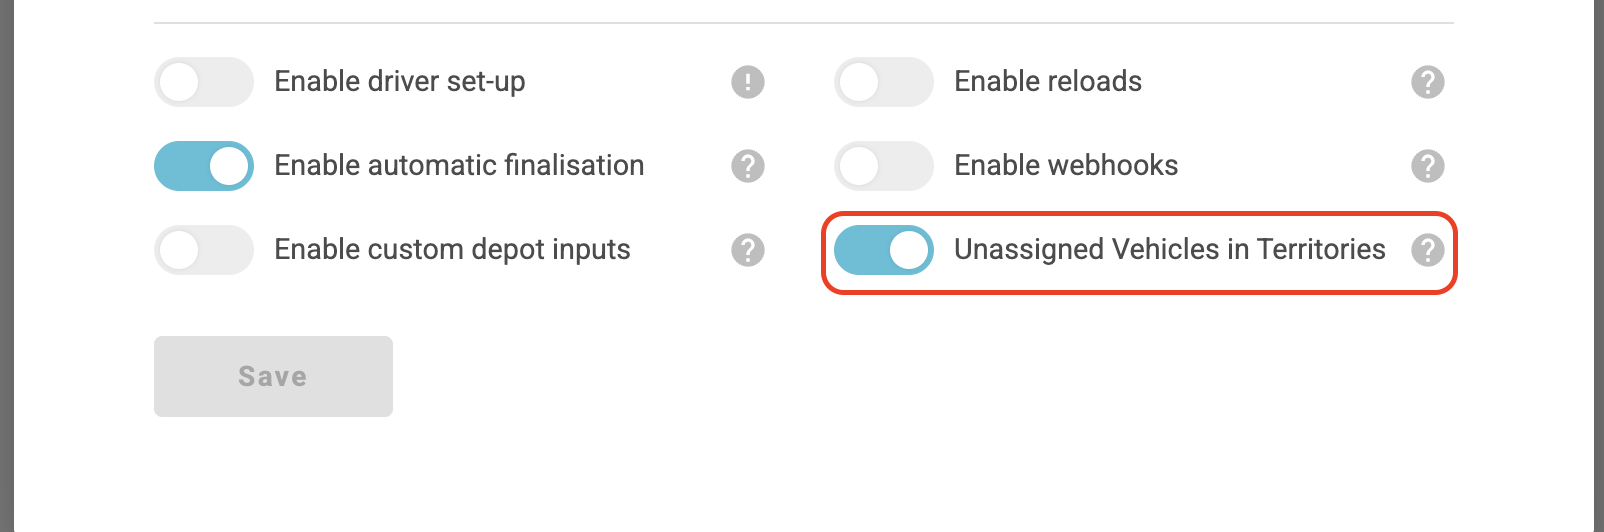
Note there is a feature toggle within Depot Config that controls the following for territories:
-
Unassigned Vehicles In Territories - enabling this means that optimisation engine will use both vehicles that have been assigned to a specified territory and vehicles that are not assigned to that territory for scheduling where required for jobs within the territory. When this flag is disabled then only vehicles assigned to that territory will be used for order scheduling.
2. How to create a territory
You create a territory from the territories page. This can be reached from the setup page by clicking the pin icon on the left menu bar.
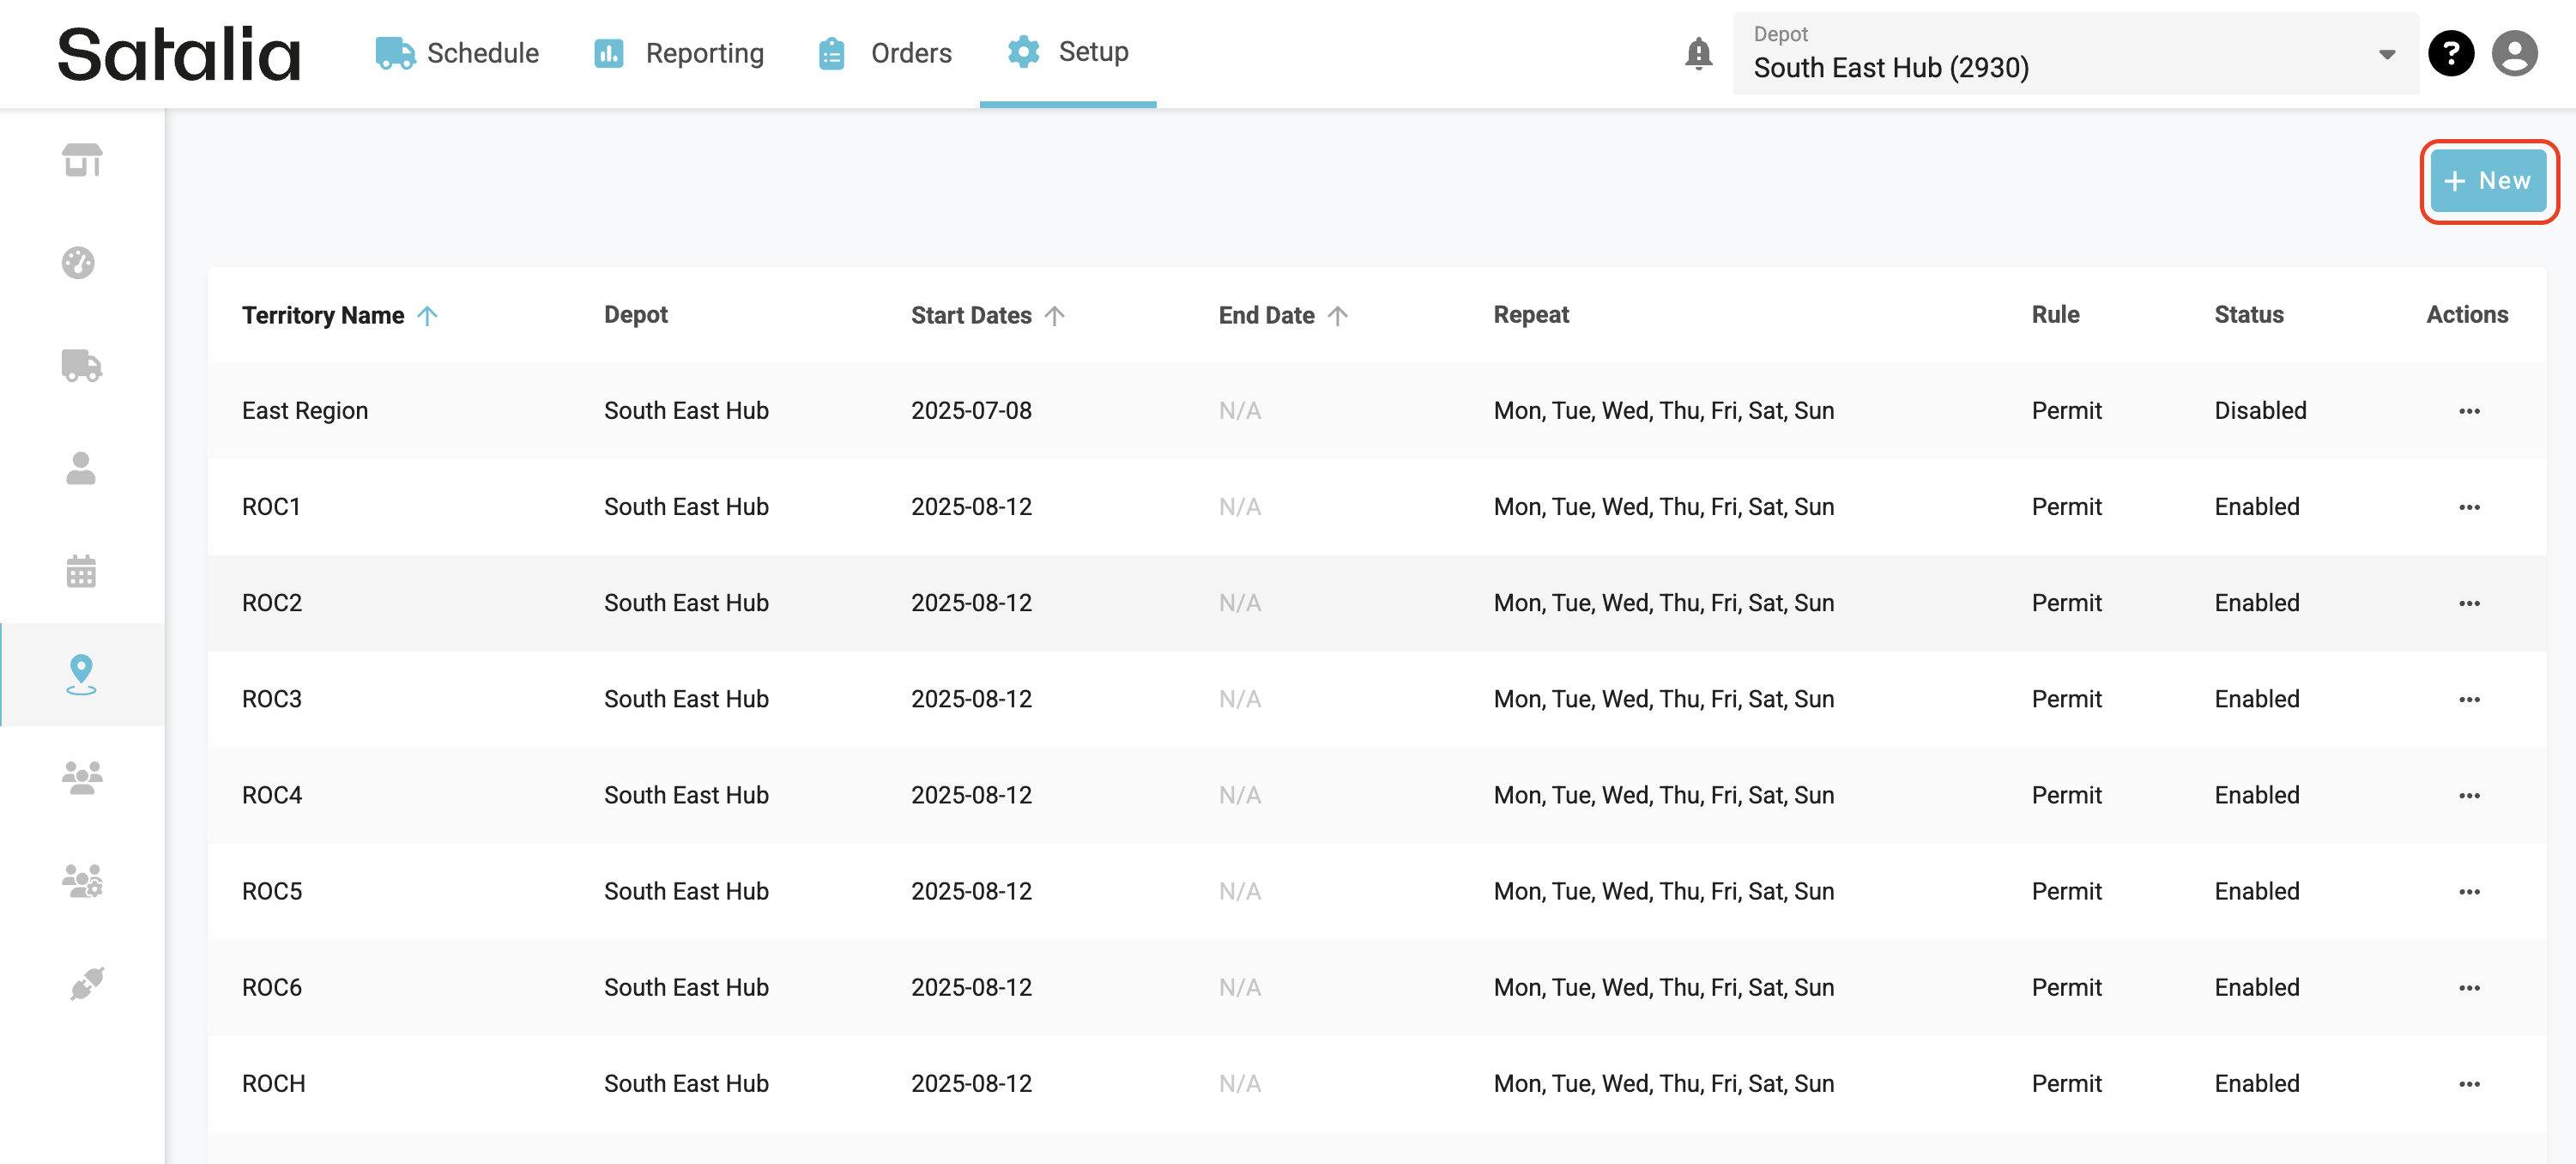
After pressing ‘+ New’ Button you will be redirected to a territory create page.
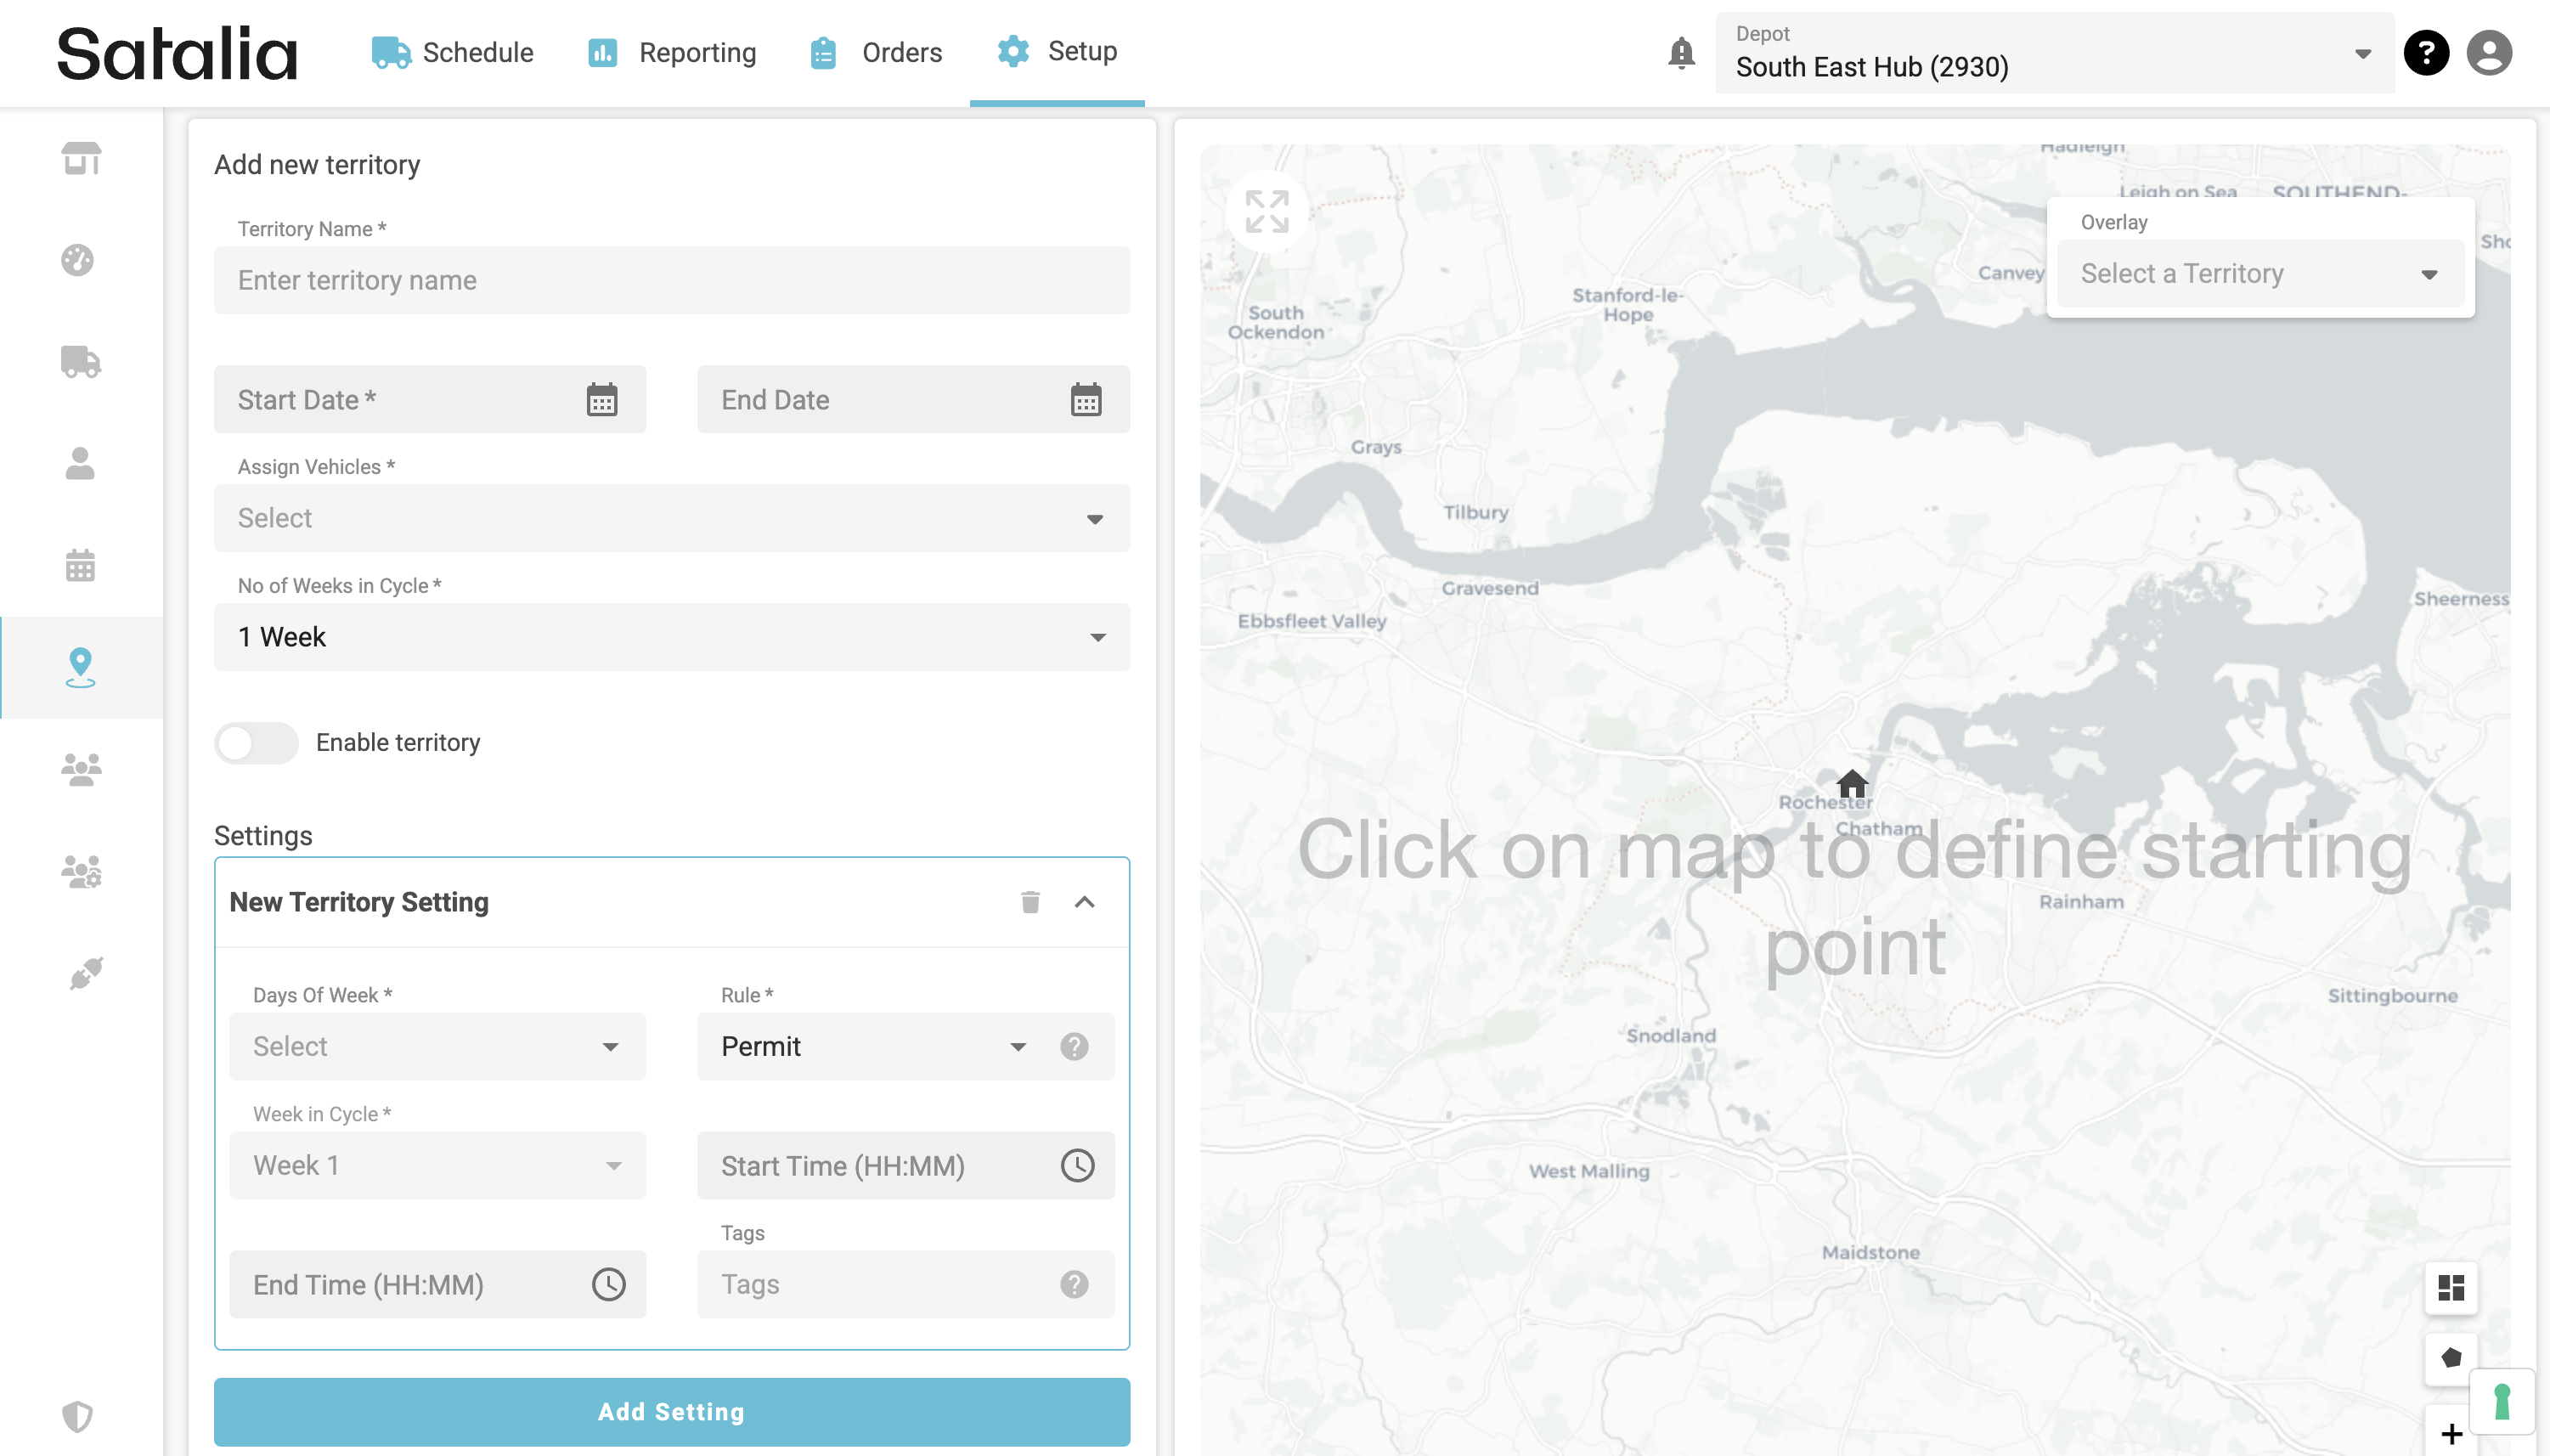
-
Territory name - the name given to a specific territory. You can create territories with the same name.
-
Start date - the date when this territory should be applied for the schedules.
-
End date - the final day when this territory is applicable to the schedule.
-
Assign vehicles - multi-select input for assigning vehicles to specific territories.
-
No of Weeks in Cycle - This enables you to define cyclical operational patterns for territories (eg alternating weekly schedules). Should be set to the max number of weeks you require in your cycle
-
Enable territory - if the toggle is off, the territory has been created but is not active and won't be applied for the schedule.
-
Territory Settings (Here you will be able to define multiple settings to be applied to the territory):
-
Days of week - the days during which the territory should be incorporated into the schedule.
-
Rule - rules specifying if a territory is permitted or prohibited when this setting is applied
-
Week in Cycle - This drives the week within the cycle that this setting will be applied - will run based on the No of Weeks in Cycle defined for the territory
-
Start Time - the start time when the territory should be applied for the schedules when applying the specific setting
-
End Time - the end time when the territory should applied for the schedules when applying the specific setting
-
Tags - Enables you to define tags that will be returned in the Get Slots Response to filter and control slot visibility to your end customers (eg Service Levels, Premium Slots etc)
-
-
Rule - rules specifying if a territory is permitted or prohibited.
To define a territory, you will have 2 options when you can click on the map, the first option will be to create a polygon in free draw mode by place dots on the map, the second will be by selecting postcode areas using the overlay on the map to plot the polygon. By placing dots around the desired area, you can accurately configure the selection.
You can toggle to the Postcode View by selecting the toggle in the bottom right. You can also change back to the free draw mode using the toggle.
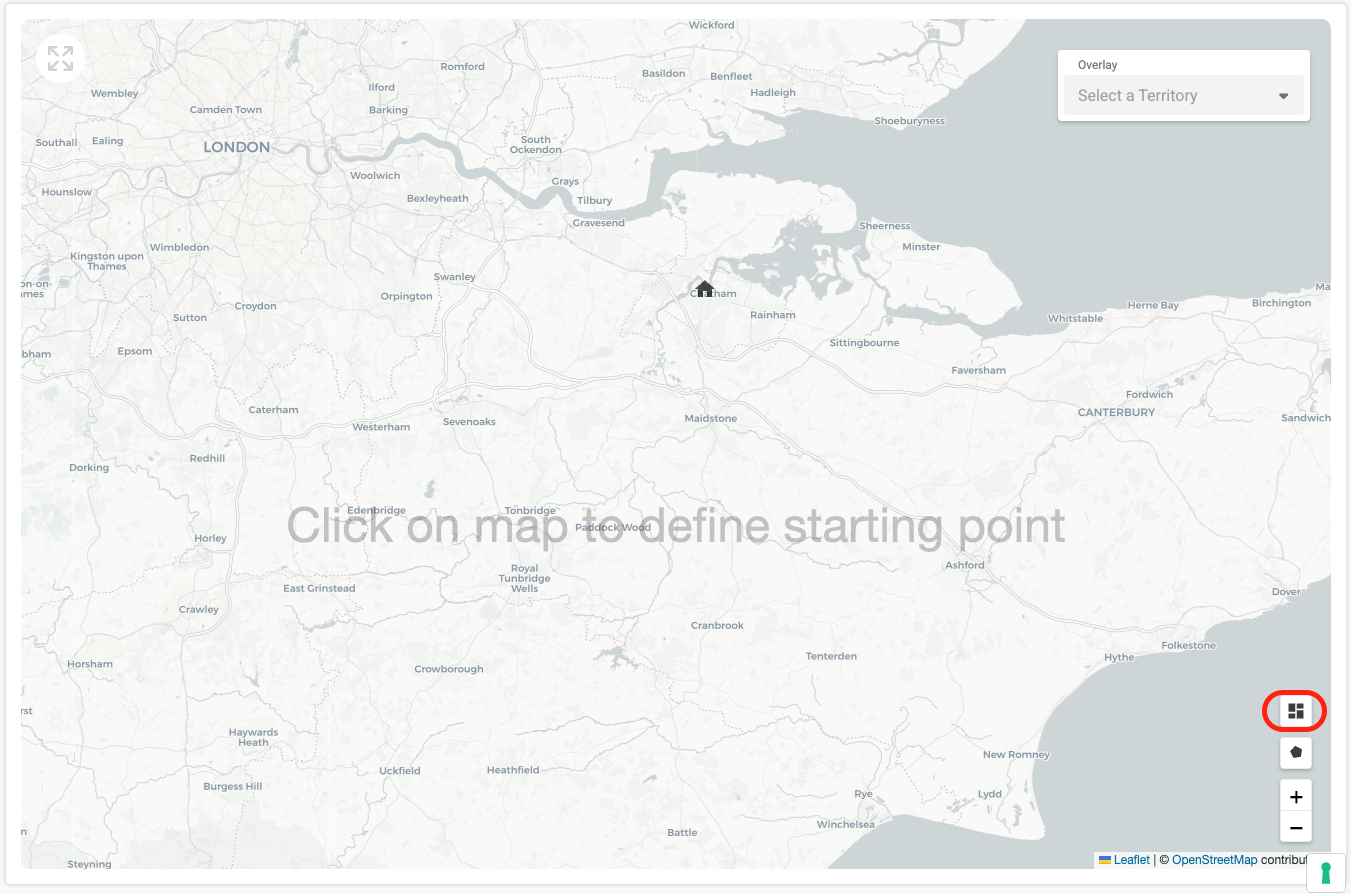
Once the Postcode Toggle has been enabled the map will display an overlay of all postcode areas where you can than select the areas you require to form the territory.
You configure Territories based on postcodes at 2 levels.
1st Level is Outward Code (eg NW1)
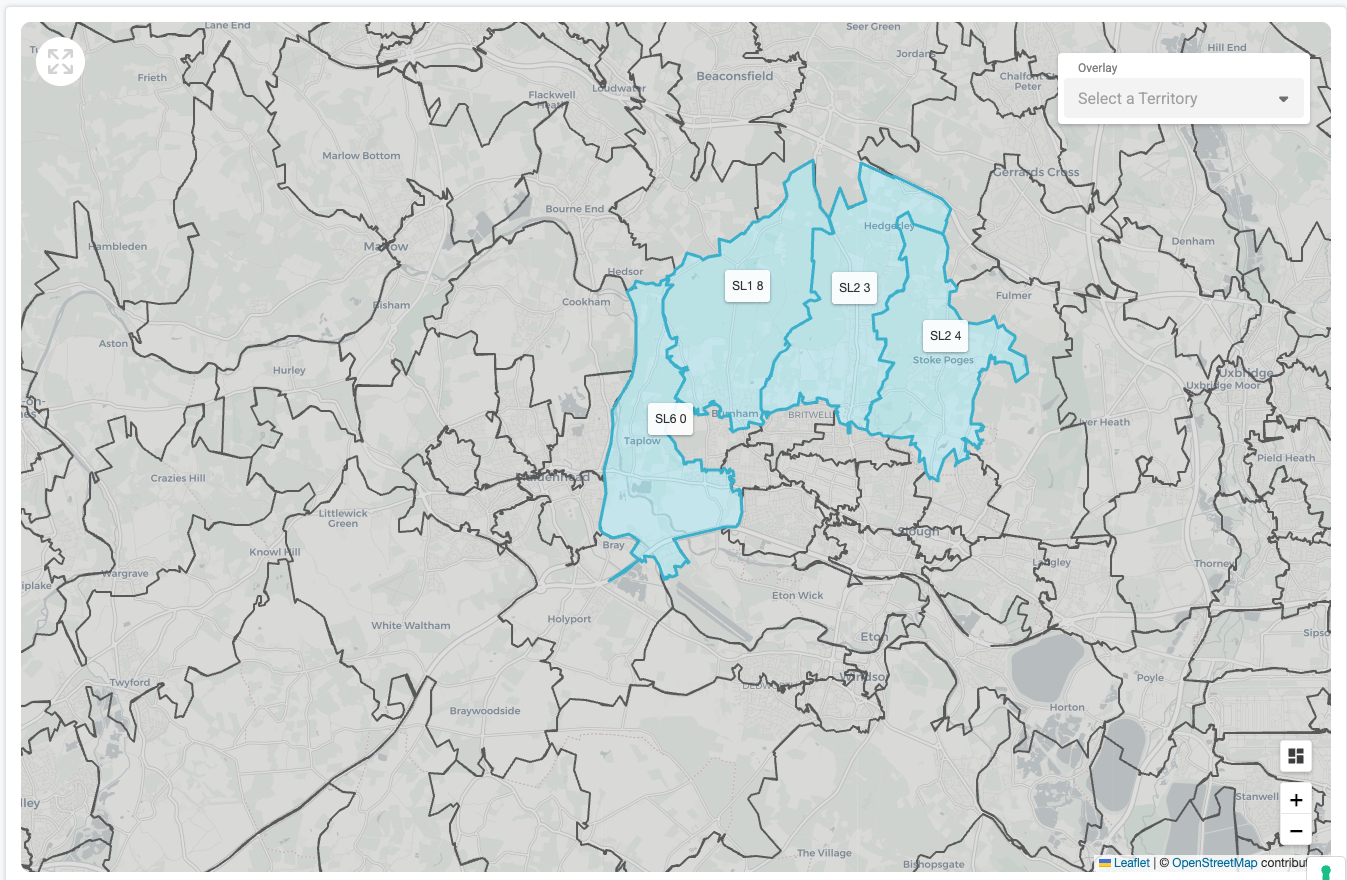
2nd Level is Outward Code + 1st Digit of Inward Code (eg NW1 1)
Plotting based on Outward Code Only:
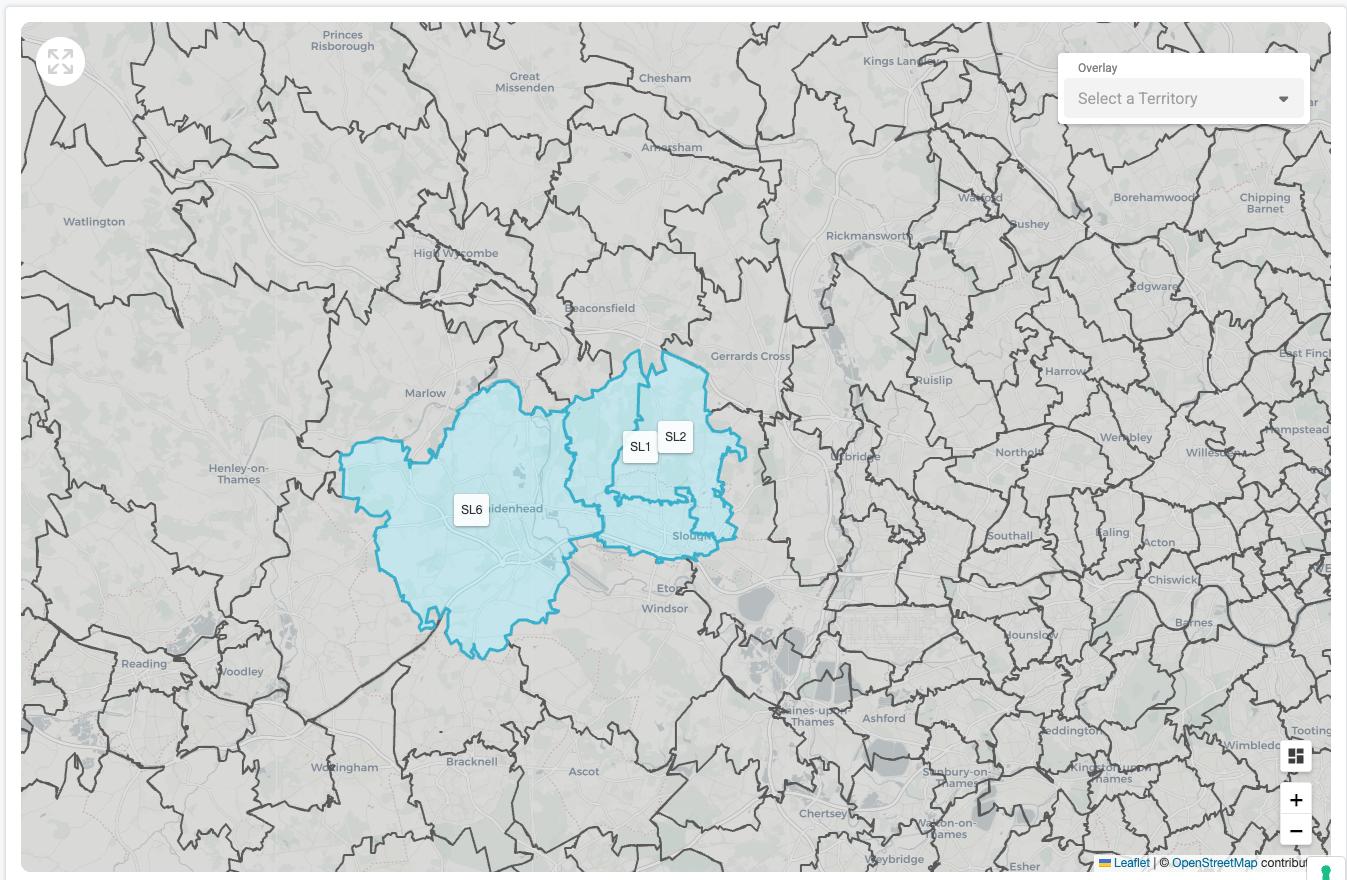
Plotting based on Outward Code + 1st Digit of Inward Code:
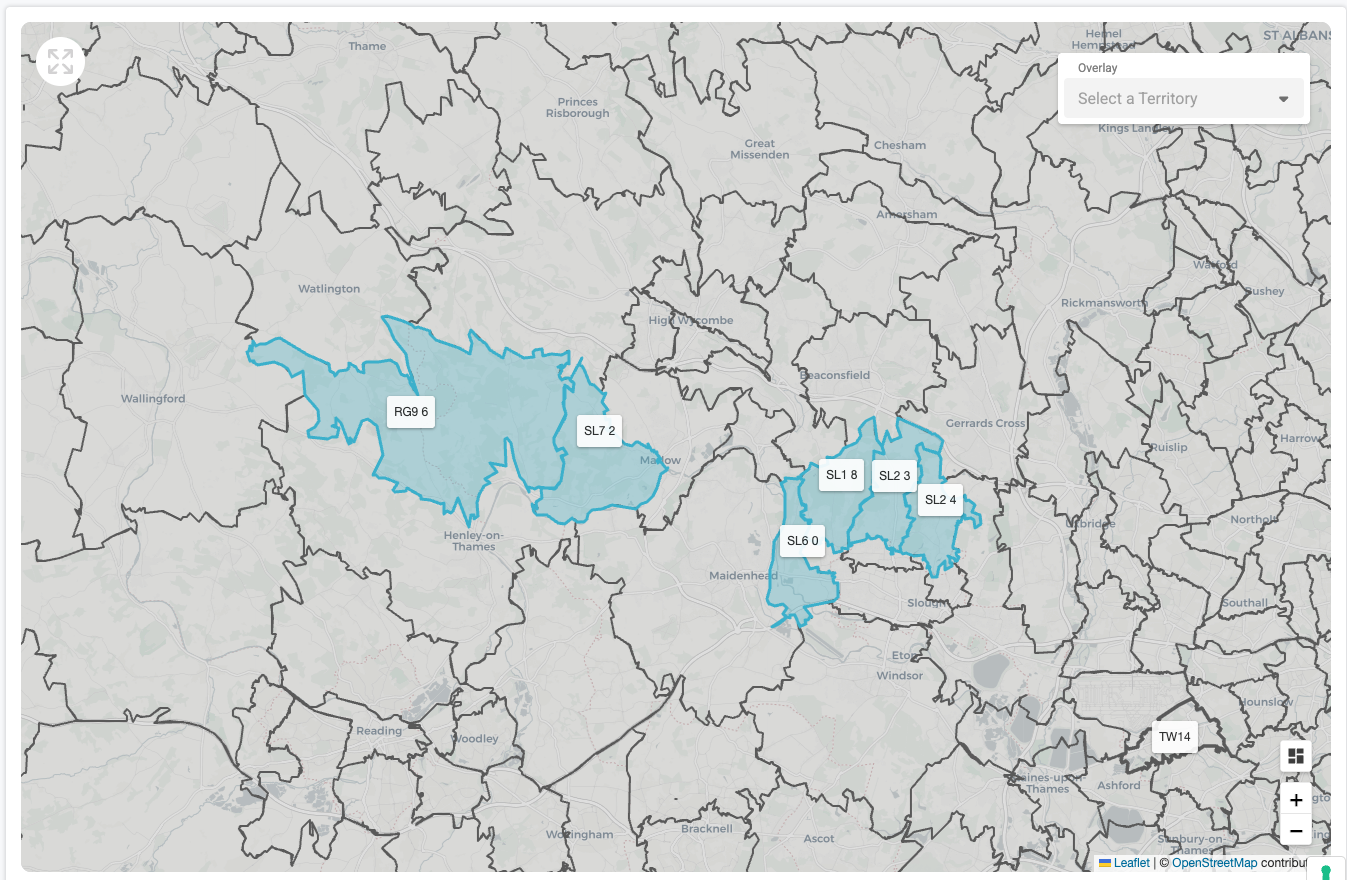
Multipolygon Territories:
You are also able to configure a territory that is made up of multiple polygons that are not connected to each other where required or leaving a section out in the middle of a polygon for example.
To do this you would simply select the first set of sectors to be covered and you can then click anywhere else on the map to add further polygons without covering the entire area in between.
3. How to update a territory
To update a territory, click on the action buttons and choose ‘edit’. Then select ‘edit layers’ in the top right corner of the map and adjust the territory by moving the points. Finally, save the changes by clicking the save button in the top right corner of the map and then pressing the save button in the left menu.

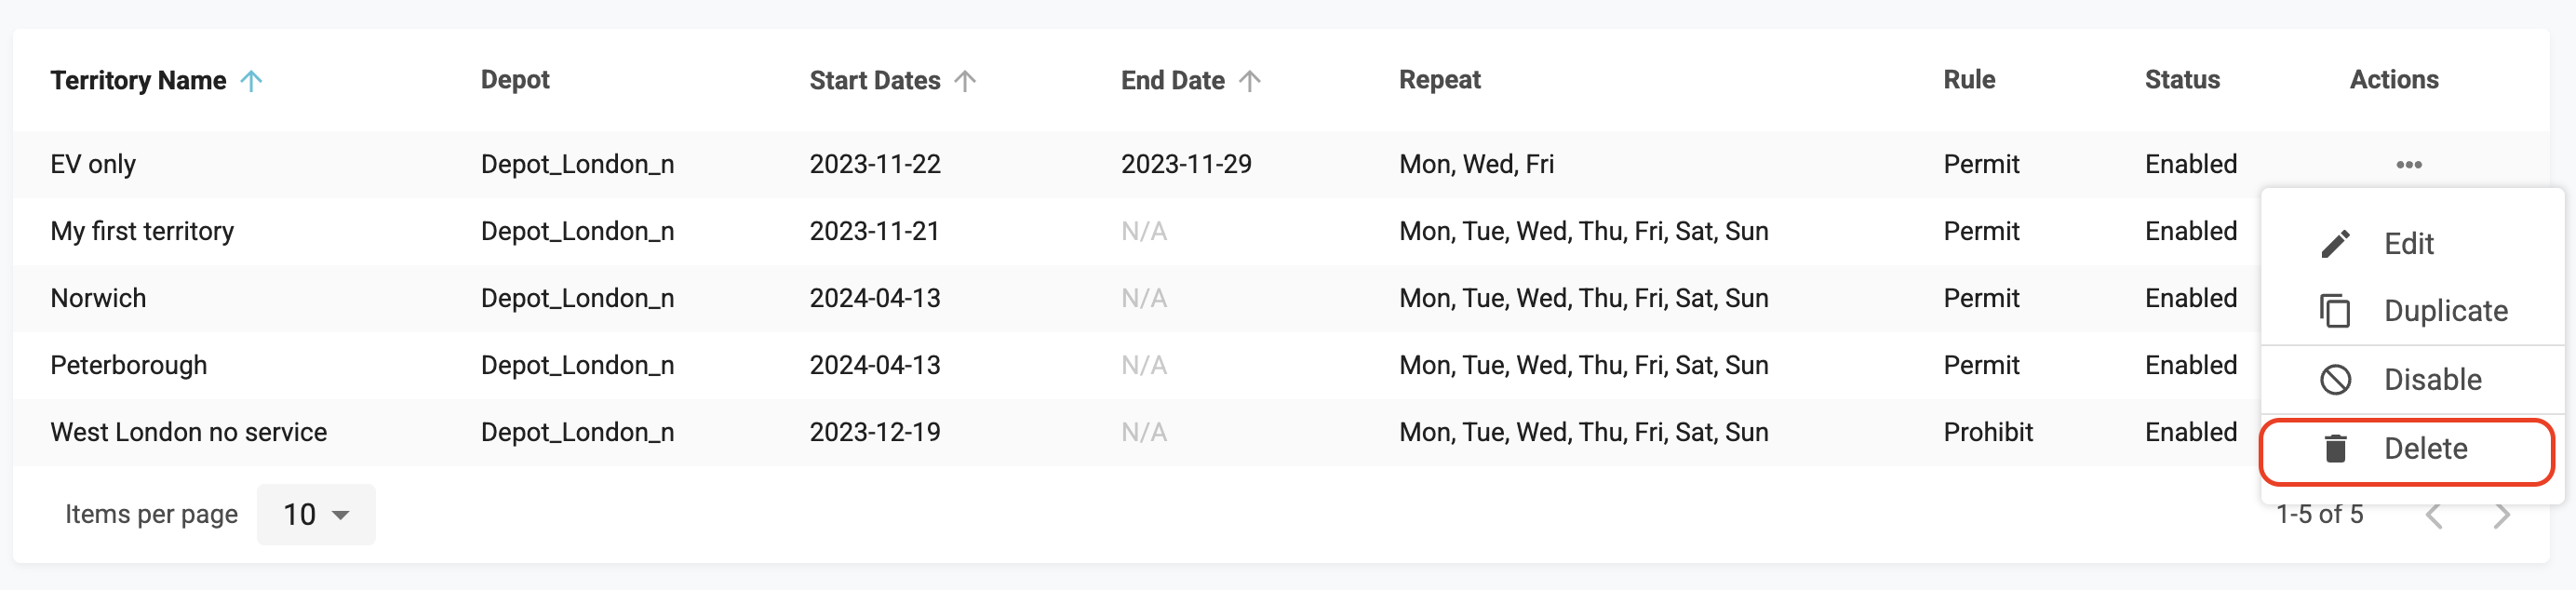
4. How to delete a territory
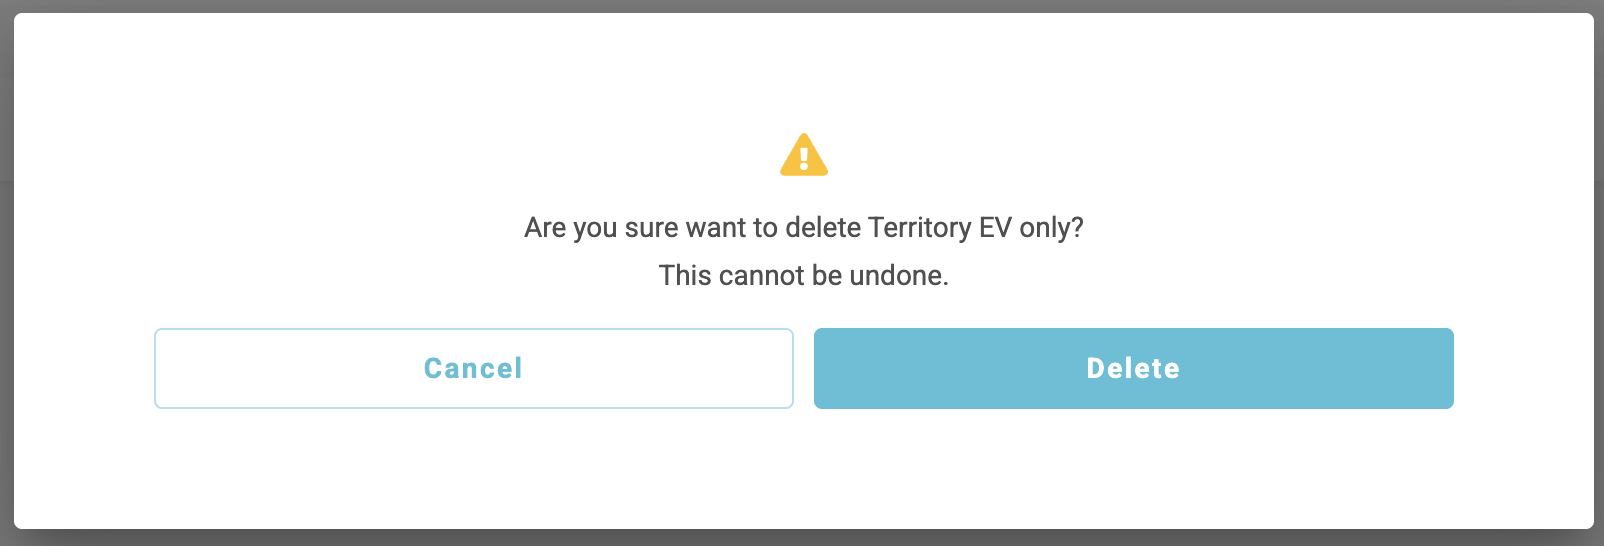
There may be instances where you wish to delete a territory completely from the platform rather than just deactivating it. To delete a territory click the actions button and then choose ‘Delete’ for the territory that you wish to delete.
Once you have triggered the delete action you will be asked to confirm if you want to proceed with the deletion as it cannot be undone once confirmed or otherwise you can cancel the deletion if required.